Author: Dave Williams; dlwilliams=aristotle=net
I suffered from a lack of imagination when I got started, and kept seeing better ways to do things as the project progressed. I'll show you what I did - "a maze of twisty little passages" - and describe some better alternatives if as I go.
 My original plan was to put a 90 degree pipe fitting somewhere along each
dovetail, with four 1/8" nylon automotive oil pressure gauge lines running up
to oil cups somewhere up on the column, gravity-fed. This would have worked
just fine.
My original plan was to put a 90 degree pipe fitting somewhere along each
dovetail, with four 1/8" nylon automotive oil pressure gauge lines running up
to oil cups somewhere up on the column, gravity-fed. This would have worked
just fine.
Here, I've drilled into the dovetail area for an oil fitting. 1/16 NPT fittings exist, but they're odd and hard to find. Common 1/8" fittings are larger than desirable, but they'll work.
For reference, this is the right side, upside down.
 Here you can see how I've drilled down into the dovetail, which is the slot
you see at the bottom of the hole. The idea was to get oil to the gib as well
as the way, which is fed through a vertical drilling down to the bottom. If I
were doing it again I'd stop short of the gib and drill a much smaller hole
through.
Here you can see how I've drilled down into the dovetail, which is the slot
you see at the bottom of the hole. The idea was to get oil to the gib as well
as the way, which is fed through a vertical drilling down to the bottom. If I
were doing it again I'd stop short of the gib and drill a much smaller hole
through.
For future reference, in order not to interfere with existing holes or cuts,
most of my oil drillings intersect at the side or back of other drillings, so
everything isn't always exactly lined up.
 Here's the oilway at the bottom. Some large machines cut oil-distribution
grooves in the ways, but I didn't think it was really necessary here.
Here's the oilway at the bottom. Some large machines cut oil-distribution
grooves in the ways, but I didn't think it was really necessary here.
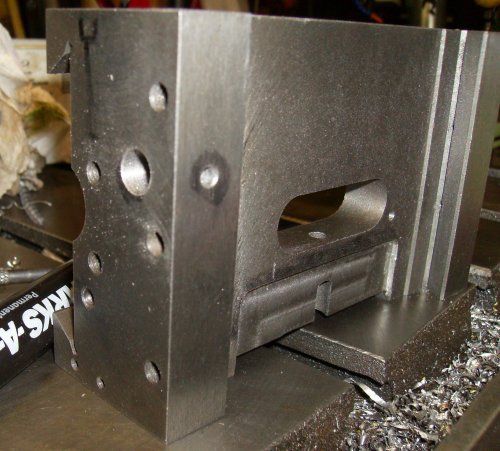
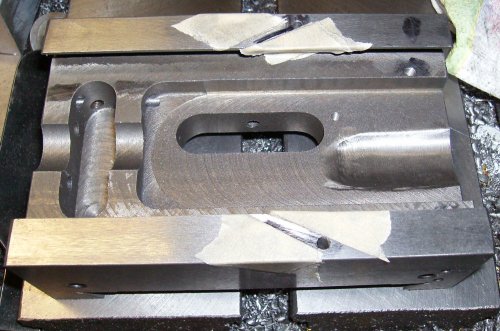
 This is the left side of the saddle, showing my first idea for lubricating
the way. The bunch of #6 tapped holes are for limit switches. The elbow
fitting had to be offset to miss the mounted switches and the ballnut.
This is the left side of the saddle, showing my first idea for lubricating
the way. The bunch of #6 tapped holes are for limit switches. The elbow
fitting had to be offset to miss the mounted switches and the ballnut.
It's not as complicated as it looks. The elbow went where it had to go to
clear everything. The vertical drilling comes down and intersects the side of
the NPT hole, it has to be offset to clear the dovetail. Later I realized I
could have ground a slight clearance notch in the dovetail, but it's okay this
way.
 The horizontal oilway goes over to the middle of the saddle, then down to the
way. It intersects the two left limit switch holes, but the mounting screws
close off any leaks.
The horizontal oilway goes over to the middle of the saddle, then down to the
way. It intersects the two left limit switch holes, but the mounting screws
close off any leaks.
The top and left entry holes are tapped #8-32 and closed off with short set screws.
This then provided lubrication for both sides of the saddle.
Then I had an idea...
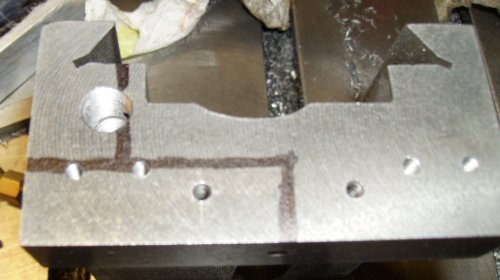
 From this picture you can see the small horizontal oil hole I drilled, and
how it's not far from a larger tapped hole. That hole is for one of the
screws that holds the way covers. On my saddle, there were two 1" deep holes
on this side; the right side was drilled all the way through. Hmm.
From this picture you can see the small horizontal oil hole I drilled, and
how it's not far from a larger tapped hole. That hole is for one of the
screws that holds the way covers. On my saddle, there were two 1" deep holes
on this side; the right side was drilled all the way through. Hmm.
A little measuring showed that it would be possible to drill all the way through without breaking through into the ballnut clearance trough. There's maybe .025" of metal there once the hole was through; plenty.
 For some reason I didn't take any pictures of the intermediate steps.
Basically, I drilled more passages to connect the new horizontal passage to
the existing holes, then drilled back under the X axis as far as I could with
a standard jobber-length drill.
For some reason I didn't take any pictures of the intermediate steps.
Basically, I drilled more passages to connect the new horizontal passage to
the existing holes, then drilled back under the X axis as far as I could with
a standard jobber-length drill.
Later I found I had a 1/8" aircraft drill that was long enough to drill
completely through the saddle crosswise, so I could have put the X oil holes
in the middle. Then I realized I could have drilled all the way across from
the right side so I wouldn't have the oil fitting in the way on the left.
[sigh] Some things are much simpler in retrospect.
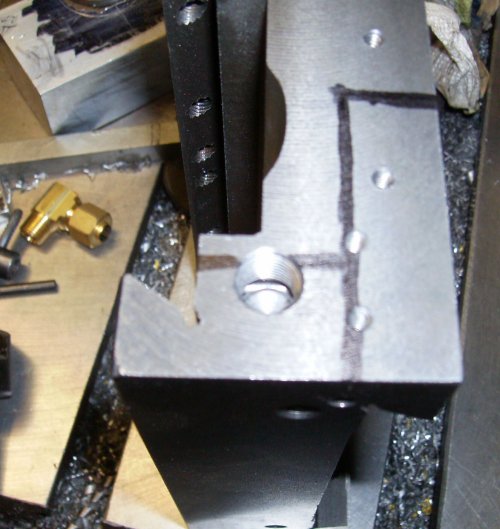
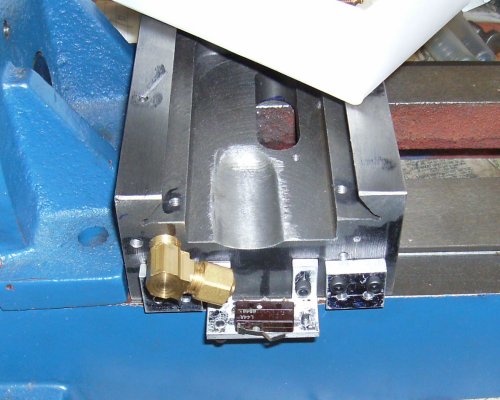 As you can see it's a bit crowded with the limit switches and oil elbow.
There is a slot cut in the back of the center switch bracket; the oil line and
switch wires go through there.
As you can see it's a bit crowded with the limit switches and oil elbow.
There is a slot cut in the back of the center switch bracket; the oil line and
switch wires go through there.
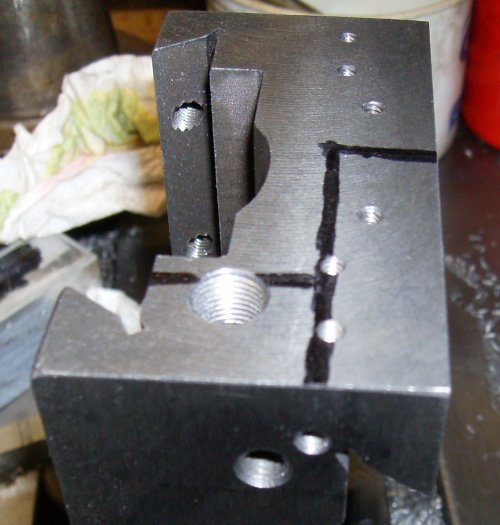
I ground some slots in the top of the saddle to distribute the oil a bit
better. Notice the oil holes are off to the outside edge; this is because
they would have broken through into the dovetail area if I'd put them in the
middle. I brought the slots to the inside edges, where hopefully some oil
will get down into the dovetail areas and gib.