Author: Dave Williams; dlwilliams=aristotle=net
The original thought was to counterweight the full mass of the head, but wound up with a 22 pound lead block, so I figured that was enough.
 I had some garage door pulleys that looked about right; filled nylon with
needle roller bearings, even. They were about .300" wide and 1-1/4 inches
around. I extended the front out as far as I could without hitting the motor,
and hung the back out to the centerline of the counterweight. The tape shows
the front and back edges of the top of the column. I bandsawed those sections
off and cleaned up the cuts with the mill.
I had some garage door pulleys that looked about right; filled nylon with
needle roller bearings, even. They were about .300" wide and 1-1/4 inches
around. I extended the front out as far as I could without hitting the motor,
and hung the back out to the centerline of the counterweight. The tape shows
the front and back edges of the top of the column. I bandsawed those sections
off and cleaned up the cuts with the mill.
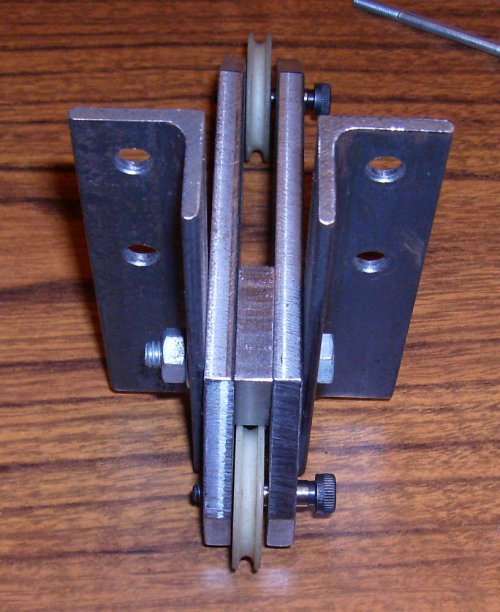
The nearside plate has through-holes; the backside plate has threaded holes. The pulleys were metric and a bit loose on 5/16" shoulder bolts, but that shouldn't be a problem.
The plates are 1/4" hot rolled steel.
You can see the 1/8x1" angle support brackets to the left. They grab the
sides of the side plates at one end and are bolted to the column at the other.
 Getting ready to transfer punch, drill, and tap to mount the support
brackets. One of the electrical boxes used to mount back here; it will be
relocated to the desk.
Getting ready to transfer punch, drill, and tap to mount the support
brackets. One of the electrical boxes used to mount back here; it will be
relocated to the desk.
 All the parts in relation to each other.
 Those were the closest shoulder bolts I could buy locally. I ordered some
from McMaster-Carr, and like a bonehead I got the wrong size, so I'll try
again next time I place an order.
Those were the closest shoulder bolts I could buy locally. I ordered some
from McMaster-Carr, and like a bonehead I got the wrong size, so I'll try
again next time I place an order.
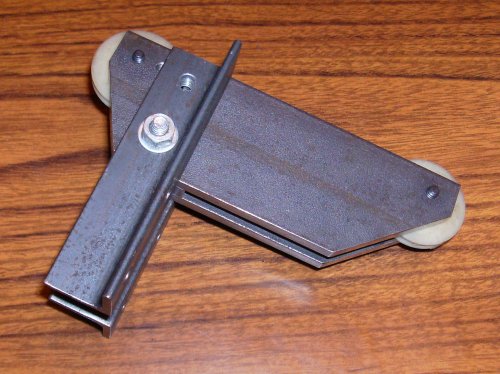
 Looking at the bottom, with the bracket upside-down.
 Pulley bracket in position. It just sits on top of the column; the bolts on
the back verticals just keep it from falling off. Two bolts would have been
more than enough; I used four "just because."
Pulley bracket in position. It just sits on top of the column; the bolts on
the back verticals just keep it from falling off. Two bolts would have been
more than enough; I used four "just because."
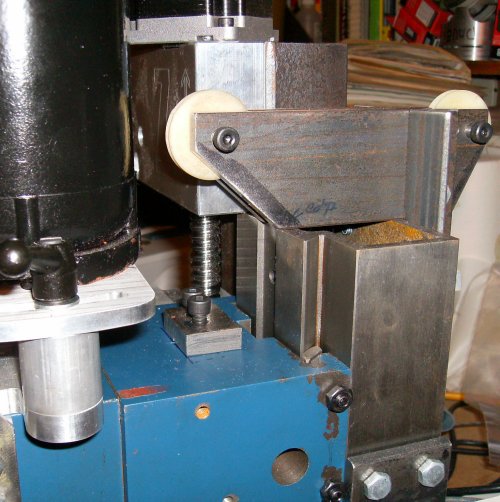
There's about an inch of clearance between the counterweight bracket and the
Z motor mount. Either can be removed without interfering with the other.
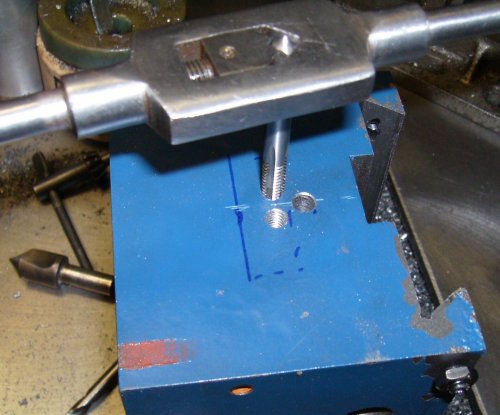 This is as far forward as the cable could mount without fouling the motor.
The mark shows the front outline of the clamp block. The block will hold the
cable, which will pass between the two fine thread bolts. The tail of the
cable will go down in the hole in the headstock, out of the way.
This is as far forward as the cable could mount without fouling the motor.
The mark shows the front outline of the clamp block. The block will hold the
cable, which will pass between the two fine thread bolts. The tail of the
cable will go down in the hole in the headstock, out of the way.
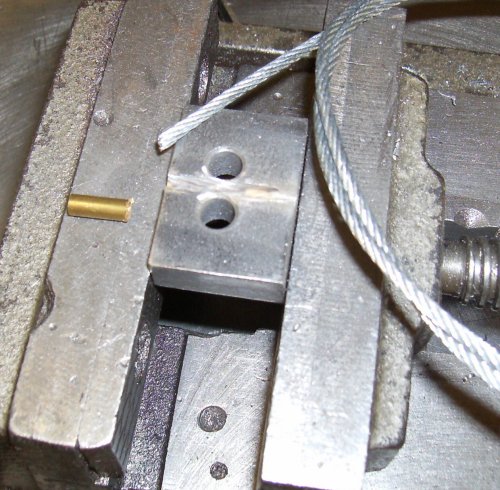 Cable and clamp assembly. 3/32" hardware-store cable and some brass tubing I
had on hand. There is a slot in the clamp, about 75% of the size of the
cable, so it will get clamped to the headstock.
Cable and clamp assembly. 3/32" hardware-store cable and some brass tubing I
had on hand. There is a slot in the clamp, about 75% of the size of the
cable, so it will get clamped to the headstock.
The plan was to solder the brass tube onto the end of the cable.
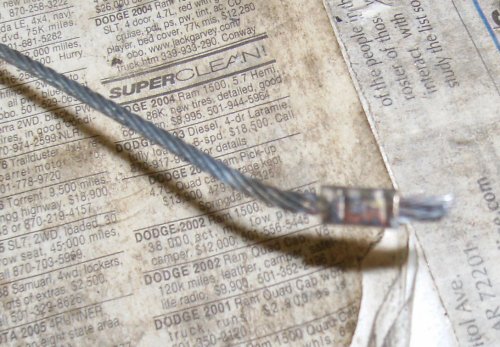 Much frusration later, involving two different kinds of flux, four different
types of solder, and the propane torch, I gave up and used Vise Grips to clamp
the freakin' tube on. It's just there to keep from stabbing a finger if the
cable unwinds, as they are wont to do.
Much frusration later, involving two different kinds of flux, four different
types of solder, and the propane torch, I gave up and used Vise Grips to clamp
the freakin' tube on. It's just there to keep from stabbing a finger if the
cable unwinds, as they are wont to do.
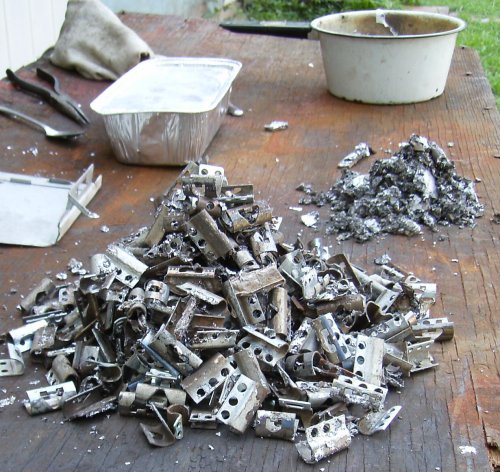
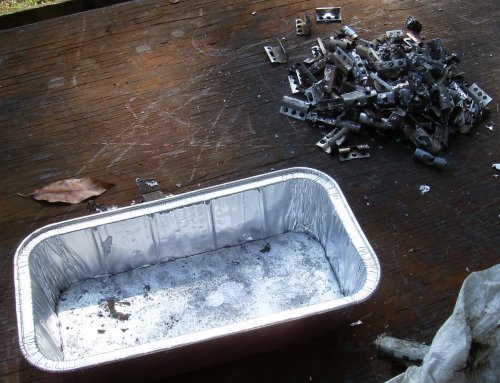 I used a grocery store bread pan for a mold. It was awkward to handle too
much molten lead at once using a hotplate and a pot, so I melted in batches
and poured in layers. Pile of wheelweight clips is growing...
I used a grocery store bread pan for a mold. It was awkward to handle too
much molten lead at once using a hotplate and a pot, so I melted in batches
and poured in layers. Pile of wheelweight clips is growing...
 Pouring finished. Yeah, that's a lot of lead that could have been flung
downrange, but it's going for a good cause.
Pouring finished. Yeah, that's a lot of lead that could have been flung
downrange, but it's going for a good cause.
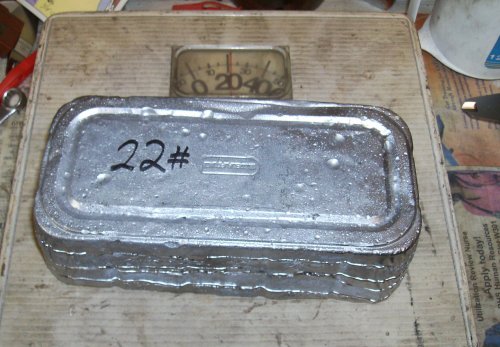 Finished brick on the scale, 22 pounds.
 I had some vague idea about bolting the cable to the brick, but I quickly
realized I'd need to guide it somehow or it would probably start to swing as
the machine moved around. I decided to box it in steel, so I cut some more of
my scrap. Both pieces are clamped in the vise so they get faced off at the
same height.
I had some vague idea about bolting the cable to the brick, but I quickly
realized I'd need to guide it somehow or it would probably start to swing as
the machine moved around. I decided to box it in steel, so I cut some more of
my scrap. Both pieces are clamped in the vise so they get faced off at the
same height.
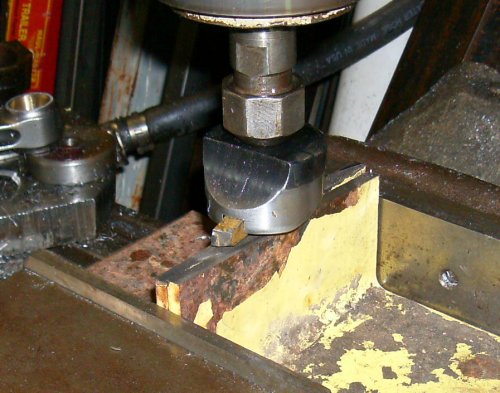
 Height cut, next they get bandsawed a bit narrower to match the brick.
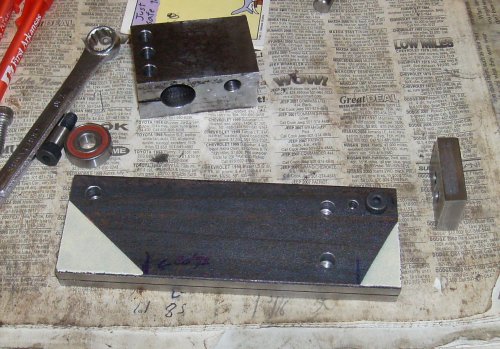
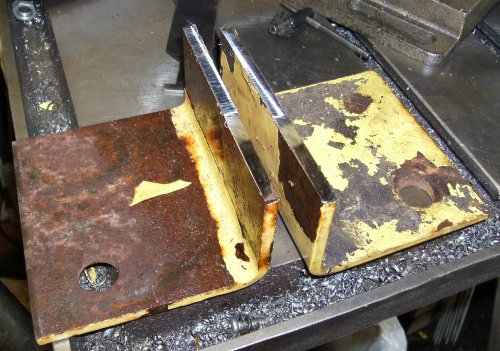
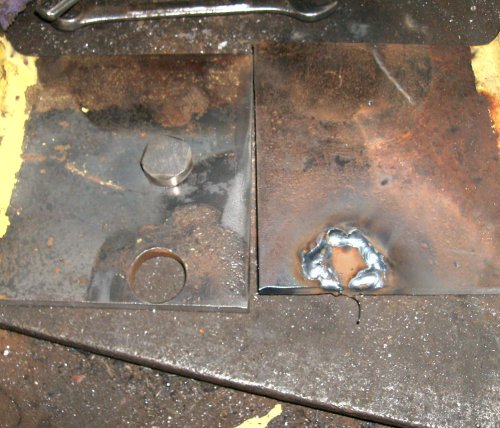 The holes didn't hurt anything, but they were ugly. I welded some plugs in.
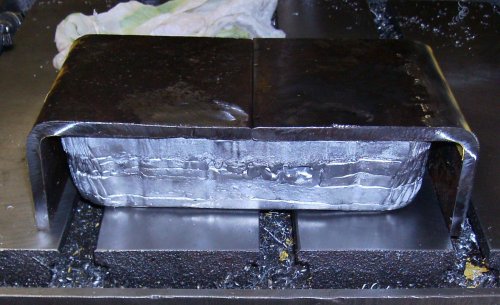 The angles meet up nicely over the lead block.
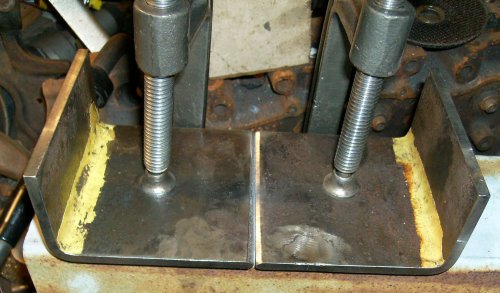 Securely clamp to a flat surface...
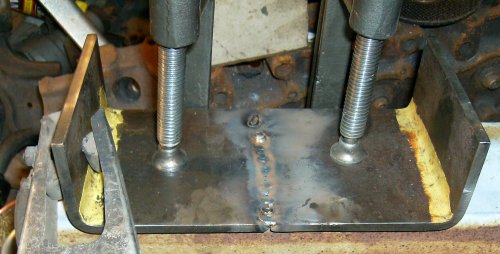 ...and weld them together.