Author: Dave Williams; dlwilliams=aristotle=net
I've been building a new engine for TRX for many years. It sort of got out of hand, and never got installed into the car, which had been defunct since it tossed the timing chain in 1997. I'd decided to get rid of the car, and had had it for sale for $500 for a couple of years, no takers. Sean Korb talked me into entering it in the 2004 Grassroots Motorsport Challenge. The Challenge is a triathlon, and has a $2004 budget limit. After deducting $500 for the car, it left me $1504 for everything else... but the new engine cost way more than the budget had left.
So, since the fancy engine wouldn't fly, I scrounged around my shop and a couple of friends' shops, and came up with a pair of 1970 351W heads in fairly sad shape, a "not good" 1979 302 block with a cylinder wall defect that made it unsellable though it would work okay, a set of 289 rods, a 255 crankshaft, and so forth. All old stuff that none of the 5.0 guys or classic Mustang people wanted. What the hell, parts is parts...
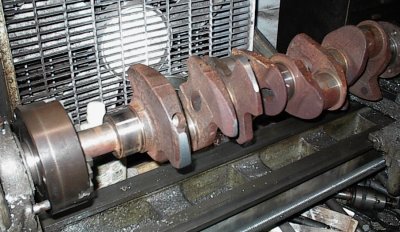
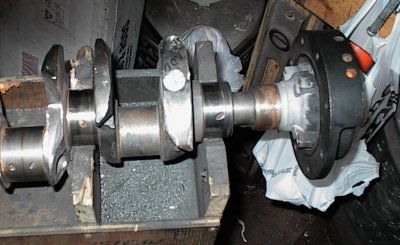
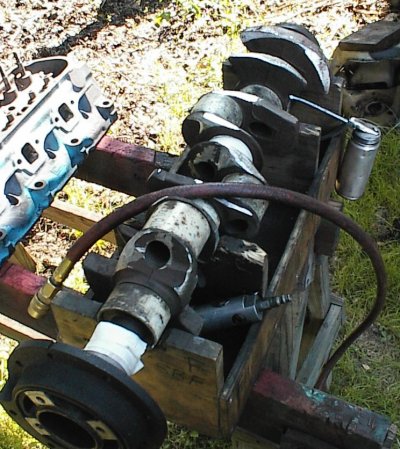
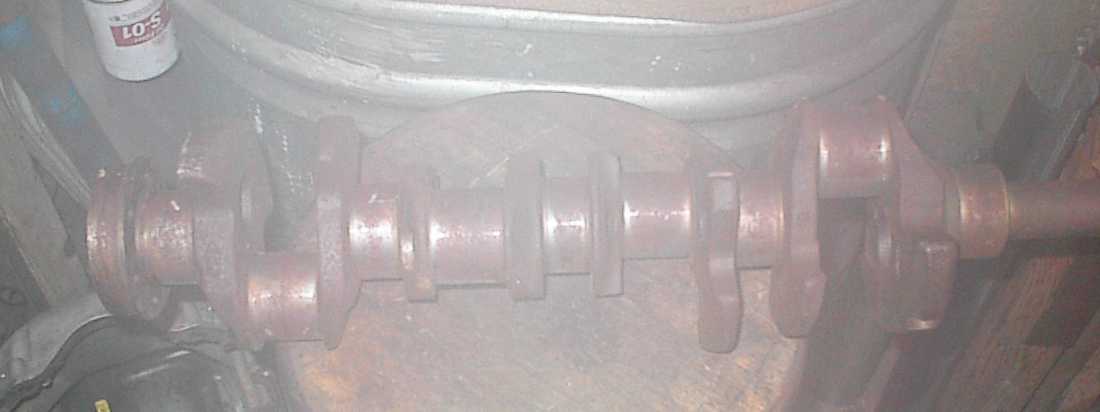
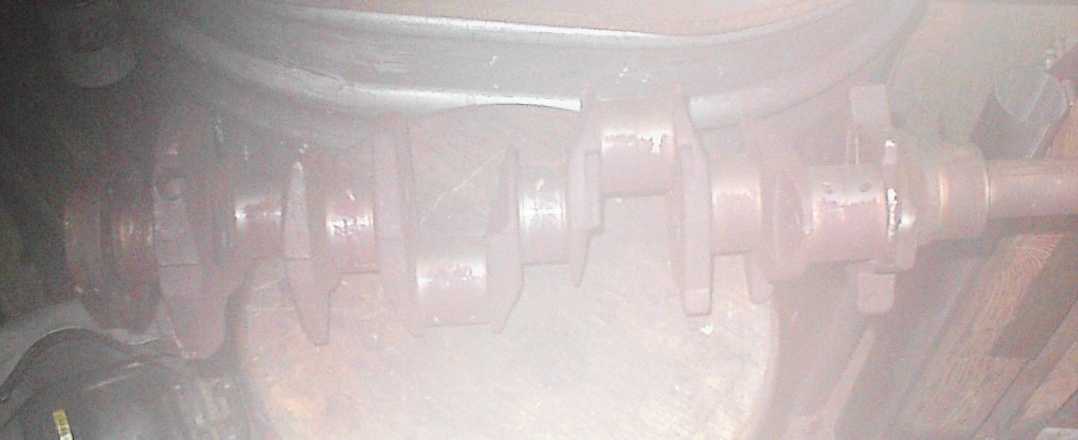
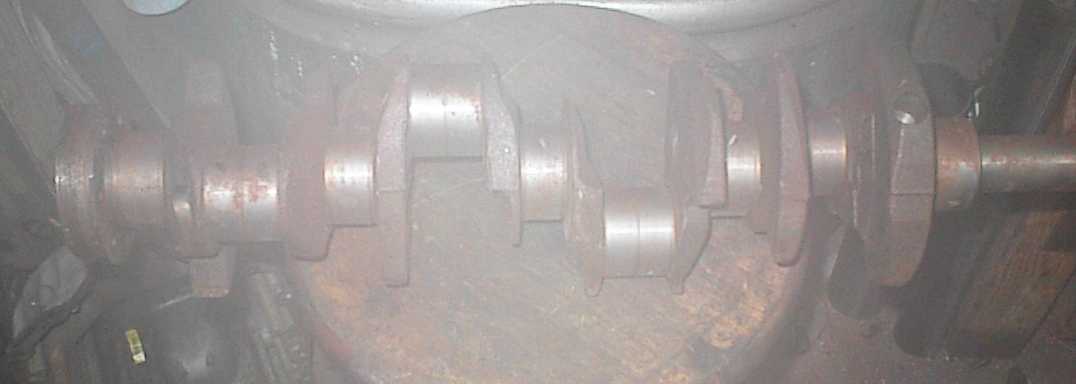
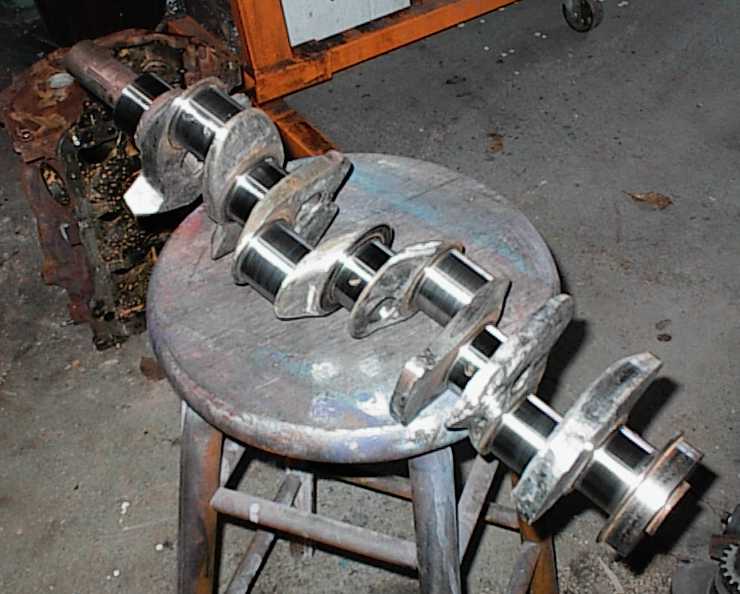
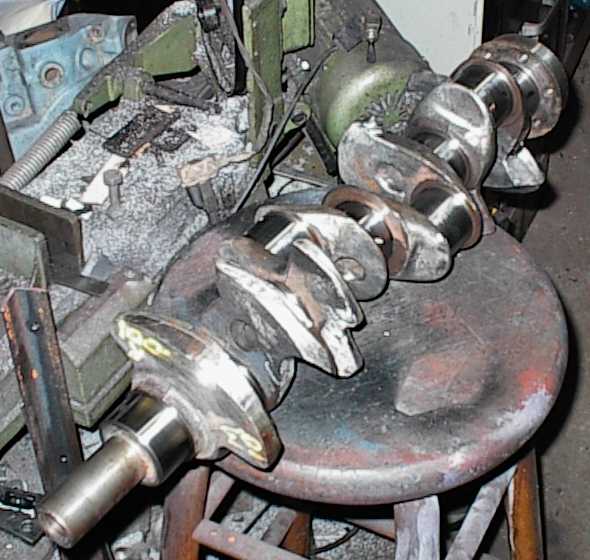
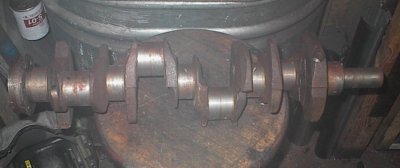 Here's the first part of the new engine - a crankshaft from a 255 Ford V8,
made from 1978 to 1980. The 255 has the same stroke as a 302, but it's much
lighter, and it's hollow!
Here's the first part of the new engine - a crankshaft from a 255 Ford V8,
made from 1978 to 1980. The 255 has the same stroke as a 302, but it's much
lighter, and it's hollow!
 Lightening the crank on the lathe. I'm turning the counterweights round, just
to start off. Even a little weight off the outside edges of the
counterweights will help reduce its inertia.
Lightening the crank on the lathe. I'm turning the counterweights round, just
to start off. Even a little weight off the outside edges of the
counterweights will help reduce its inertia.
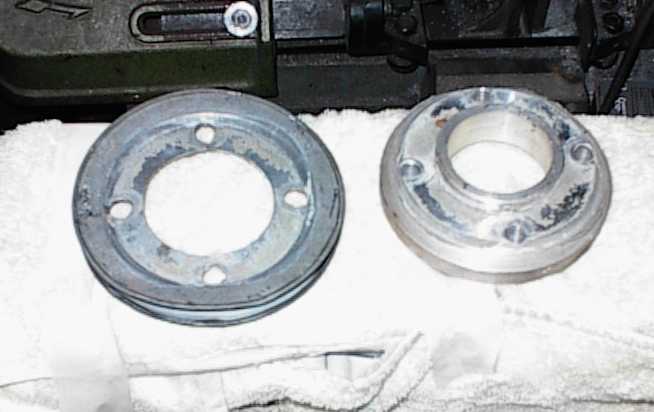
 This is an aluminum harmonic balancer from a 3.8 V6. It's a bunch lighter
than even the early thin 289 balancer, and it's 28oz, just like a 289 or 302.
Unfortunately, the weight is offset about 15 degrees from where the V8 puts
it. It's not a problem since I'm doing some fairly major work on the crank
anyway...
This is an aluminum harmonic balancer from a 3.8 V6. It's a bunch lighter
than even the early thin 289 balancer, and it's 28oz, just like a 289 or 302.
Unfortunately, the weight is offset about 15 degrees from where the V8 puts
it. It's not a problem since I'm doing some fairly major work on the crank
anyway...
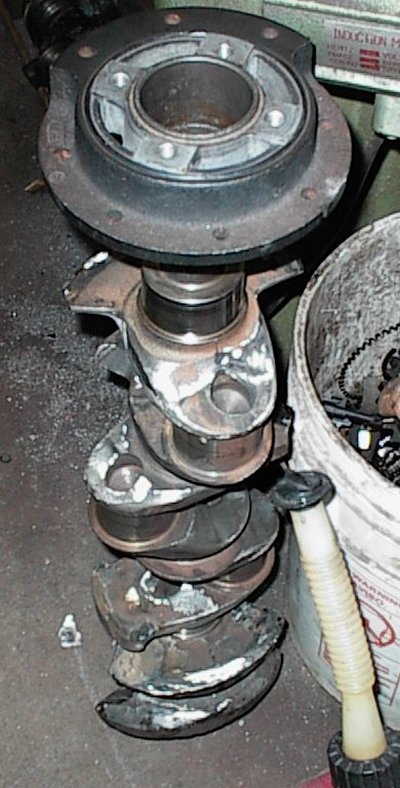
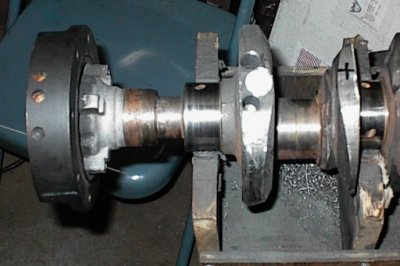
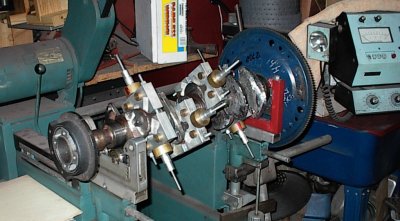
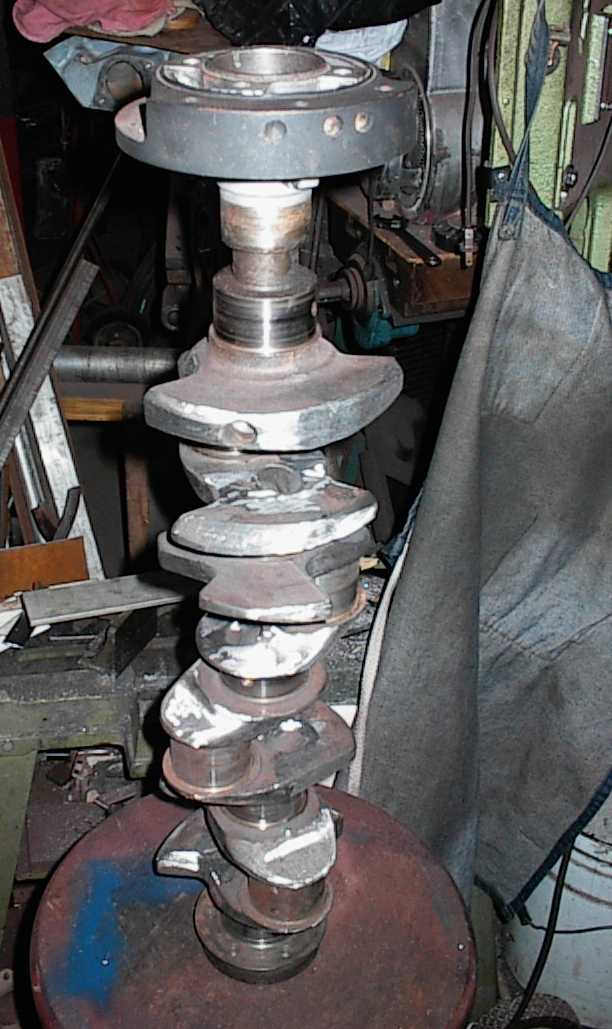
This particular shot is near the end of the balancing process; note the strap welded across the third counterweight from the bottom. The sides of the two lowest ones have also been extended, as well as knife-edged.
You can see that the rod journal holes aren't all that deep in the 255 crank.
Most 302 cranks go almost through. Drilling holes that size is a lot of work,
so I'm saving that for last, in case I run into trouble balancing the thing.
 Firing up the angle grinder and removing odd knobs and bosses, then knife-
edging the counterweights. This will hose the balance even worse than the V6
balancer... but the 255 engines were internally balanced, so it's hosed from
the very beginning!
Firing up the angle grinder and removing odd knobs and bosses, then knife-
edging the counterweights. This will hose the balance even worse than the V6
balancer... but the 255 engines were internally balanced, so it's hosed from
the very beginning!
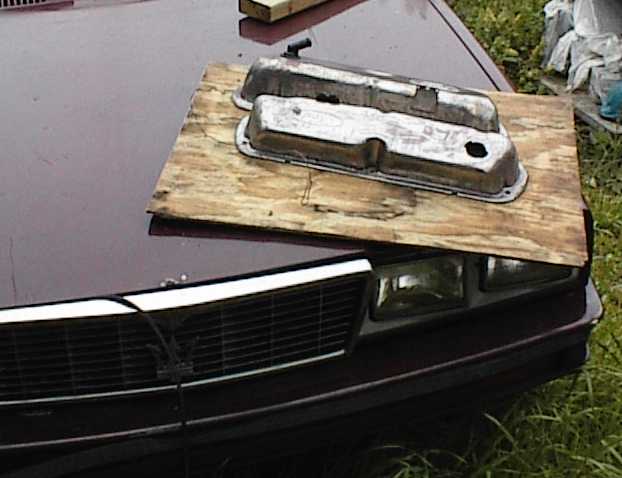
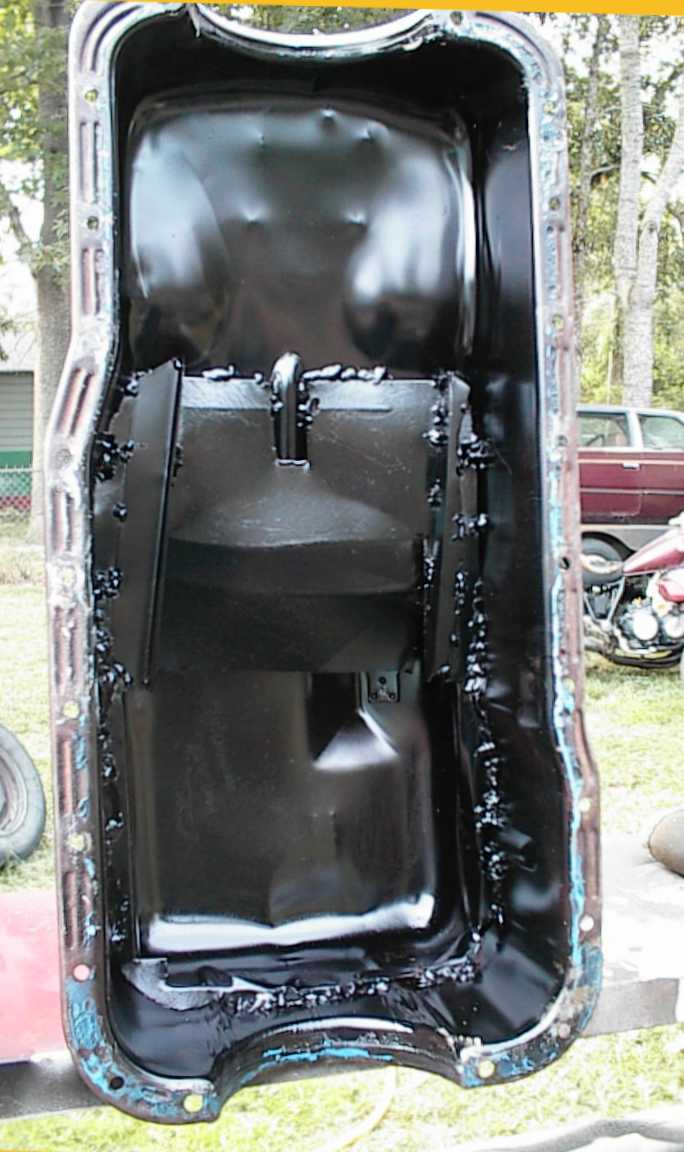
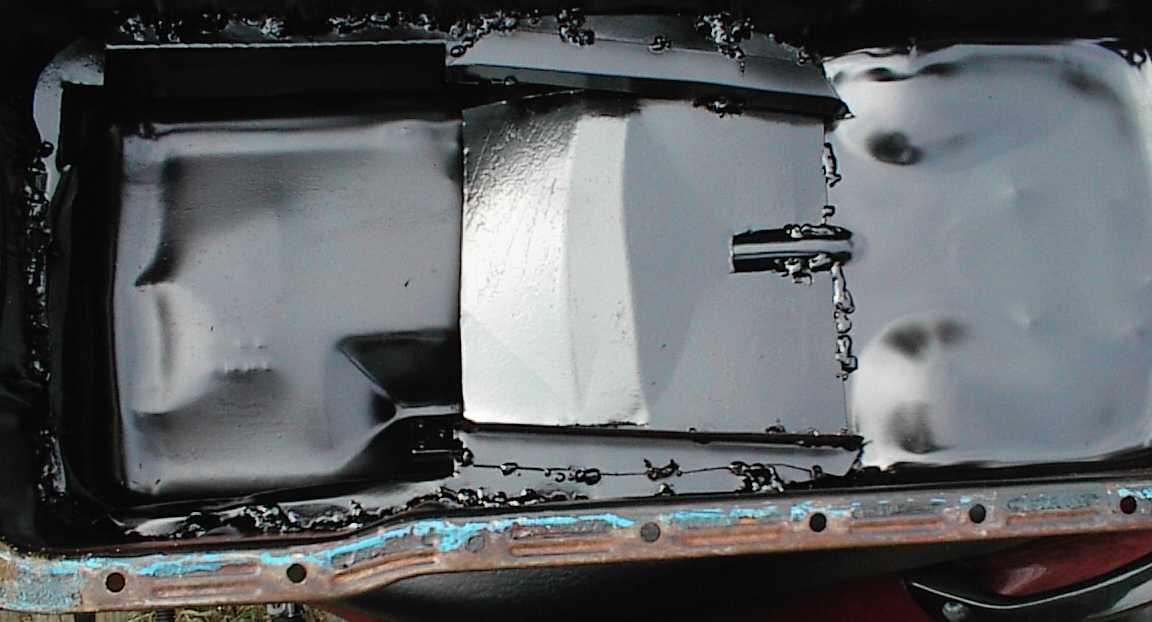
Chopped and channeled oil pan is for a turbo 2.5 Chevy four for my Mazda B2000
pickup.
 Starting the balance job. A 1" x 2.25" hole filled with lead and capped off
with a steel plug. Lead's a lot cheaper than Mallory metal.
Starting the balance job. A 1" x 2.25" hole filled with lead and capped off
with a steel plug. Lead's a lot cheaper than Mallory metal.
 Okay, we need more lead...
 ...and some in the back...
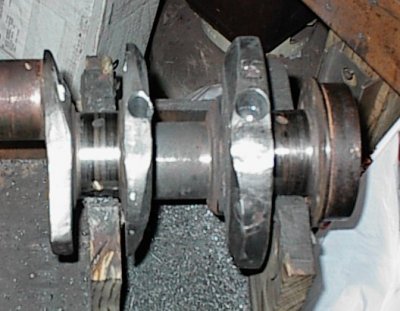
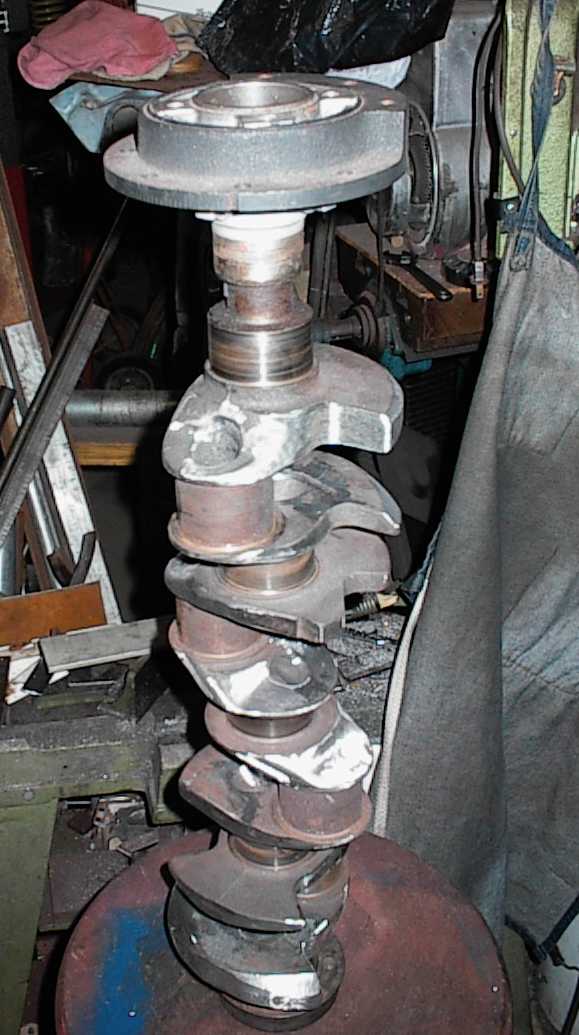
 We're out of places to put lead and Mallory metal now. So I've begun building
up the OD with straps of 1/8" and .090" flat steel stock. This adds weight
where it's most effective. Turning the counterweights round turned out to be
a waste of time, but that's the way it works sometimes. Balancing something
radical like this is always a crap shoot.
We're out of places to put lead and Mallory metal now. So I've begun building
up the OD with straps of 1/8" and .090" flat steel stock. This adds weight
where it's most effective. Turning the counterweights round turned out to be
a waste of time, but that's the way it works sometimes. Balancing something
radical like this is always a crap shoot.
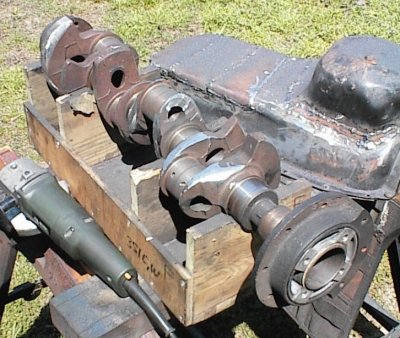
 Lots and lots of grinding... right now, there's probably 30 hours of work in
this crank, and it's not balanced yet. It's probably been spun up 20 times.
Lots and lots of grinding... right now, there's probably 30 hours of work in
this crank, and it's not balanced yet. It's probably been spun up 20 times.
Was it worth all the work? In all honesty, probably not... if I ever do it
again, I'll use lightweight Keith Black pistons instead of the heavy rebuilder
pistons, which will require less counterweighting.
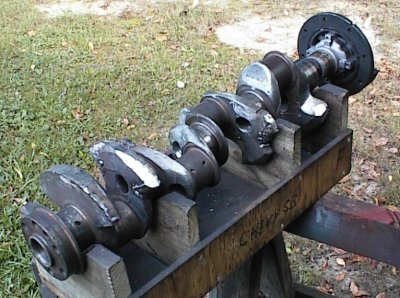
 And we're done! Finally! Yow!
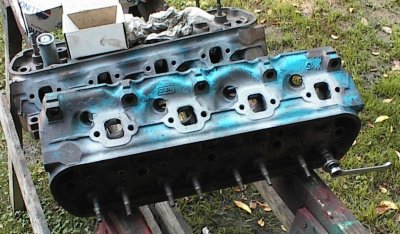
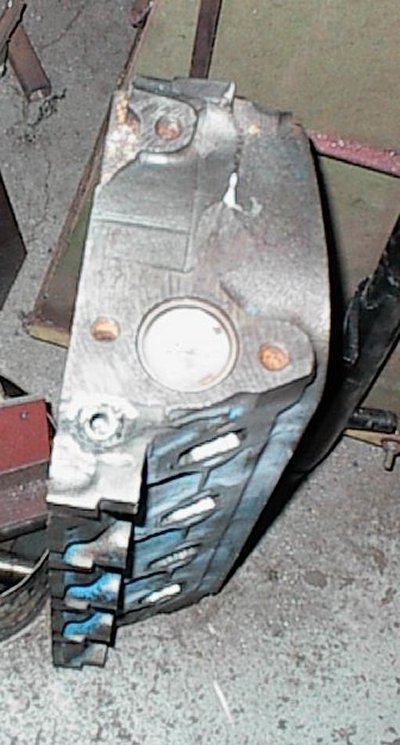
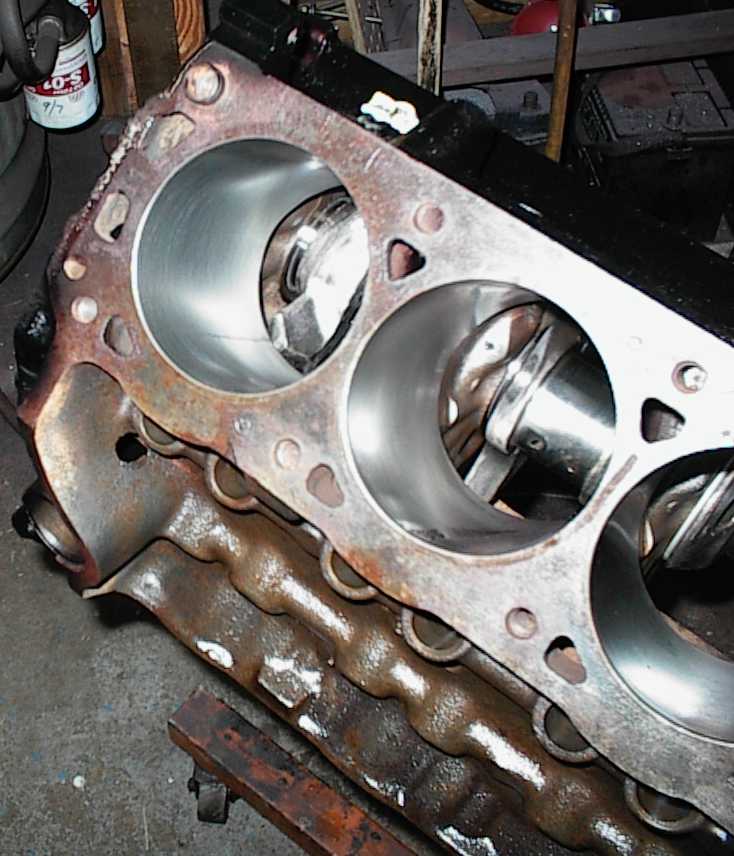
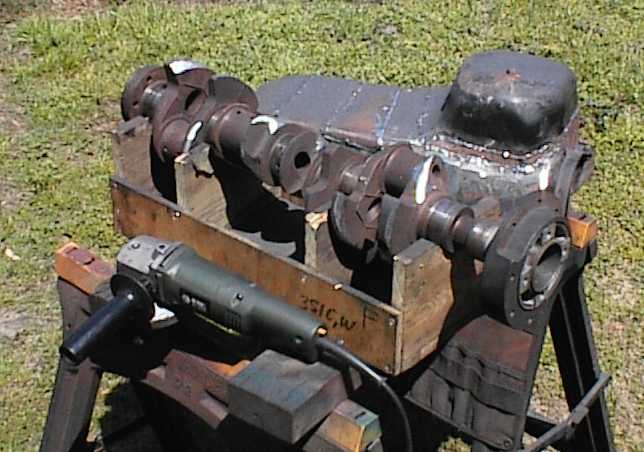
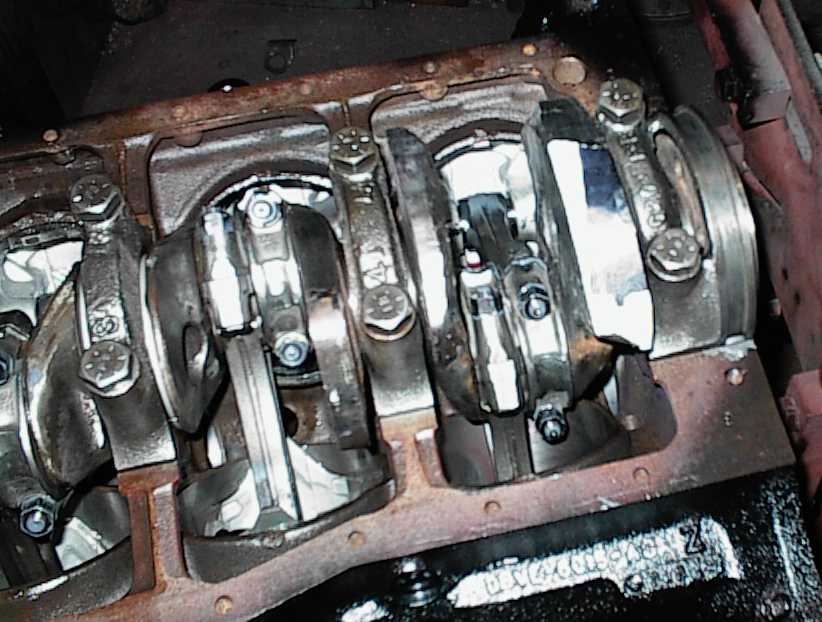
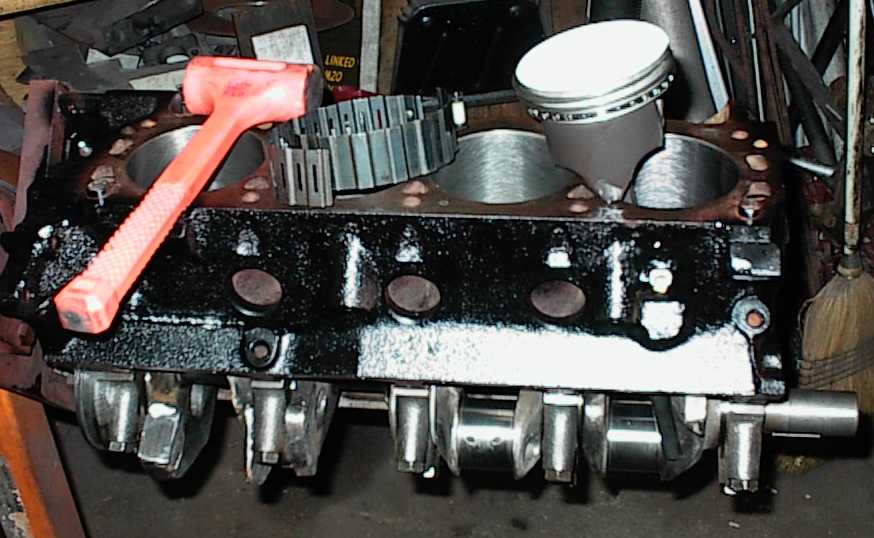
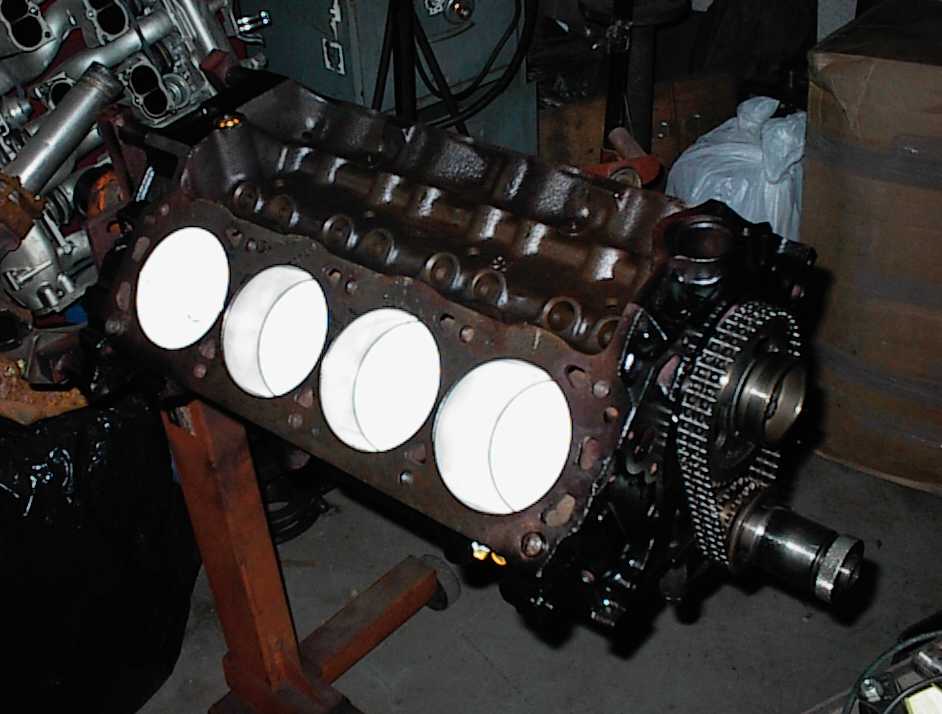
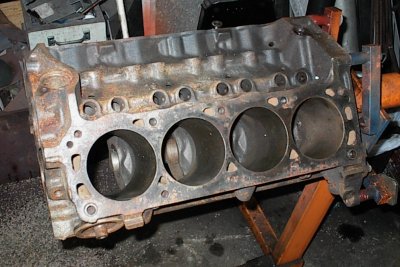 Moving right along, here's the block. D9 blocks are thought to be undesirable
since they're made of cheap gray iron instead of the stronger nodular iron the
5.0 blocks are made of. This one was worn pretty bad, and didn't quite
clean up at .030 over. It left a couple of "fingernail marks" at the tops of
the bores. They're not the end of the world, but nobody wants visible worn
spots on a brand new bore job, so I stuck it in the shed for some future
project. There's a little rust to be taken care of, but it'll do.
Moving right along, here's the block. D9 blocks are thought to be undesirable
since they're made of cheap gray iron instead of the stronger nodular iron the
5.0 blocks are made of. This one was worn pretty bad, and didn't quite
clean up at .030 over. It left a couple of "fingernail marks" at the tops of
the bores. They're not the end of the world, but nobody wants visible worn
spots on a brand new bore job, so I stuck it in the shed for some future
project. There's a little rust to be taken care of, but it'll do.
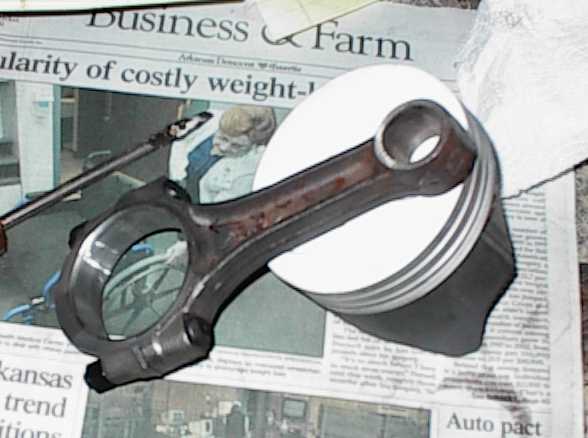
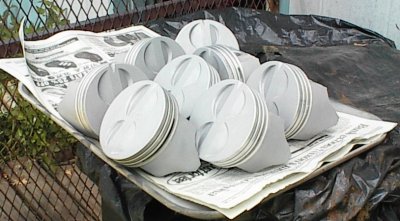 A set of cheap rebuilder flat top pistons - Federal-Mogul - and a date with
the sand blaster for moly and ceramic coatings. The coatings themselves are
cheap; all the money is in the labor.
A set of cheap rebuilder flat top pistons - Federal-Mogul - and a date with
the sand blaster for moly and ceramic coatings. The coatings themselves are
cheap; all the money is in the labor.
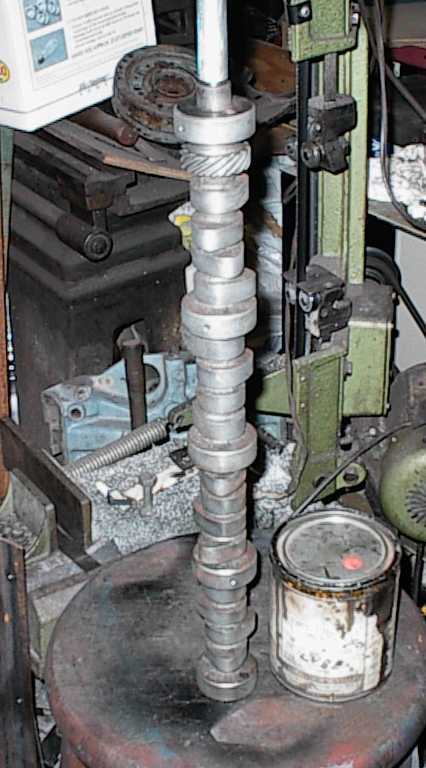
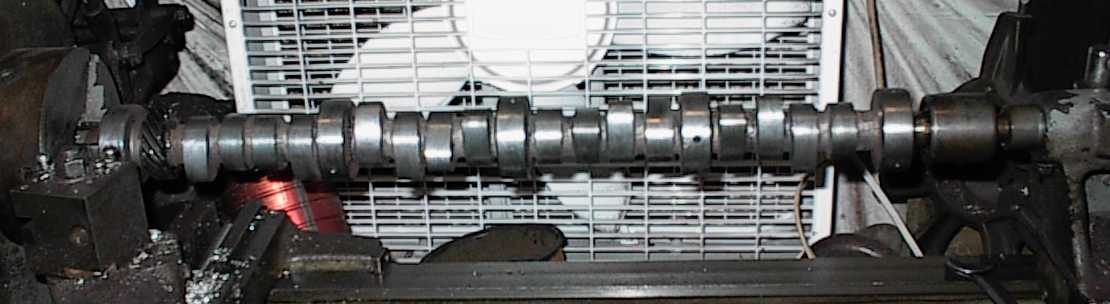
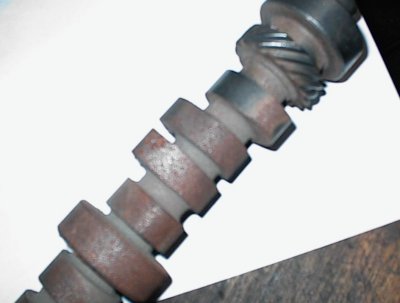 Free, rusty cam. It's an old Melling, 230 @ .050 on a 110. It only had a few
miles on it, got pulled and replaced with something milder, and sat on a shelf
in a friend's shed for several years. Humidity and condensation got to it.
Free, rusty cam. It's an old Melling, 230 @ .050 on a 110. It only had a few
miles on it, got pulled and replaced with something milder, and sat on a shelf
in a friend's shed for several years. Humidity and condensation got to it.
 The lobes weren't pitted that bad, and mostly on the base circles. The
bearing journals were the worst. I may mask, sandblast, and moly coat those;
the coating fills in the pits and makes a clean bearing surface for the oil.
Tech Line says it's okay to do the lobes that way as well, but I'm still leery
about sandblasting cam lobes...
The lobes weren't pitted that bad, and mostly on the base circles. The
bearing journals were the worst. I may mask, sandblast, and moly coat those;
the coating fills in the pits and makes a clean bearing surface for the oil.
Tech Line says it's okay to do the lobes that way as well, but I'm still leery
about sandblasting cam lobes...
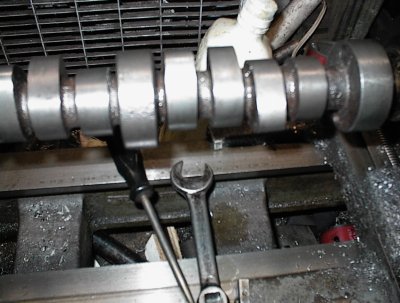
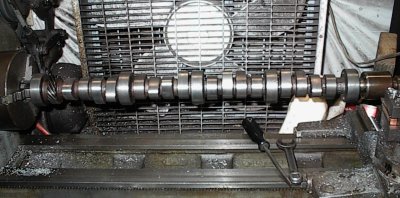 A little more polishing with emery cloth, and it's done. Since this is an
autocross and drag car that'll be unlikely to see 20 miles per year, I can get
away with cheesy tricks like this. The cam would last maybe one tank of gas
on the street or at a track event. But I'm operating under that danged budget
limit, and besides, I wanted to see if I could actually save the thing...
well, the whole idea of the Challenge is to do it on the cheap, isn't it?
A little more polishing with emery cloth, and it's done. Since this is an
autocross and drag car that'll be unlikely to see 20 miles per year, I can get
away with cheesy tricks like this. The cam would last maybe one tank of gas
on the street or at a track event. But I'm operating under that danged budget
limit, and besides, I wanted to see if I could actually save the thing...
well, the whole idea of the Challenge is to do it on the cheap, isn't it?
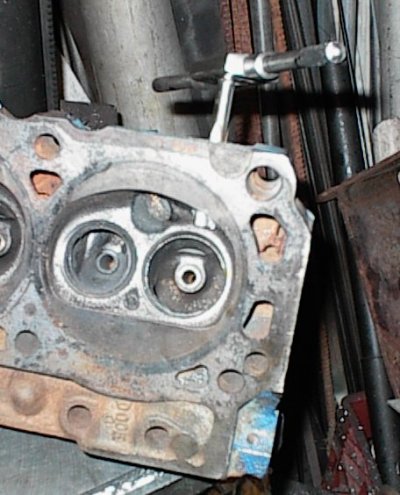
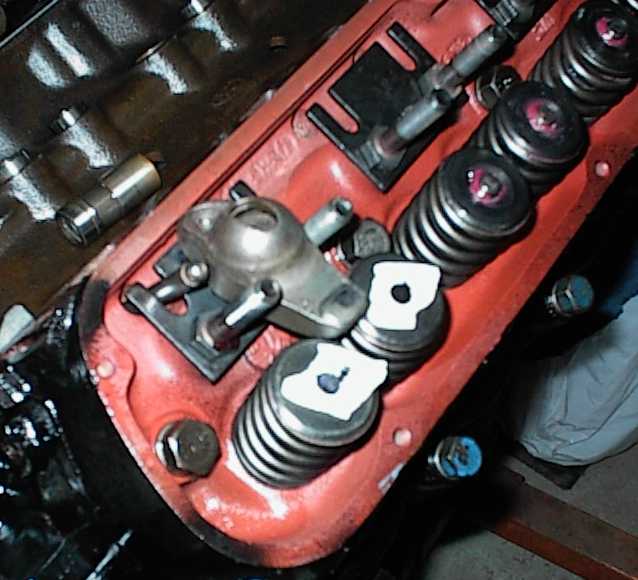
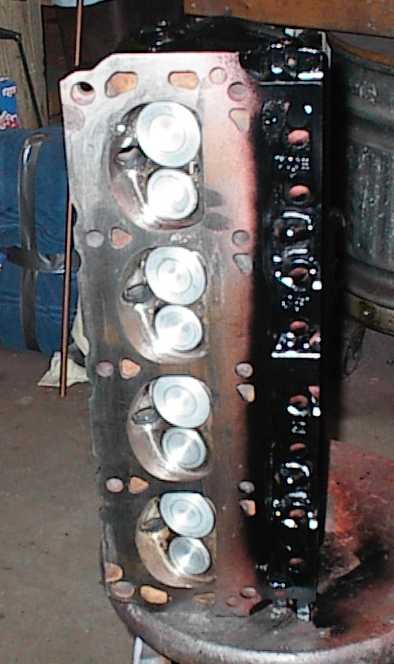
 Porting the D0OEs. I got a little crazy. The original plan was to put four
hours in, then quit. That was probably 20 hours ago... here I'm removing the
A.I.R. knobs from the exhaust ports and opening the ports up around the valve
guides.
Porting the D0OEs. I got a little crazy. The original plan was to put four
hours in, then quit. That was probably 20 hours ago... here I'm removing the
A.I.R. knobs from the exhaust ports and opening the ports up around the valve
guides.
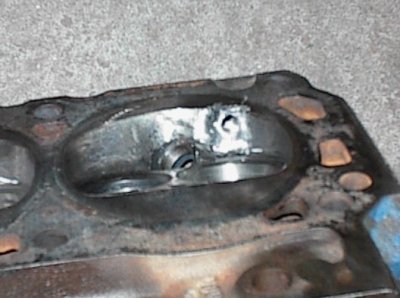
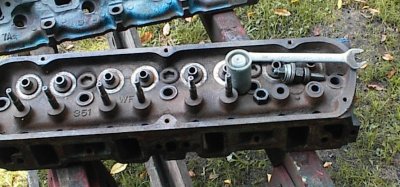
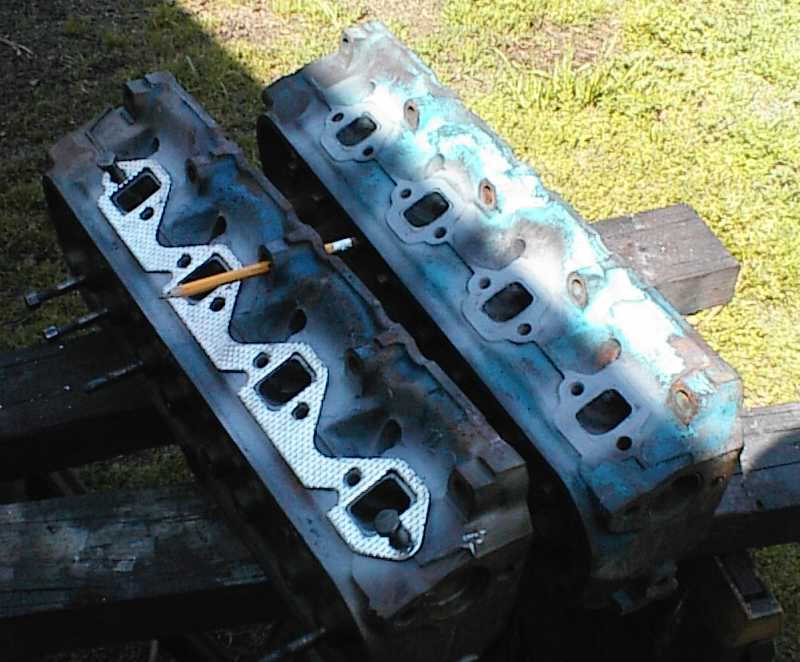
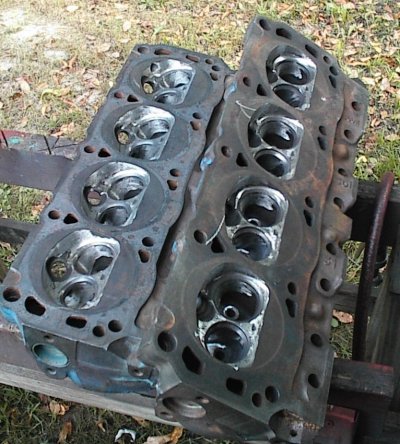 The combustion chambers get polished, too. The heads came off two different
engines. At some time, a chimpanzee sank all the exhaust valves in one head
an eighth of an inch. That'll have to be dealt with...
The combustion chambers get polished, too. The heads came off two different
engines. At some time, a chimpanzee sank all the exhaust valves in one head
an eighth of an inch. That'll have to be dealt with...
Most of the expense of the store-bought sensors is because they're non- invasive, built into spark plugs. If I had a threaded hole to screw a sensor into, I could use a cheap sensor.
There were two basic types of sensors I was interested in - piezoelectric and ionic. Omega Products had a piezeo sensor that would work, for under $150. The ion probe will be homemade, just a tiny "spark plug" gap to measure the resistance of the air in the cylinder. I'll make that myself, using the same technoques modelmakers used to make their own spark plugs.
With that in hand, all we needed were holes. Putting holes in OHV cylinder heads is a hassle. You also have to clear the manifolds, accessories, fasteners, etc. while making sure you seal the combustion chamber and water jacket. I made some threaded bushings, screwed them in, and welded them. Then I'll screw my sensors in later.
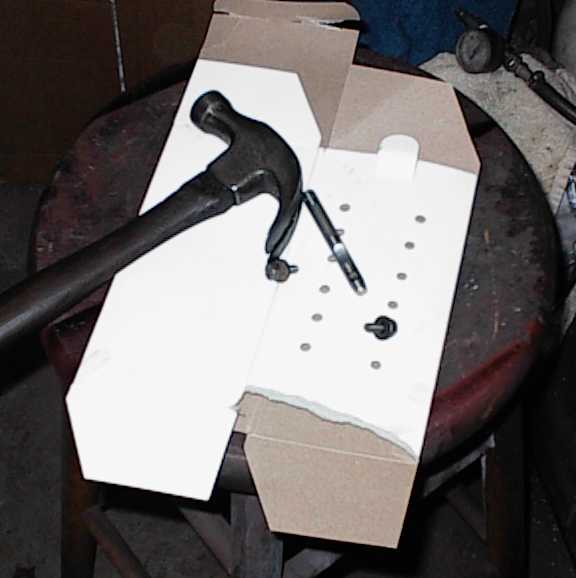
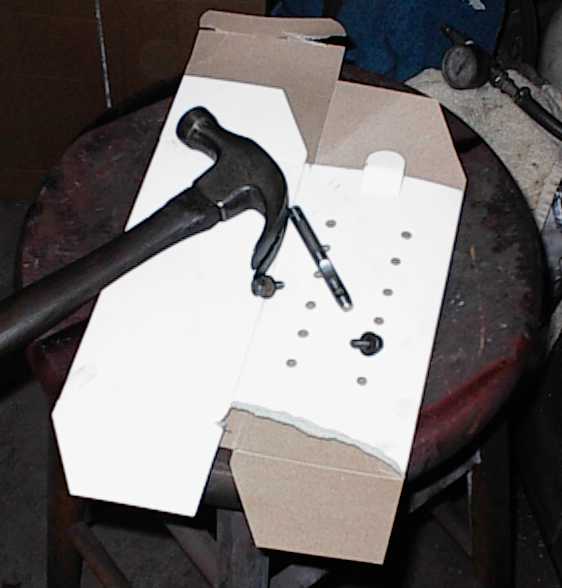
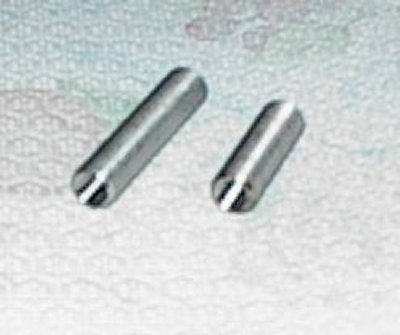 These are the bushings I made for the cylinder head pressure taps. They're
1/2-20 stainless steel threaded rod. The short bushing is for the ion probe,
the long one is for the gas pressure sensor.
These are the bushings I made for the cylinder head pressure taps. They're
1/2-20 stainless steel threaded rod. The short bushing is for the ion probe,
the long one is for the gas pressure sensor.
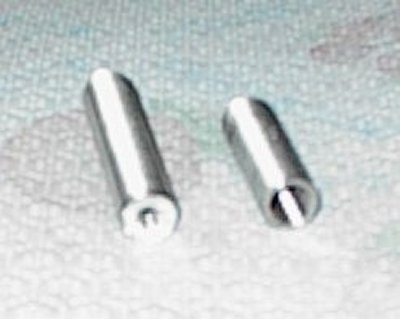 For the long bushing, I drilled a 5/16" hole most of the way through, a #49
hole almost into the chamber, a 1/8" hole into the chamber itself, taper
reamed and tapped the ends for 1/8" NPT. The short bushing is drilled and
tapped 5/16-24 fine thread all the way through.
For the long bushing, I drilled a 5/16" hole most of the way through, a #49
hole almost into the chamber, a 1/8" hole into the chamber itself, taper
reamed and tapped the ends for 1/8" NPT. The short bushing is drilled and
tapped 5/16-24 fine thread all the way through.
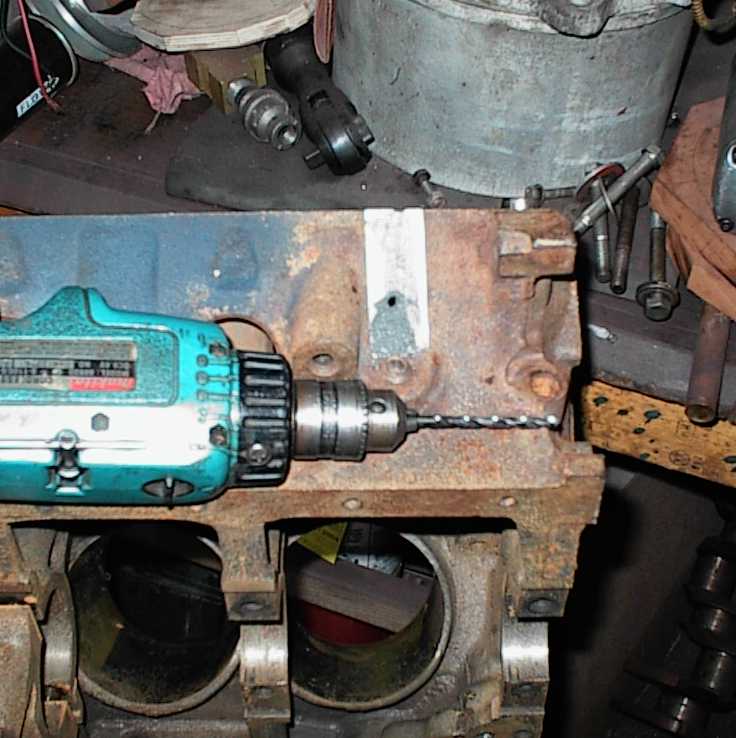
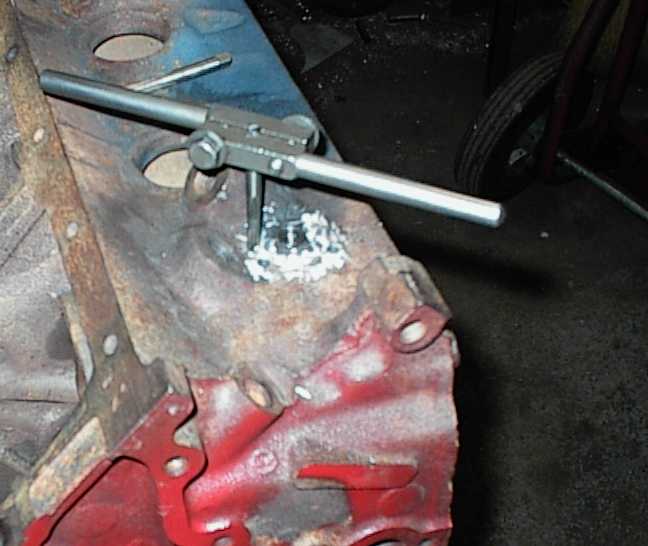
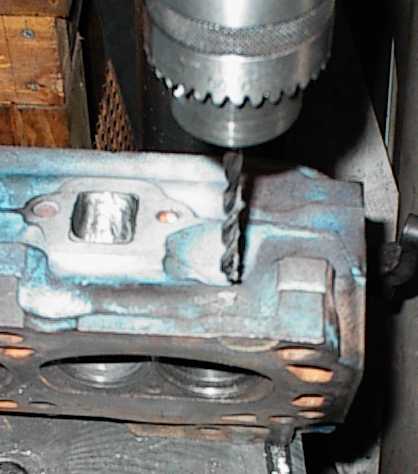
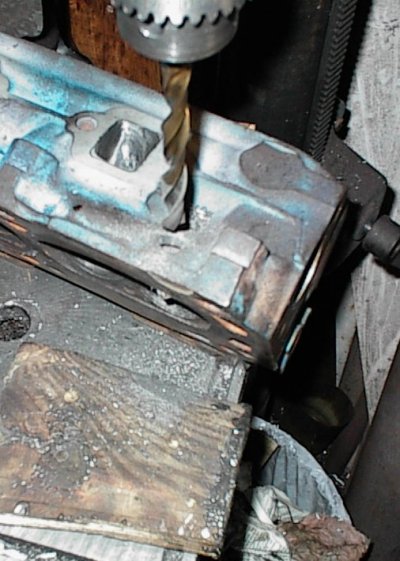 Drill a pilot hole, wedge the head up on chunks of wood, and drill 27/64 for a
1/2-20 bushing. I contemplated setting it up on the milling machine, but the
drill press worked out okay.
Drill a pilot hole, wedge the head up on chunks of wood, and drill 27/64 for a
1/2-20 bushing. I contemplated setting it up on the milling machine, but the
drill press worked out okay.
 Threading 1/2-20. This is the passenger side head, to take the ion probe.
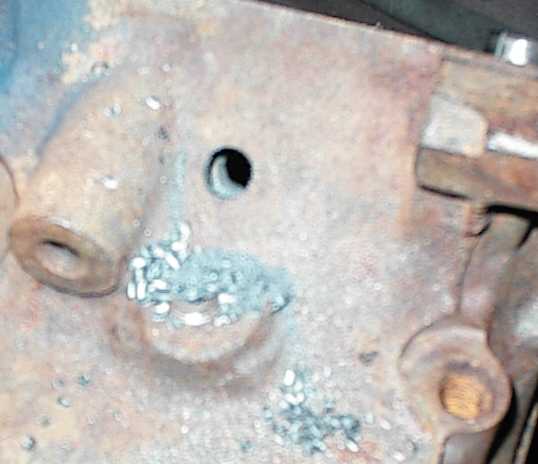
 Here it is after being welded and ground down.
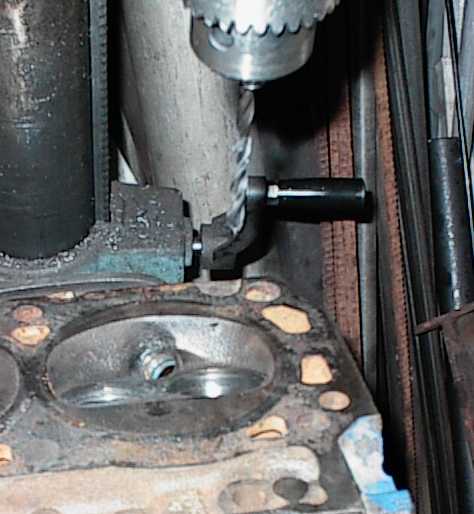
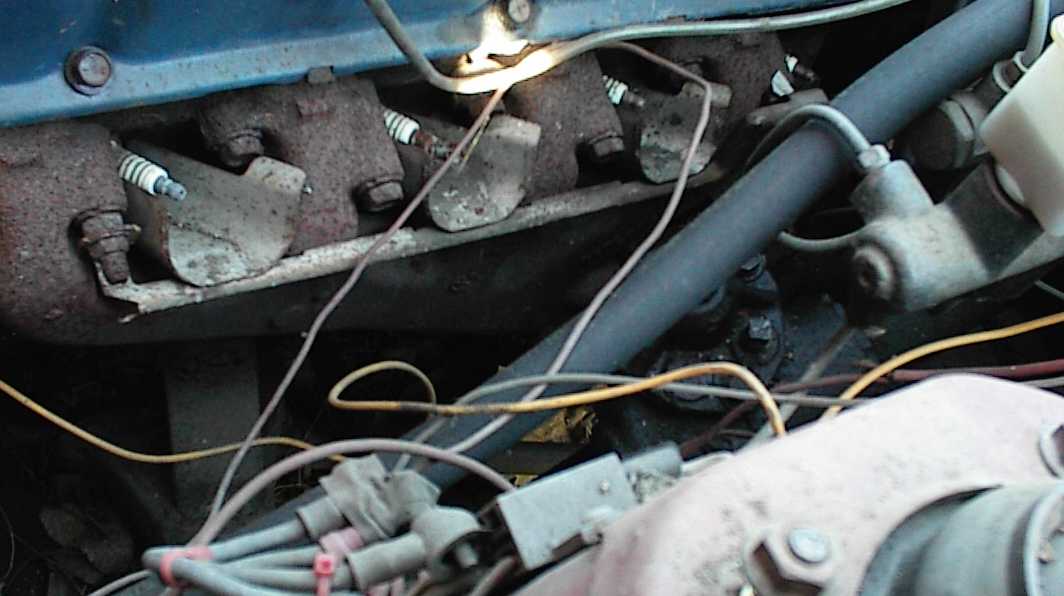
 This is the driver's side head. The exhaust manifold and spark plug made it
impossible to go in from the side, so I went in from the front at a compound
angle.
This is the driver's side head. The exhaust manifold and spark plug made it
impossible to go in from the side, so I went in from the front at a compound
angle.
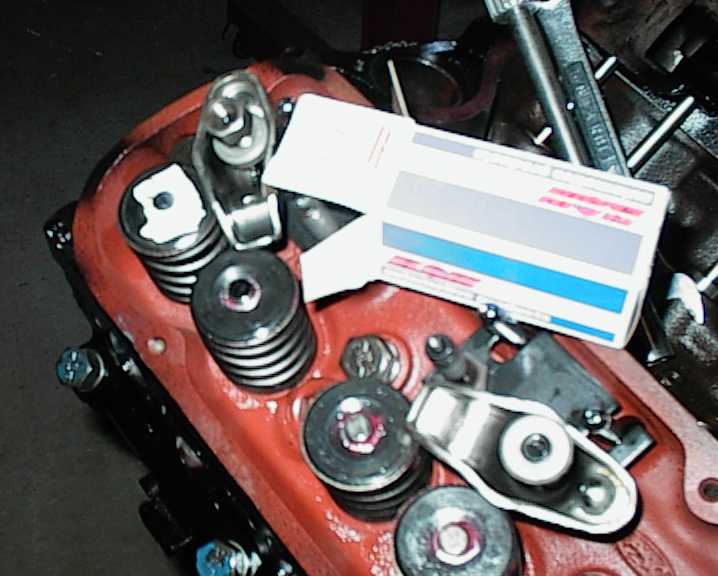
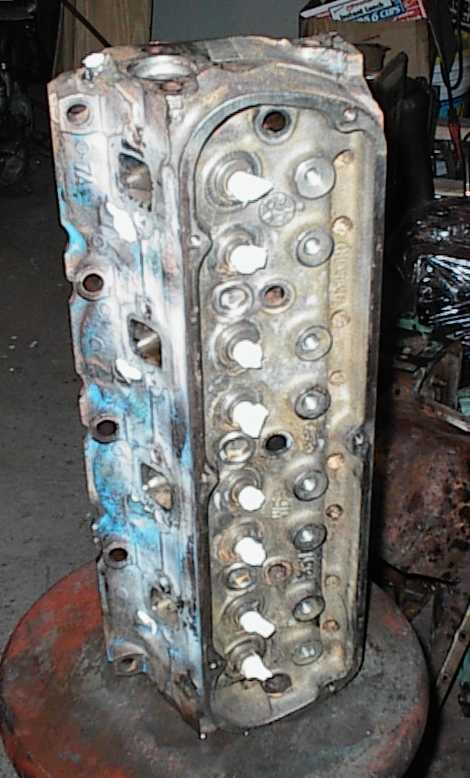
You can see some of the bowl work in this shot. I've also cut the chambers
back to unshroud the valves.
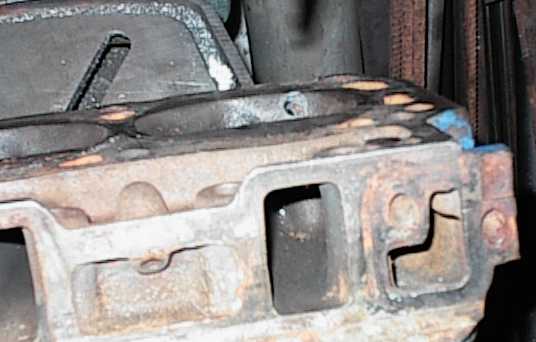
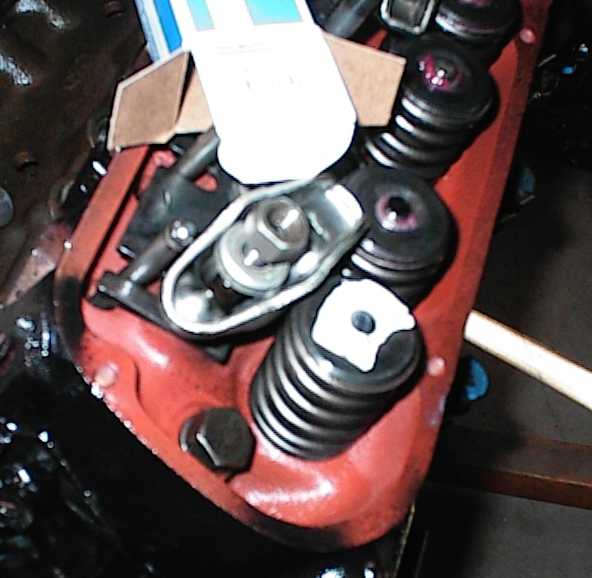
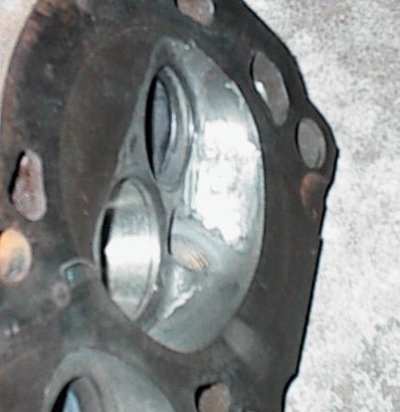 The threaded hole entered the chamber at an acute angle, so I wound up
grinding off some of the threaded bung that stuck into the chamber, then
filling the unused part of the threaded chamber wall with weld. Then, of
course, I got to grind it all back smooth. You can barely see the #49 hole in
this shot.
The threaded hole entered the chamber at an acute angle, so I wound up
grinding off some of the threaded bung that stuck into the chamber, then
filling the unused part of the threaded chamber wall with weld. Then, of
course, I got to grind it all back smooth. You can barely see the #49 hole in
this shot.
 The outside gets welded and finish ground too.
 In between porting, drilling, welding, and so forth, I pulled studs, using
stacks of washers and some old conrod nuts. ARP super moly lube works well
for the threads. The D0OE studs step down from 3/8" in the heads to 5/16"
threads, and if you aren't careful, you'll just break the threaded part off
the lower part. I managed to pull all 16 studs without breaking any; I
usually wind up drilling one or two broken ones out...
In between porting, drilling, welding, and so forth, I pulled studs, using
stacks of washers and some old conrod nuts. ARP super moly lube works well
for the threads. The D0OE studs step down from 3/8" in the heads to 5/16"
threads, and if you aren't careful, you'll just break the threaded part off
the lower part. I managed to pull all 16 studs without breaking any; I
usually wind up drilling one or two broken ones out...
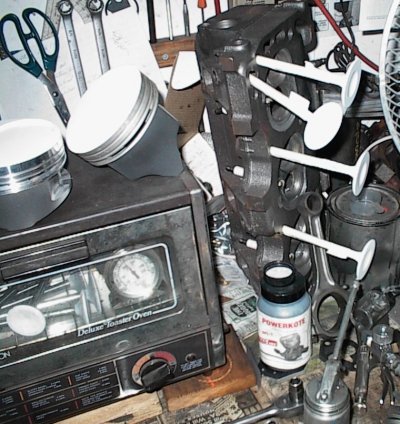 Coated 302 pistons sitting on top of the toaster oven, freshly coated valves
stuck into handy Buick head to dry. They're used 1.94/1.50 small block Chevy
valves.
Coated 302 pistons sitting on top of the toaster oven, freshly coated valves
stuck into handy Buick head to dry. They're used 1.94/1.50 small block Chevy
valves.
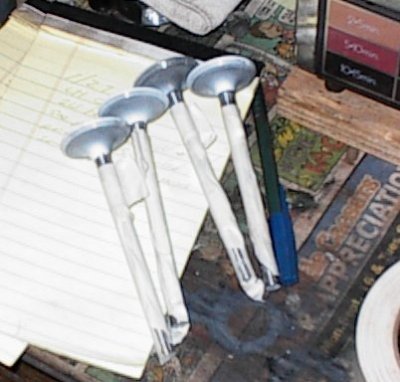 I coated the backs of the valves as well.
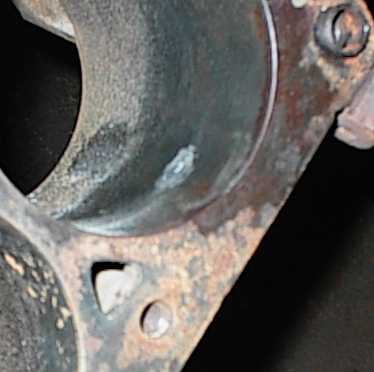
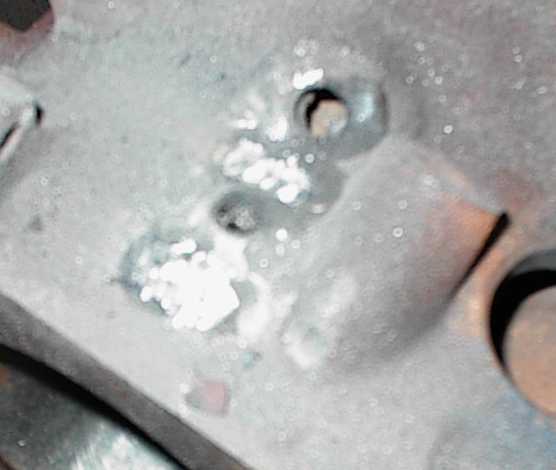
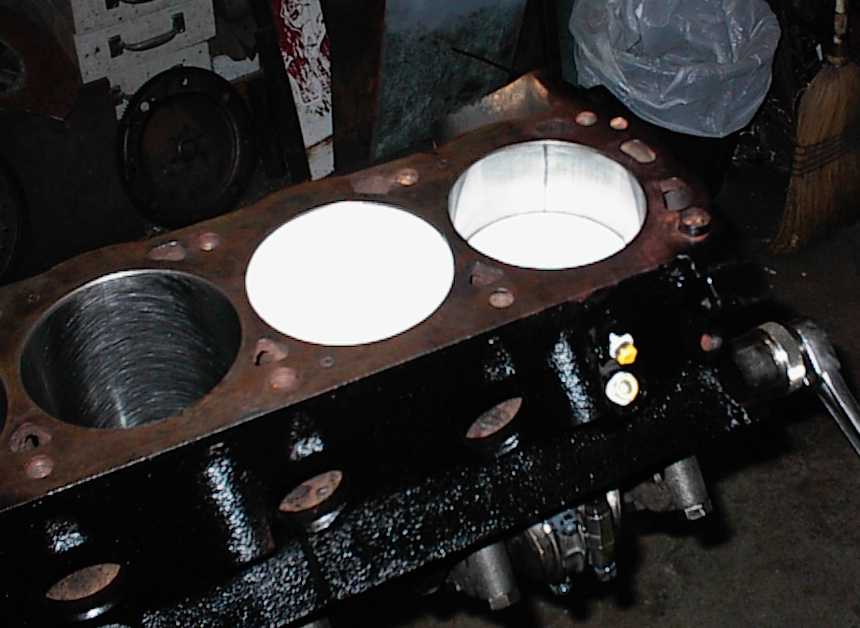
 This is the pilot hole for the side pressure tap into the cylinder. It goes
through the water jacket, but not the cylinder.
This is the pilot hole for the side pressure tap into the cylinder. It goes
through the water jacket, but not the cylinder.
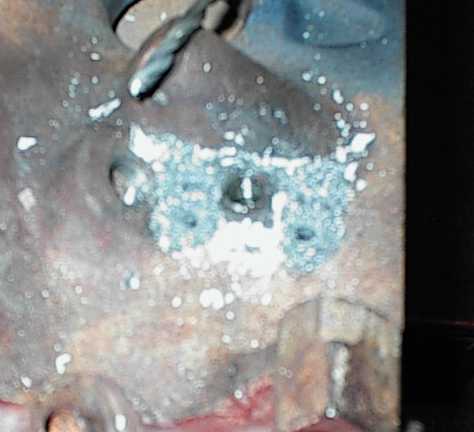
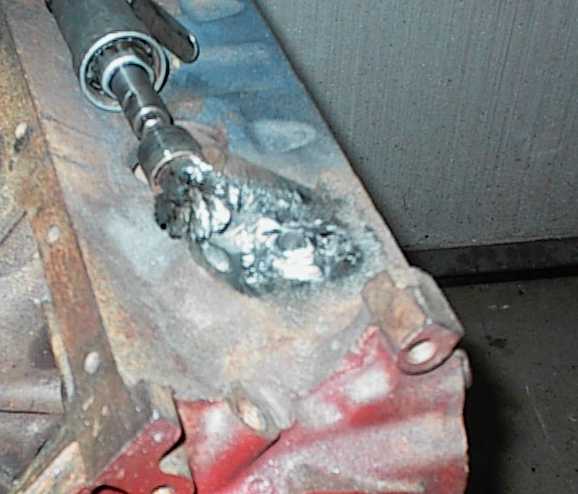
 And the hole after some moron had brain failure and drilled 27/64 right
through the side of the cylinder. Damned clones can't do anything
right...
And the hole after some moron had brain failure and drilled 27/64 right
through the side of the cylinder. Damned clones can't do anything
right...
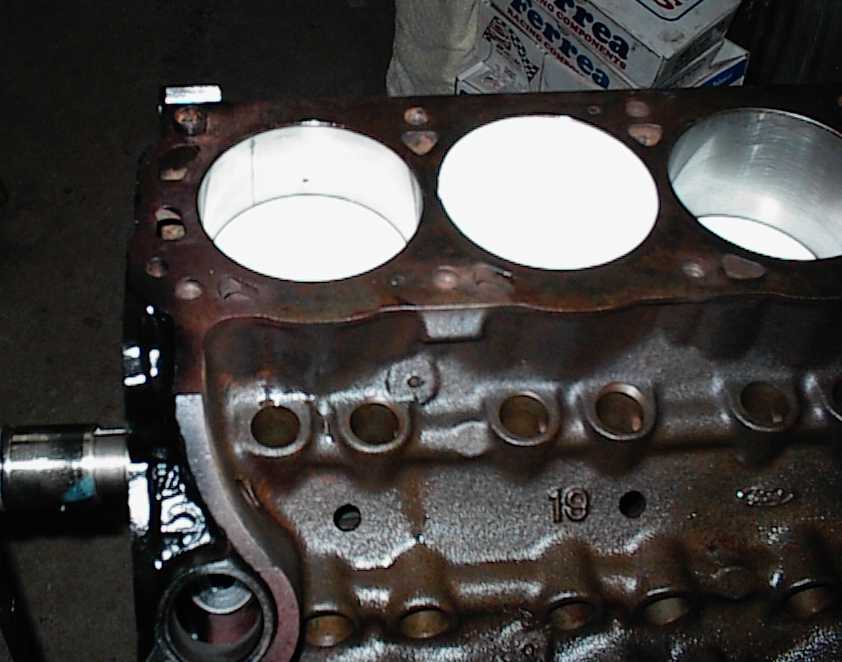
 Not too much to do except keep on truckin'. I ran the 1/2-20 tap all the way
through.
Not too much to do except keep on truckin'. I ran the 1/2-20 tap all the way
through.
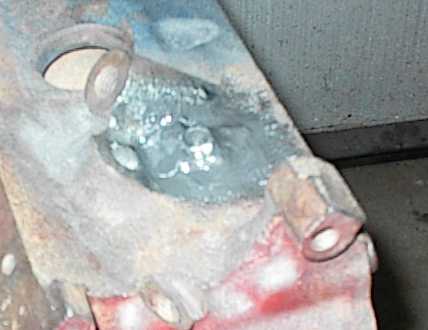
 Stainless bushing installed with epoxy and ground down with the die grinder.
 Outside of the bushing prior to welding.
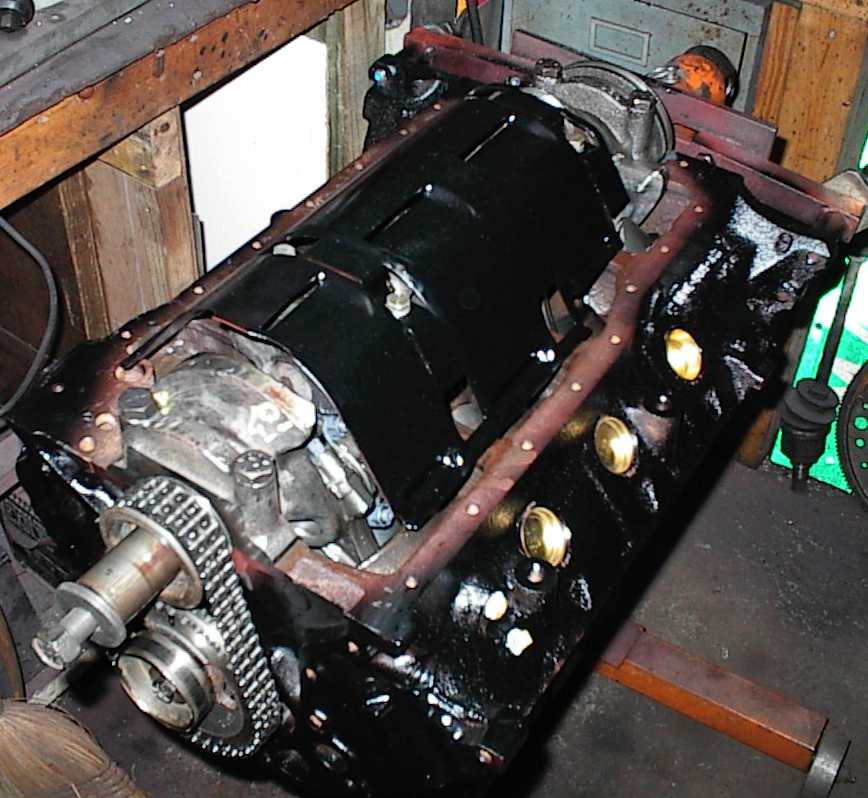
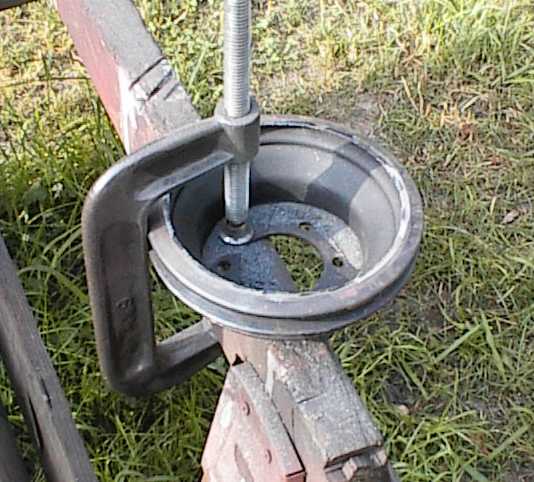
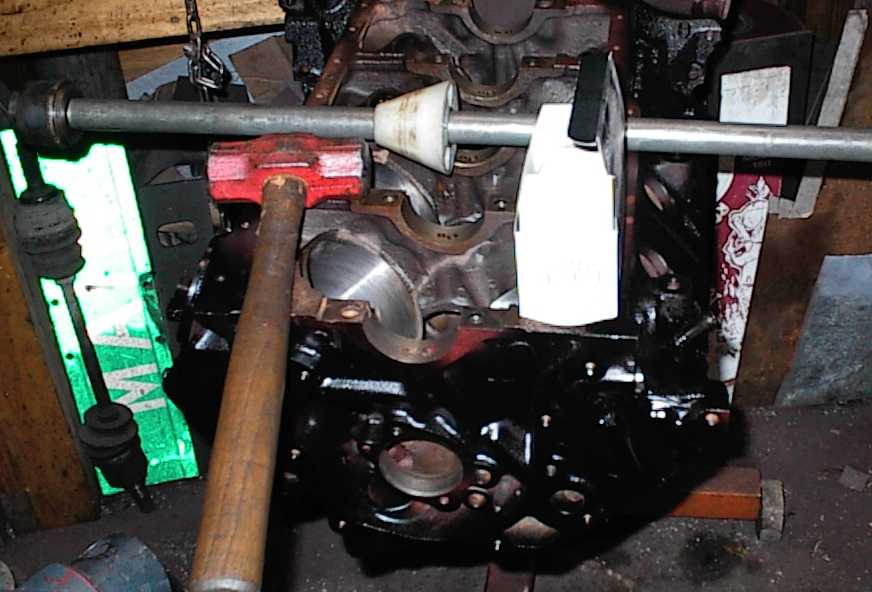 Getting ready to drive the new cam bearings in.
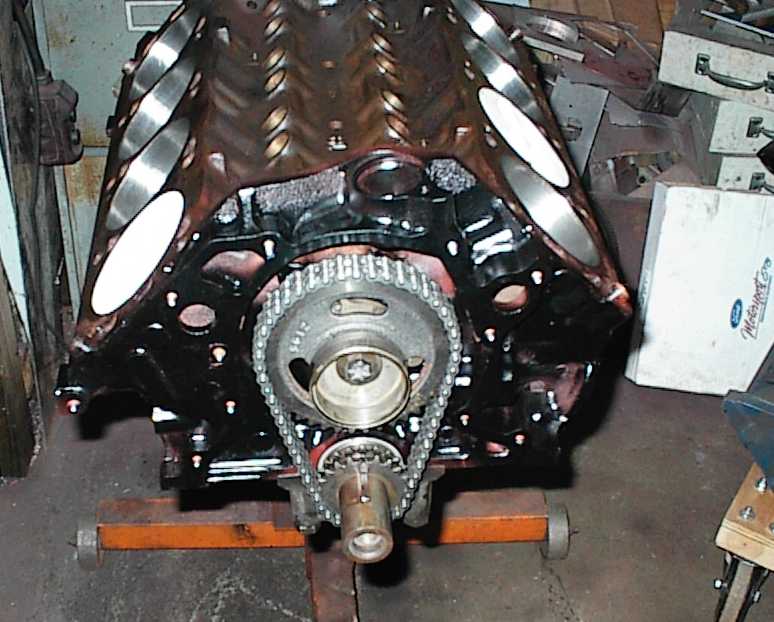
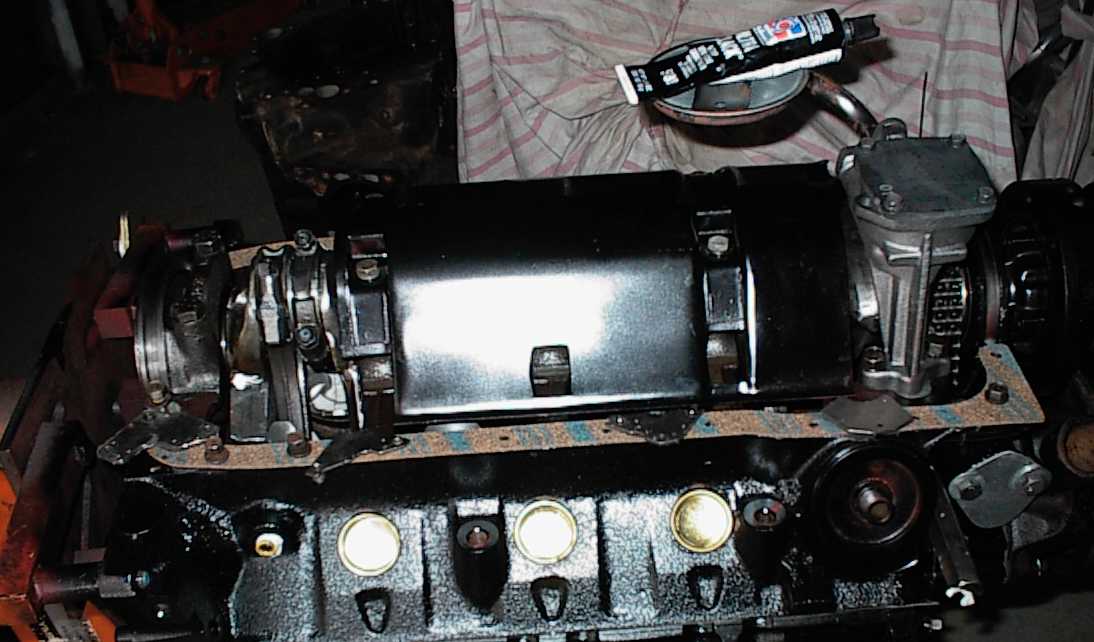
 Starting final assembly. Cam bearings in, ready for rear main seal.


 I picked up a 10" torque convertor and flexplate from a Ranger pickup with a
2300 and C4. The plan was to modify the V8 flexplate to take the 2300 convertor.
However, I later found the four cylinder C4 had different splines on the pump
and input shaft, and the mainshaft was also different. It looked like the
only practical way to use the convertor would be to use a whole 2300 box and
just swap bellhousings. Not having a trans on hand, I set the project aside.
I picked up a 10" torque convertor and flexplate from a Ranger pickup with a
2300 and C4. The plan was to modify the V8 flexplate to take the 2300 convertor.
However, I later found the four cylinder C4 had different splines on the pump
and input shaft, and the mainshaft was also different. It looked like the
only practical way to use the convertor would be to use a whole 2300 box and
just swap bellhousings. Not having a trans on hand, I set the project aside.
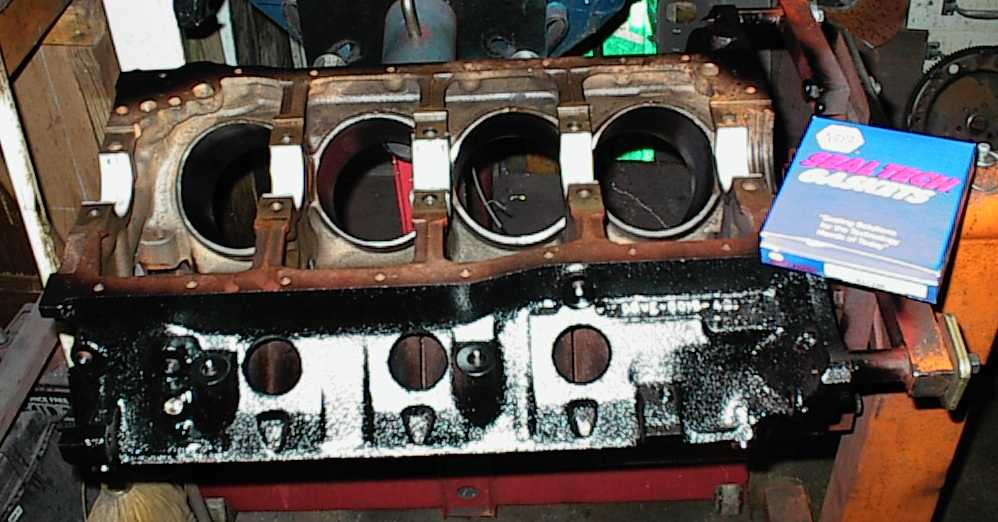
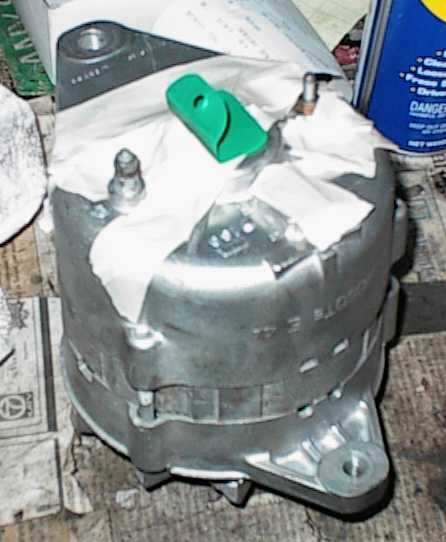
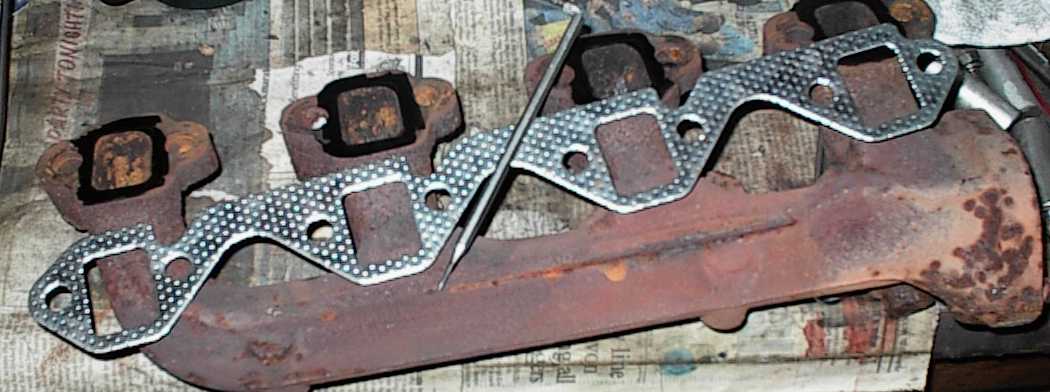
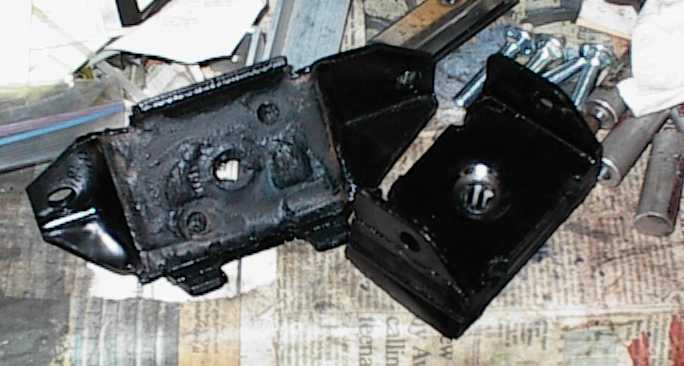
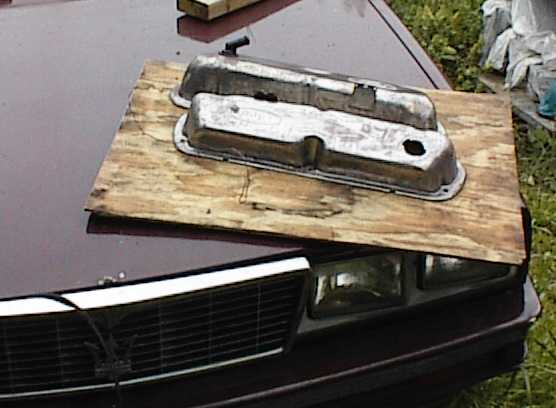
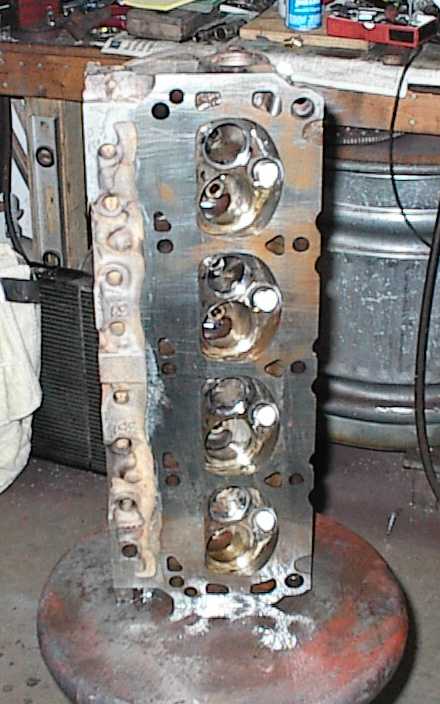
 Washed, hosed with carb cleaner, and ready to paint.
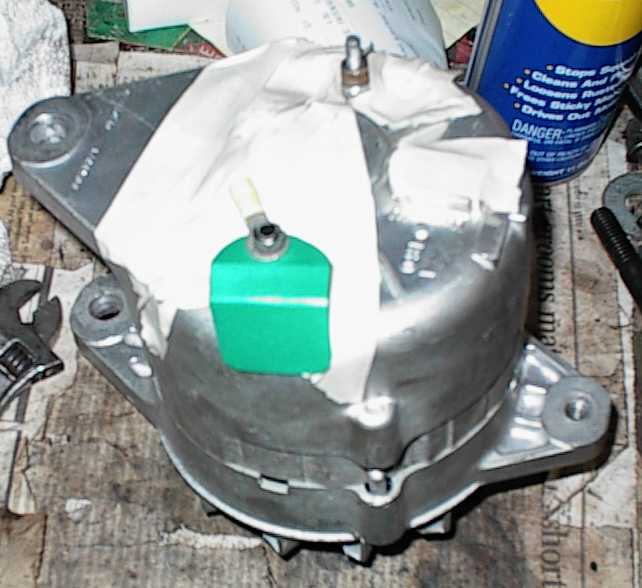
 Washed.
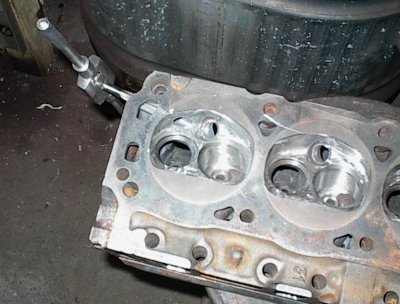
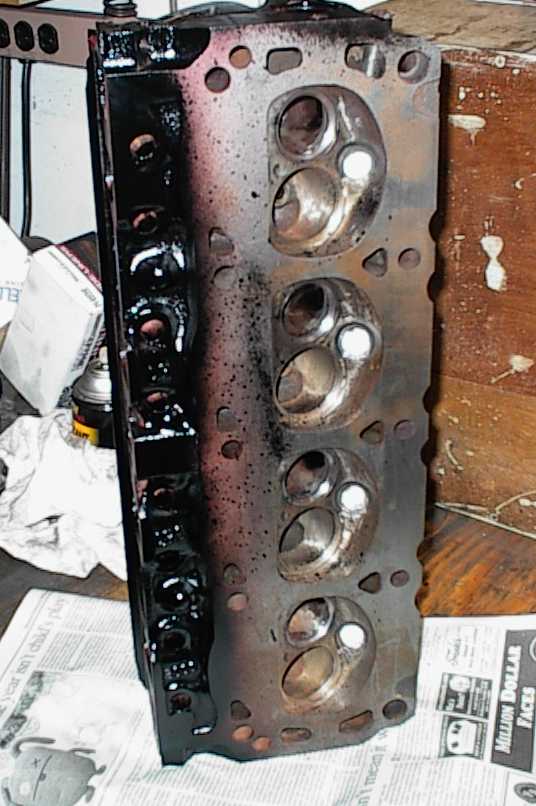 Chamber and port work is visible here.
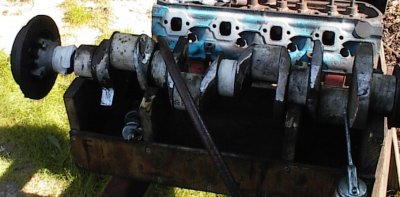
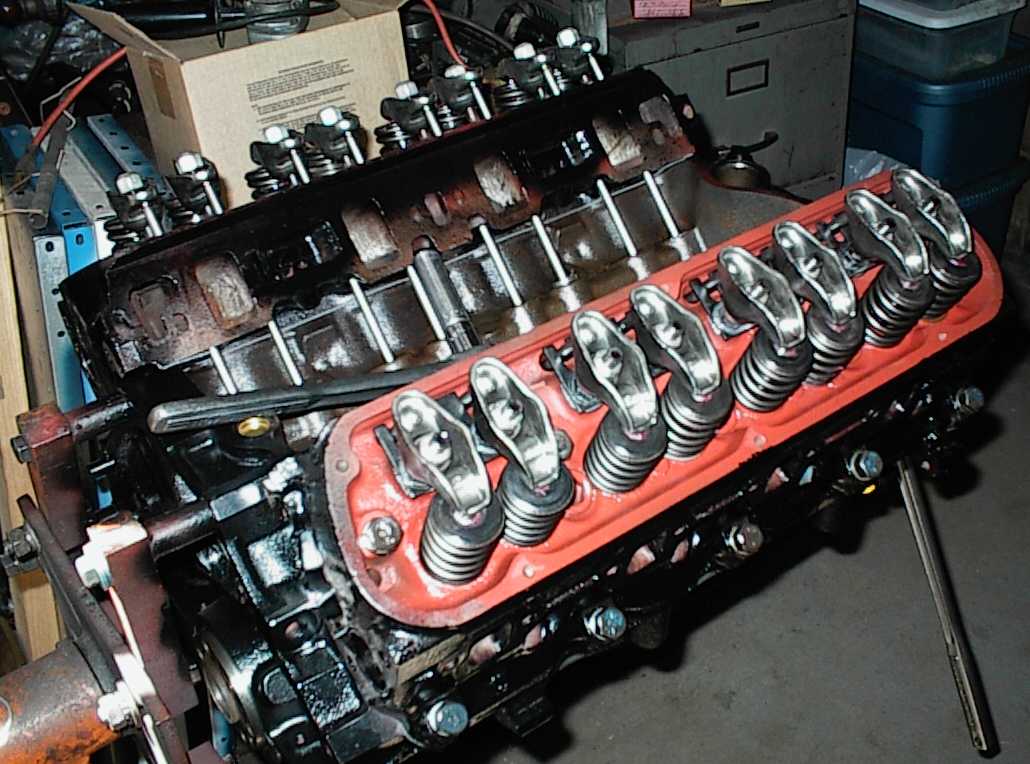
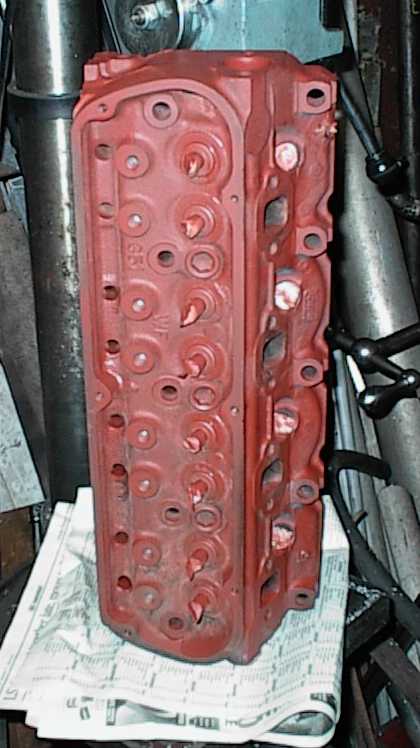
 A long way from the scrap iron I bought for $20. Red primer makes things look
neater.
A long way from the scrap iron I bought for $20. Red primer makes things look
neater.
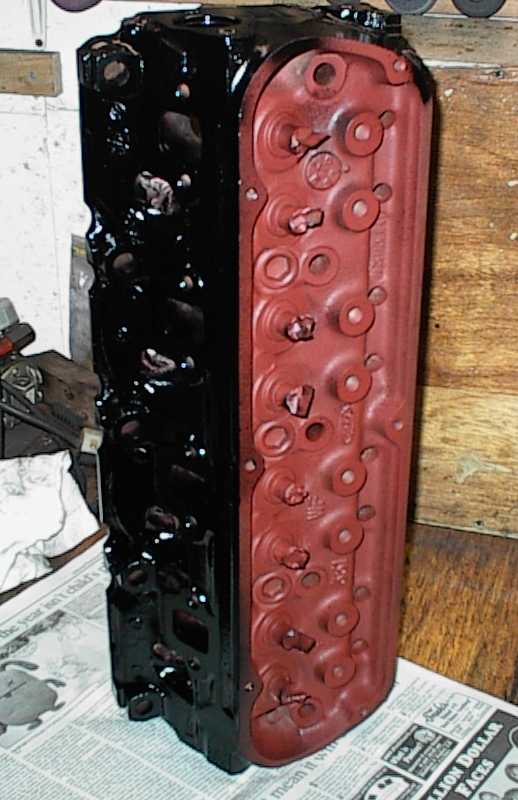
 Deck side. Overspray gets wiped off with acetone before assembly.
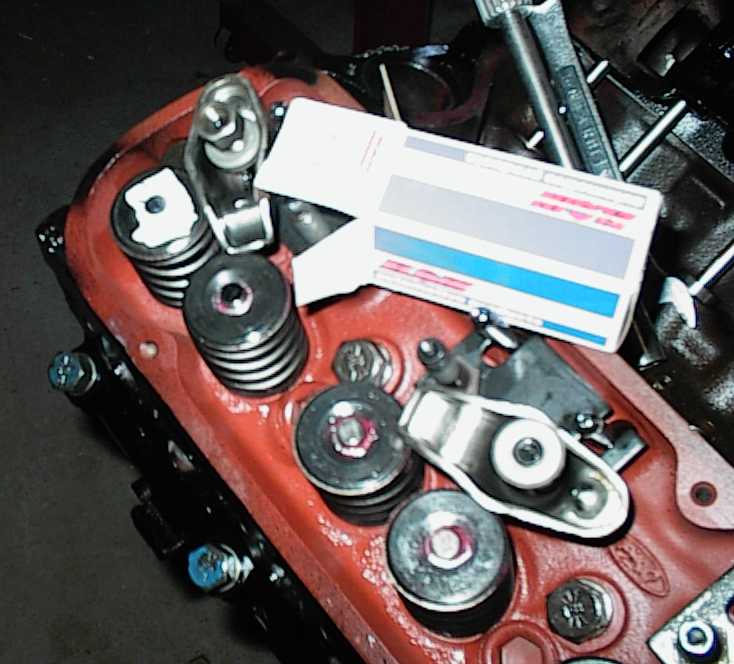
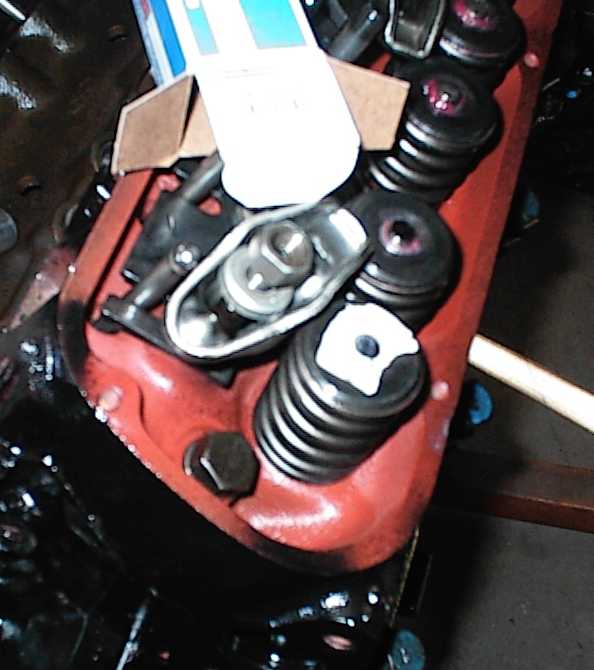
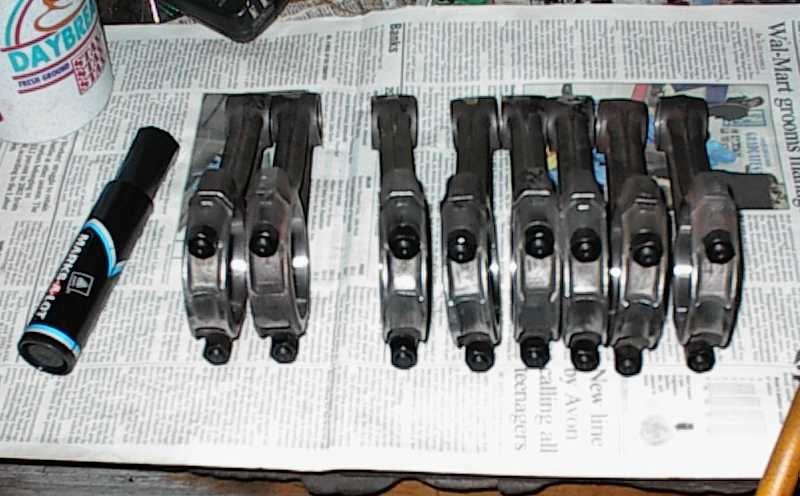
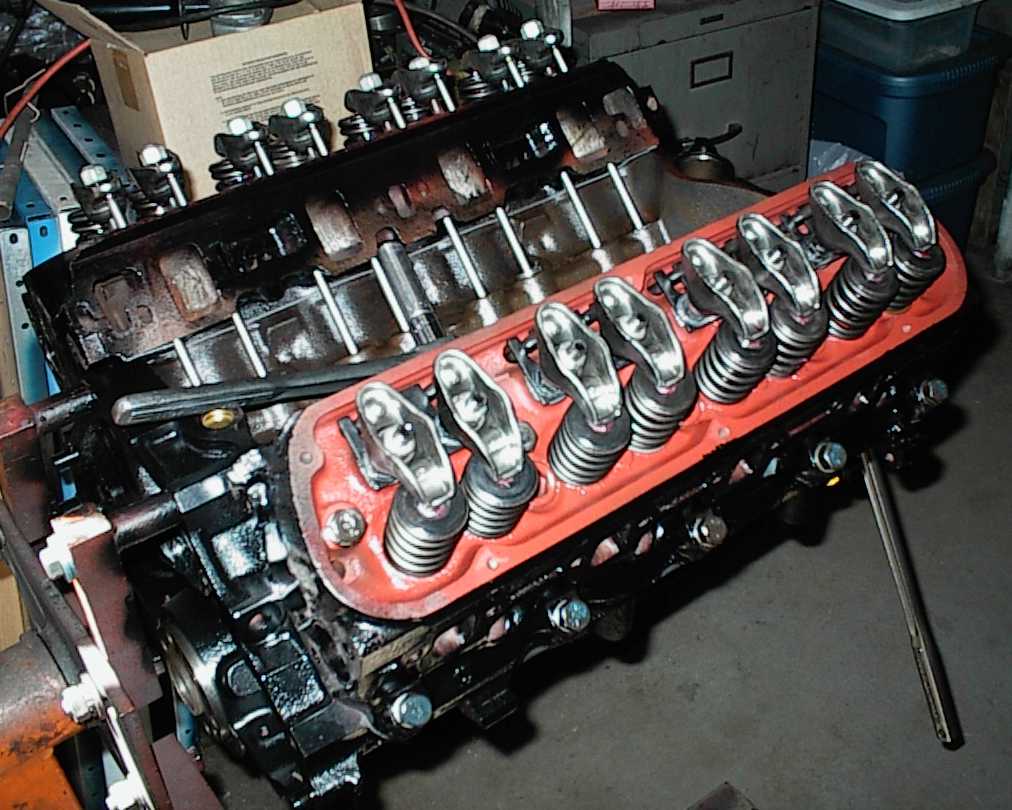
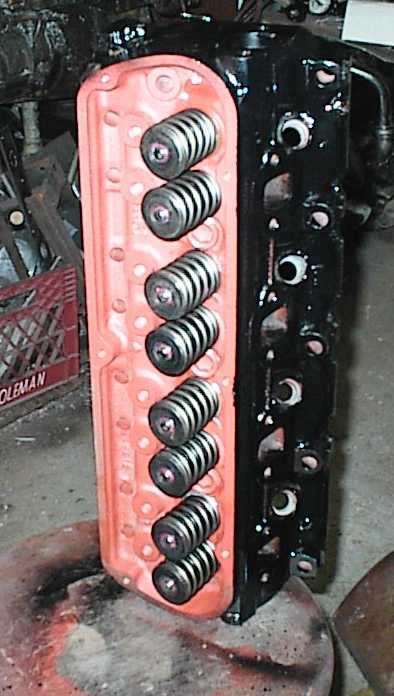 Painted and assembled; new chrome moly retainers, 300# double springs.
There's still bits of paper towel stuffed in the guide plate holes.
Painted and assembled; new chrome moly retainers, 300# double springs.
There's still bits of paper towel stuffed in the guide plate holes.
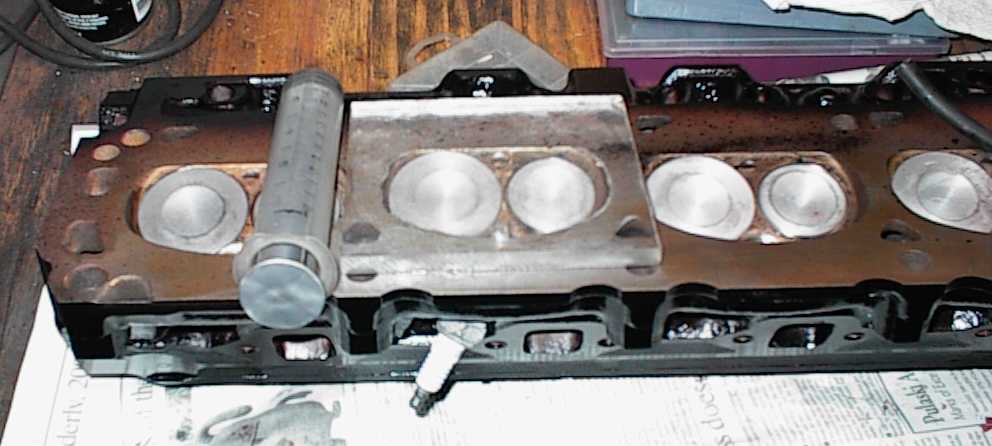 CC'ing the heads. Both came out the same, fortunately. It's not always a
given, since Ford chamber sizes vary quite a bit.
CC'ing the heads. Both came out the same, fortunately. It's not always a
given, since Ford chamber sizes vary quite a bit.
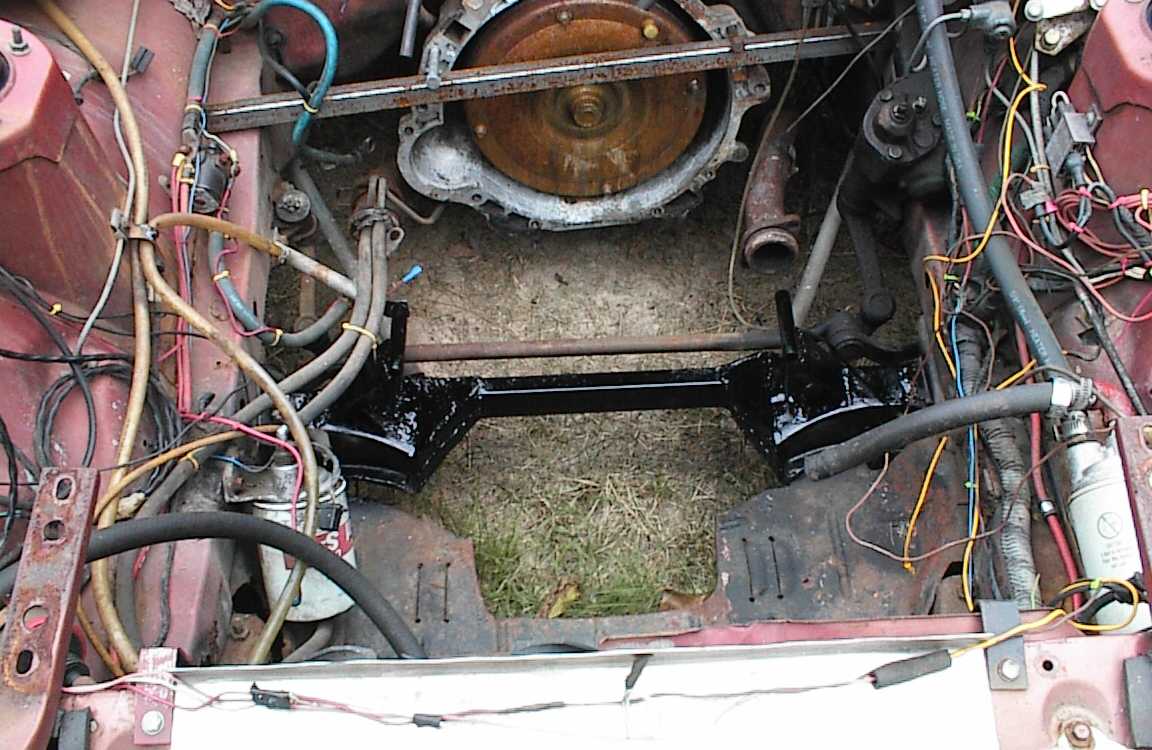
The engine went in easily and started up first try. However, the transmission made a horrendous screeching noise, loud enough that people would jump back when the car fired up. There was an ominous rattling and a strong vibration, too, enough that I checked to make sure I'd installe the same flexplate I'd balanced the engine with. The transmission took (literally) minutes to go into gear, indicating it might be gummed up inside, which C4s are noted for, and it slipped and acted weird when it finally decided to move the car. Then the crankcase filled up with "chocolate milk" indicating an internal water leak. I thought ruefully of the sleeves I'd put through into the combustion chambers and #5 cylinder, decided I didn't have time to deal with this, and parked the car out of the way.
Over the intervening year I moved the car around the yard a few times so it could kill the grass in different spots. Each time it fired right up, though the noise wasn't constant.
In midsummer of '06 I had a pair of cylinder heads I'd done some extensive weld repair on. They failed pressure check. I got the idea of coating the insides with epoxy, then decided to try running some Stop-Leak through first. I drilled and tapped the ends for some heater hose fittings, made some cardboard gaskets, and bolted them (separately) to a Ford torque plate. Then I ran two six-foot pieces of heater hose from the RX7's engine out to the cylinder head, dumped a can of Stop-Leak into the radiator, changed the oil and filter, and fired it up.
The cylinder heads came out beautifully... they seeped a little water, then stopped. But I noticed water was fizzing out from around the intake manifold bolts on the RX7's engine! I got out a wrench and found both the intake and water pump bolts were barely more than finger tight. The fizzing stopped. I was getting some steam out the breather for a while, and then that stopped too. The oil looks clean.
Well, damn.
I ran the car for about three hours, total. At the end of that time the transmission would go into gear immediately when I moved the shifter. The clashing and grinding noises were still there, however. I drove the car around the block again, and it still shifted funny.
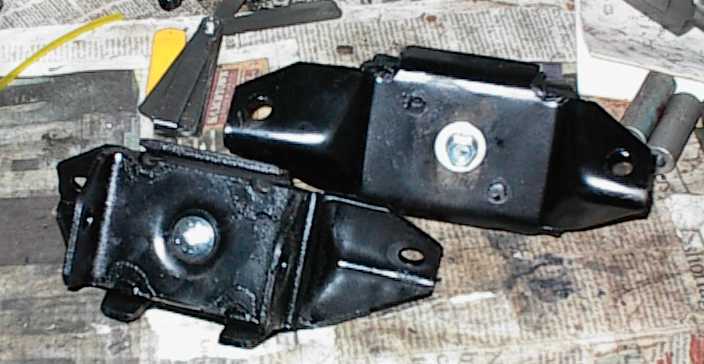
For a while I'd wondered if the noise might be something else, but I hadn't had time to do anything about it. So I jacked it up, crawled underneath, and found the exhaust bracket by the transmission mount was a bit loose. Still snug, but it had some play. I tightened it up... and the horrendous noise was gone!
Well, damn...
I also found that the molded hose going to the vacuum modulator had a hole in it. I put a new one on.