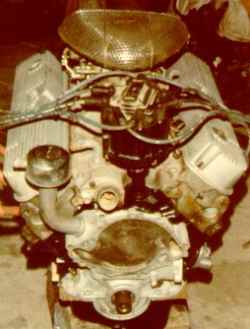
 HEI on Ford
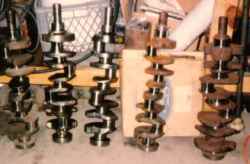 Cranks in process
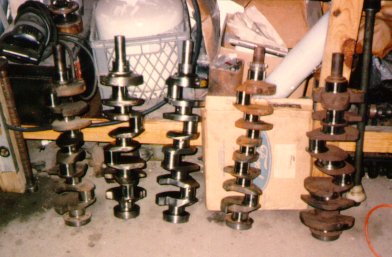
"Stuff" in the workshop, late 1997. Left to right: 3.075" stroked 302 crank, lightened 302 crank with Chevy rod journal size, 351 Cleveland crank cut down to fit in a 302, 351 Cleveland crank stroked to 3.65", 400 crank stroked to 4.187 with Chrysler rod journals. The apparent size difference of the 400 is true; the counterweights are enormous.
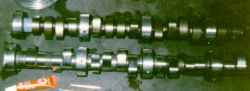 Crossdrilling Ford cams
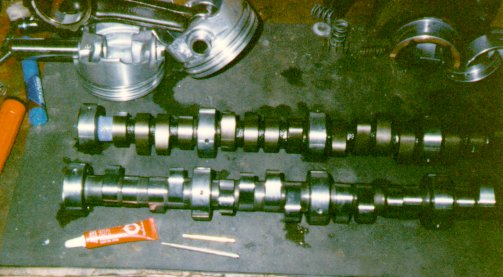
Cross-drilling Ford cams. One cam had a very deep spot drill in the end, requiring installation of a brass tube. Small block Fords try to oil the cam at the bottom, at the point of highest pressure. Judging from the way I often see massive cam bearing wear in core motors, it doesn't work too well. I've started crossdrilling the cams so oil goes *through* the cam to the low pressure area at the top, hopefully to be carried around the journal as it rotates.
 Windsor oiling mod
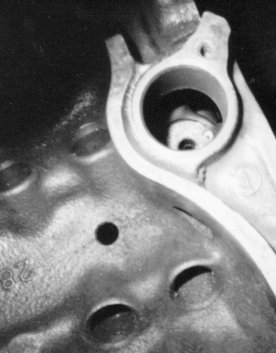
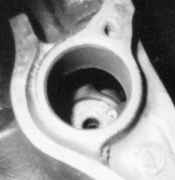
Windsor distributor gear oiling mod. There's an oil gallery that runs from the cam bearing to the lower distributor shaft. This hole intersects that gallery and squirts oil directly onto the distributor gear teeth. A large bit is used until it gets close to breaking through, then a .025" drill is used to make the final step.
 Windsor-pattern 400
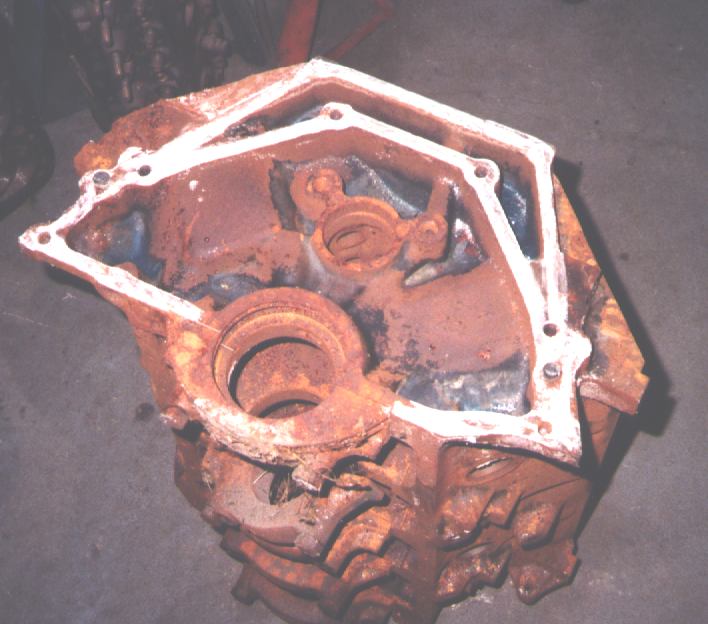
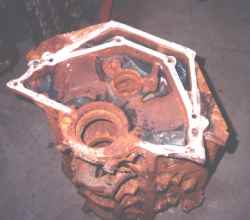
This is a 400 (Cleveland) Ford block. These blocks normally have the 429/460 big block bellhousing bolt pattern. This one has the Windsor/351C small block pattern. Notice the skeletal outline of the old big block pattern was left. These blocks have the same deck height as a 460 and weigh over 200 pounds, but they'll let you build a 400 to 450 cubic inch motor that will drop right in to a Pantera, at least once you drill the blank motor mount bosses out to accept standard Cleveland mounts. Why stroke a 351C when you can just bolt in 400 or more inches?
 narrowing rod bearings
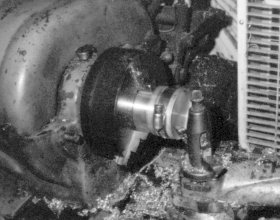
A somewhat low resolution photo of how I narrow rod bearings after narrowing rods for stroker motors. I have a selection of spuds that I put in the lathe chuck. The bearings go on the outside with a plain old hose clamp. I can narrow and chamfer the bearings in one pass. You still have to break the edges and deburr, but it only takes a few minutes.
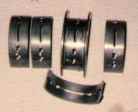 main bearing mod
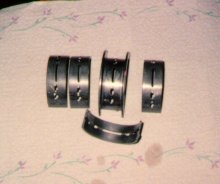
These are main bearings for a 302 Ford with the main bearing oiling mod. A 1/8x1/8" groove is cut in the main bearing bore in the block, intersecting the oil feed hole. Extra holes are drilled in the main bearing shells to line up with the groove. These are upper bearings with a groove in the bearing already, though it doesn't show well in this picture. The extra groove behind the bearing feeds more oil to the journal. The main purpose is to ensure full oil flow available for the rod bearings, which pick up oil from this groove.
 valve crusties
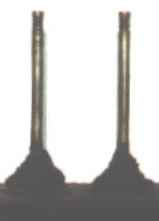
These are two of the eight intake valves from a 351 Cleveland. Notice the carbon buildup. This is pretty common on Clevelands; the umbrella valve stem seals tended to disintegrate and let oil by, which got carbonized onto the valves. I imagine air flow wasn't so hot by the time these valves were retired. The stuff is so hard even a hammer won't remove it.
 why 5.0 pumps suck
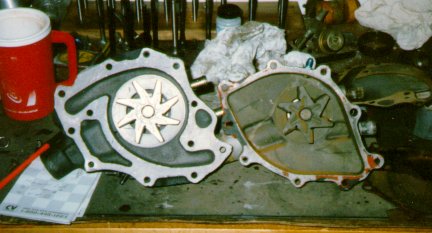
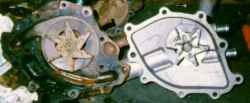
The pump on the left is the early 302-type cast iron model. The one on the right is the aluminum "5.0" style. Both are standard rotation. Note the early pump has a larger, better shaped impeller, fitting closely against a machined surface in the housing, which is also scrolled to direct water out to the ports in the block. The late model pump sort of has this sheet metal fan thing, flapping around in a big cavity. No wonder the car overheated with the new water pump! Believe it or not, both pumps fit up to an ordinary Ford timing cover, which has lots of unused mounting holes. Note the air bleed added to the late pump on the right; it is from my V8 RX-7.
 water pump air bleed
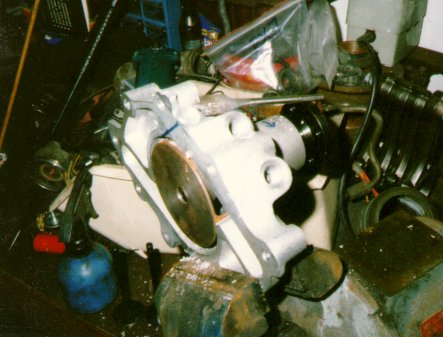
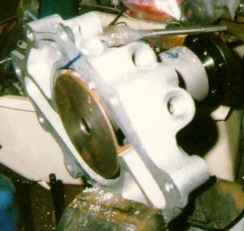
This photo is kind of blurry, but it's an Edelbrock pump for a 5.0 Ford. I'm drilling a hole to add an air bleed from the top of the pump to the remote coolant reservoir. Due to the way the Edelbrock pump is made, the hole has to slant in at an angle, and there's no flat surface to start the drill from. Stock pumps are easy. Trying to fixture the Edelbrock pump in the milling machine turned into a hassle, so I did it freehand. I drilled the hole with an ordinary hand drill. Unfortunately, I needed a flat surface to start the NPT tap. In a "try anything" mood, I put a 5/8" spade drill in my low-speed Makita battery operated drill and tried that. The spade drill was intended for wood, but the long nose piloted in the hole I'd already drilled and the wings peeled off beautiful shavings of cast aluminum. It looked great when done, no sign of the low-tech operation visible.
 air pocket
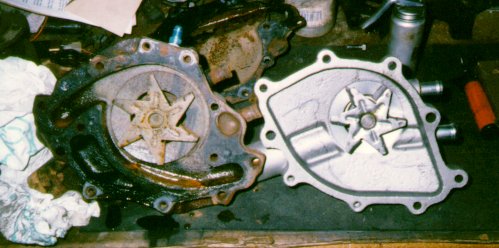
The left is the first pump that was on the 302 in the RX. Note "ring around the toilet bowl" corrosion from before I added the air bleed. New '80s 302 aluminum pump on the right.
 302 water pumps
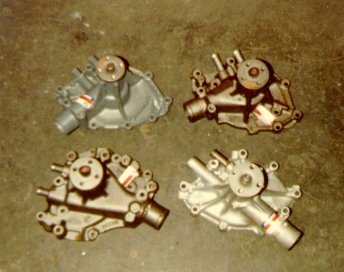
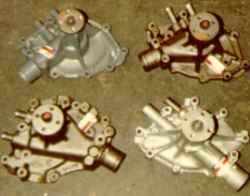
Assorted 302 pumps, found by digging through parts boxes at an agreeable store, circa 1985 or so. Unfortunately I lost my notes for which pumps fit what. [sigh] The picture at least shows there were left and right hand outlets available for both iron and aluminum pumps. Given the time when the picture was taken, these are likely all standard-rotation V-belt pumps.
 Windsor timing covers
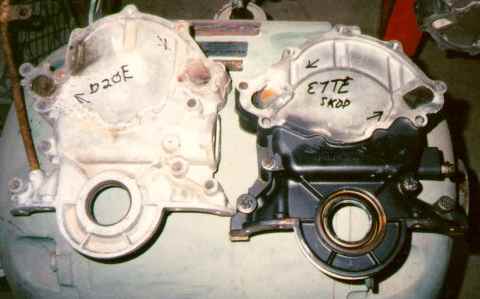
Early V-belt standard rotation (left) and late serpentine reverse rotation (right).