My brother Kevin and I had talked about building a V8 drag bike for years. We had a bunch of sketches for a long wheelbase drag-only machine when Kevin suggested making whatever modifications were needed to fit a V8 into his Sportster chassis, which already had electrics, brakes, title, etc.
A little rough tape measure work showed the idea wasn't totally out of line. We hauled the bike from Florida to my shop and I started tinkering. Like many things around here it's a low priority project, but it will get done...
The engine that's eventually slated to go in here is Kevin's aluminum-rod, solid lifter, dual quad, bracket racer 355 Chevy that used to be in his '52 Chevy pickup. I tossed a brand new Hilborn injection setup into the pot; the nozzles will go into Kevin's Offenhauser 2x4 intake with a pair of large bore throttle bodies on top. This will give fuel tank clearance for the induction.
I don't have a lot of photos of the project yet, so you'll have to bear with me for now...
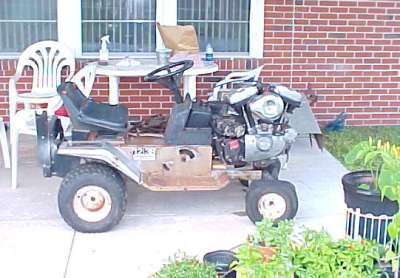
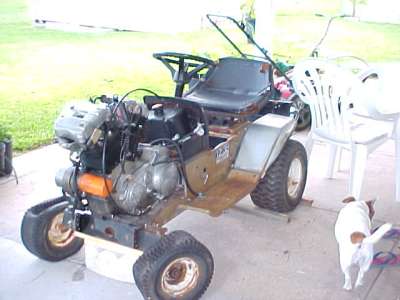
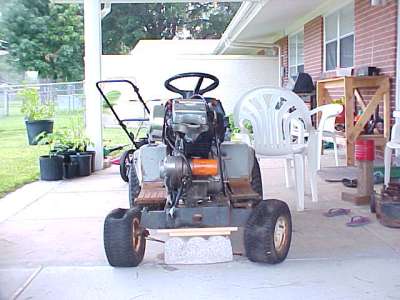
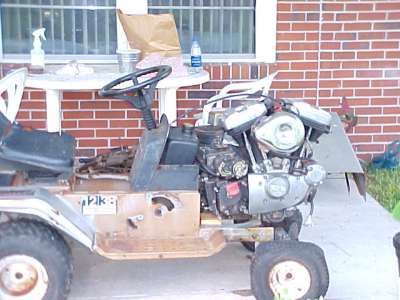
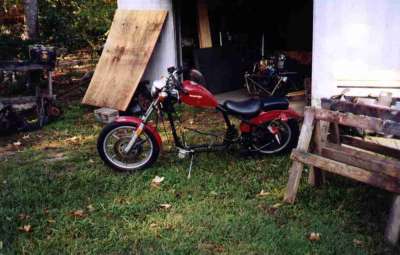 Here's the '84 Sportster after being unloaded from the truck. Everything is
there except the engine, which will probably go into Kevin's riding lawnmower
just to make the biker-clones angry.
Here's the '84 Sportster after being unloaded from the truck. Everything is
there except the engine, which will probably go into Kevin's riding lawnmower
just to make the biker-clones angry.
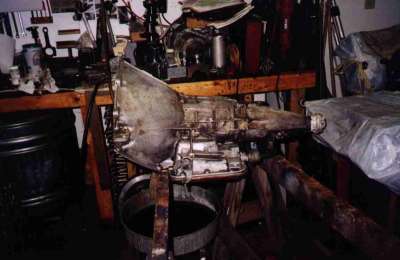 Here's the Powerglide. It came out of a friend's '67 El Camino. I hung on to
it because you never know when you might need a Powerglide for something...
The '67 still had a rear pump and governor, among other things that I'll be
discarding as part of the conversion. Without a rear pump Kevin can't push
start the Harley, but you can't have everything.
Here's the Powerglide. It came out of a friend's '67 El Camino. I hung on to
it because you never know when you might need a Powerglide for something...
The '67 still had a rear pump and governor, among other things that I'll be
discarding as part of the conversion. Without a rear pump Kevin can't push
start the Harley, but you can't have everything.
Most V8 bikes have no transmission at all. It works, sort of, but I think
it's a pretty cheesy way of going about things. The Powerglide is light,
small, and has park, neutral, reverse, and two forward speeds.
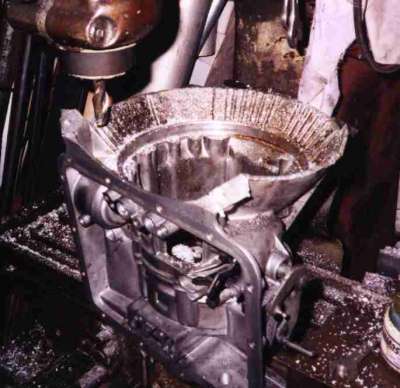 After getting it apart I had a friend whack the bellhousing off with his
plasma cutter. I was then able to get it on the milling machine to face off
the front of the case.
After getting it apart I had a friend whack the bellhousing off with his
plasma cutter. I was then able to get it on the milling machine to face off
the front of the case.
After all the mods are done the trans will be rebuilt to stock specs, more or
less. After riding it we'll see what has to be done about the shift speed,
etc.
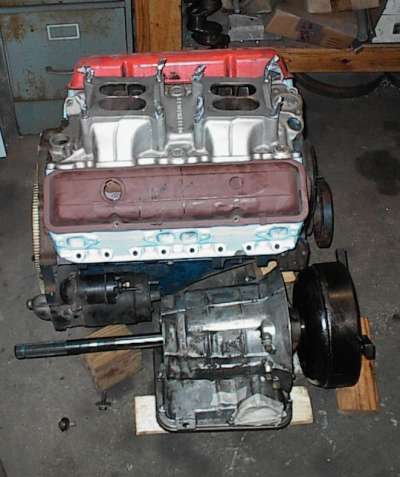
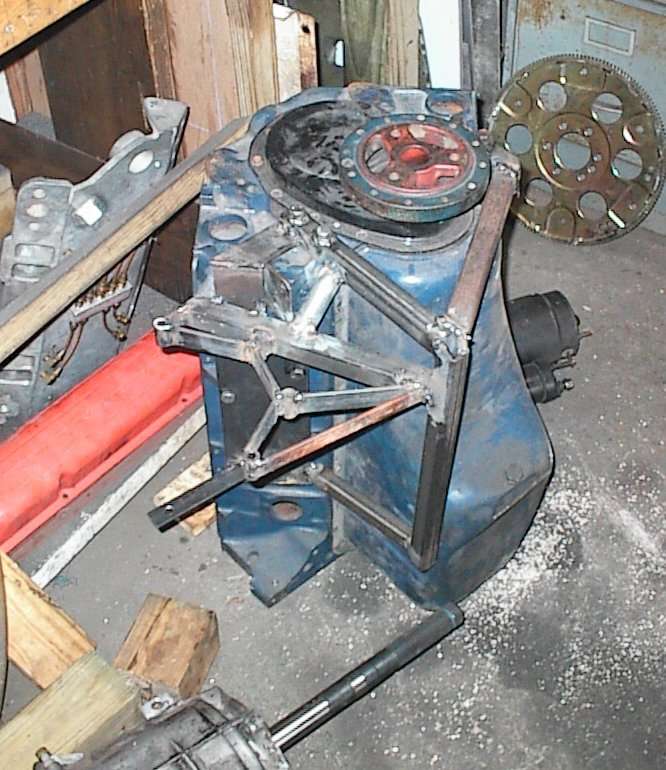
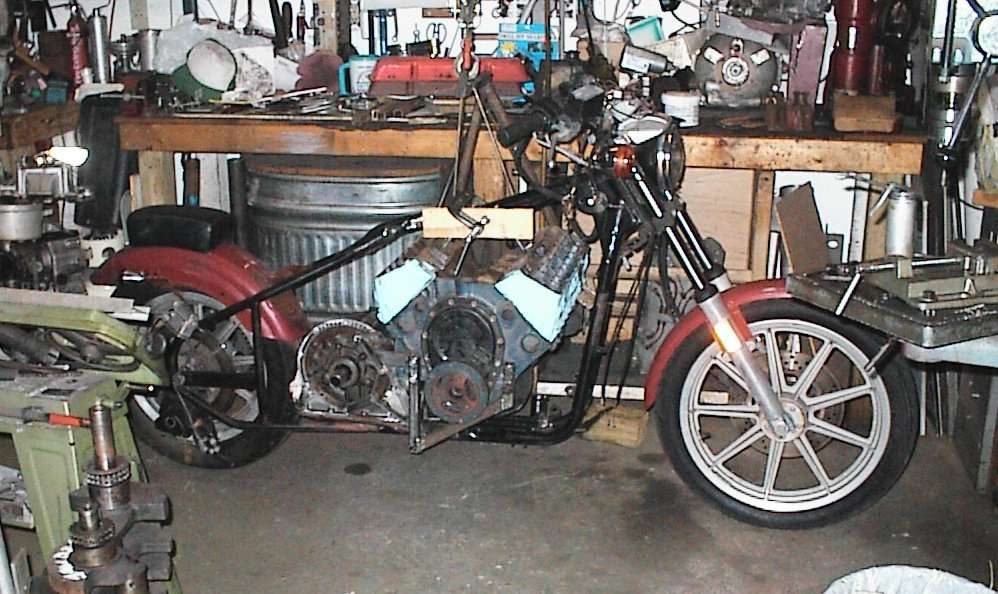
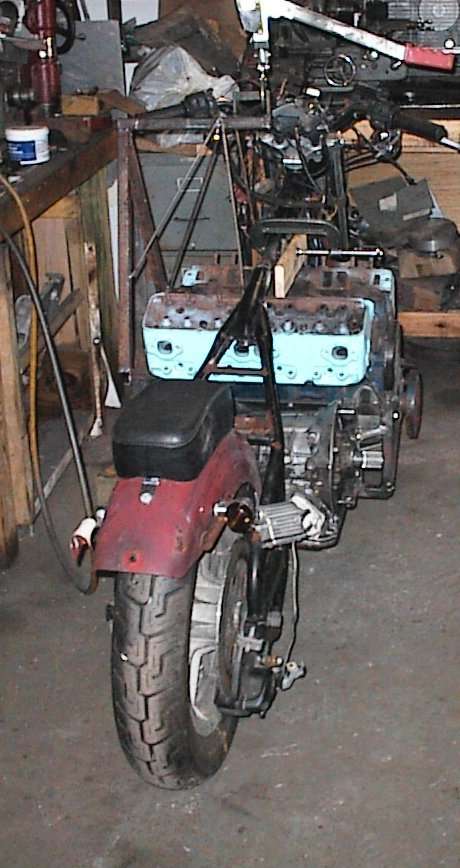
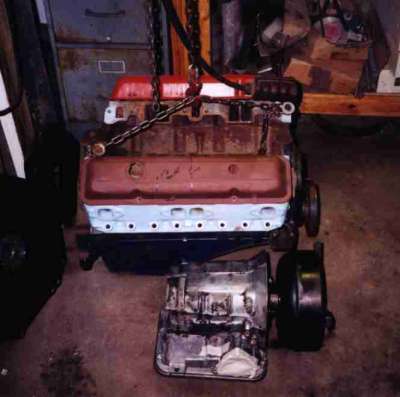 Here are the major parts in their positions. The transmission will have a
bearing retainer plate on the output side and there will be an outrigger
bearing holding the torque convertor snout. The primary drive will run
from the harmonic balancer to the torque convertor via ordinary #530 chain.
By driving from the balancer end of the crank all the directions of rotation
stay the same as stock. It looks a little weird, though.
Here are the major parts in their positions. The transmission will have a
bearing retainer plate on the output side and there will be an outrigger
bearing holding the torque convertor snout. The primary drive will run
from the harmonic balancer to the torque convertor via ordinary #530 chain.
By driving from the balancer end of the crank all the directions of rotation
stay the same as stock. It looks a little weird, though.
The Harley's rear wheel has the sprocket on the right. It'll have to be flipped around to move it to the left. The sprocket offset lines up with the trans sprocket just fine. I'll have to rework the rear brake bracket, but that's no big deal.
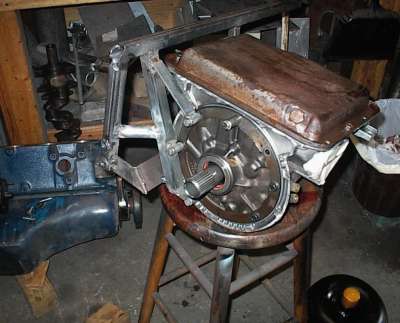
This is just a bunch of old parts making up a dummy engine. After checking all the major parts positions as shown here, I made some wood patterns, clamped them to the chassis, and made sure everything would fit. The engine will sit very low on the chassis, but the oil pan and flexplate should still clear even when leaned over hard. The torque convertor shield just barely clears my knee; Kevin should have no problem.
That's a 4000-RPM stall T350 convertor on a TCI adapter shaft. It should be
just about right for a motorcycle. A regular car convertor would creep so bad
you'd have to hold the brakes at stop and low speeds.
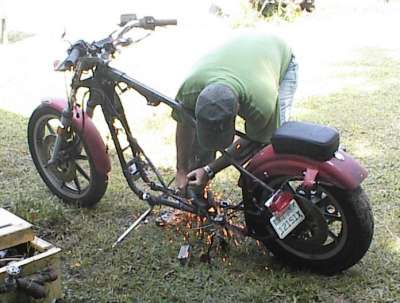 Kevin sawed out the rear downtube and engine mounting bracket. Now he's
grinding the stubs down flush. I'll weld patches over them later.
Kevin sawed out the rear downtube and engine mounting bracket. Now he's
grinding the stubs down flush. I'll weld patches over them later.
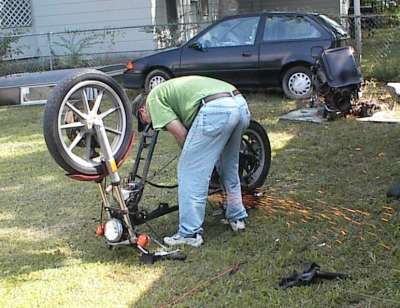 Some things are easier to get to upside-down. Enginless chassis doesn't weigh
much. It's about 105 degrees out there.
Some things are easier to get to upside-down. Enginless chassis doesn't weigh
much. It's about 105 degrees out there.
 Blocking and shimming the transmission and engine into alignment with each
other. We did this a lot of times, cutting, fitting, welding, checking.
Blocking and shimming the transmission and engine into alignment with each
other. We did this a lot of times, cutting, fitting, welding, checking.
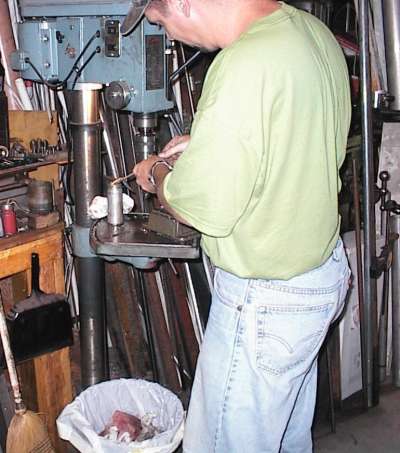 Kevin is making some brackets on the drill press.
 The major problem we ran into was there was no direct shot from anywhere to
any place else, and no practical way to triangulate everything. Of course,
Chevrolet's engineers probably assumed their customers would leave the
transmission on the back of the engine...
The major problem we ran into was there was no direct shot from anywhere to
any place else, and no practical way to triangulate everything. Of course,
Chevrolet's engineers probably assumed their customers would leave the
transmission on the back of the engine...
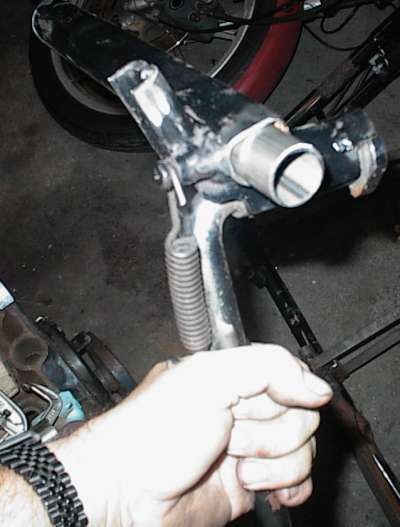
We used a 5/16" x 3 flat and a piece of thickwall 1" tubing as upper and lower
adapter rails. Then we attached the adapter rails to the engine and
transmission as best as we could. The little piece at the left lower corner
is temporary; a beefier bolt-on piece will go on later.
 It's not readily apparent, but the transmission can be removed by pulling the
chain and convertor, unbolting the adapter from the pump (or vice versa),
removing the left-side support plate, and just sliding it out of the bike to
the left. The starter will probably have to come off to do it.
It's not readily apparent, but the transmission can be removed by pulling the
chain and convertor, unbolting the adapter from the pump (or vice versa),
removing the left-side support plate, and just sliding it out of the bike to
the left. The starter will probably have to come off to do it.
When you're working from nothing, you might as well think about what you'll do
for service down the road, right?
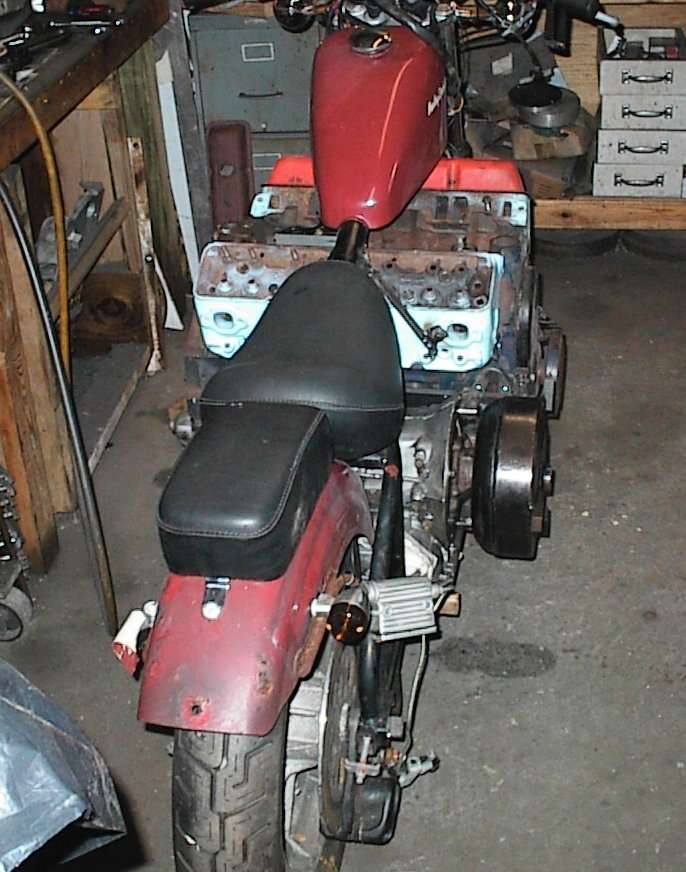
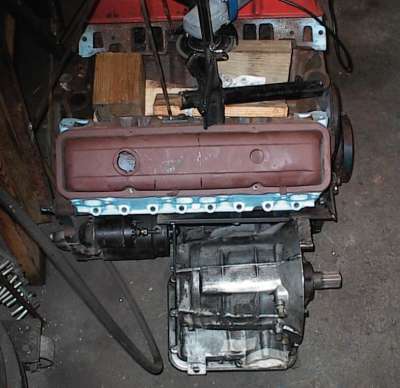 Here's how it looks from the rider's position. Not much to see here; most of
the bracketry is underneath.
Here's how it looks from the rider's position. Not much to see here; most of
the bracketry is underneath.
Note how the starter just clears the transmission. We had expected to have to
use one of the mini-starters.
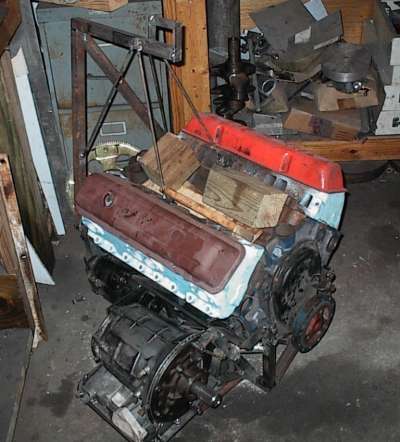 Just getting the Harley engine in and out was a major operation. Neither of
us liked the idea of trying to jockey the powertrain in with a floor jack, so
we built this lifting bracket. The intake has to be off, and the
yet-to-be-built flexplate guard, but the rest, exhaust manifolds and all, can
be slid in from the side with a cherry picker, or it can be supported from an
overhead beam and the chassis slid around it from the side. I had a beam, so
we did it that way.
Just getting the Harley engine in and out was a major operation. Neither of
us liked the idea of trying to jockey the powertrain in with a floor jack, so
we built this lifting bracket. The intake has to be off, and the
yet-to-be-built flexplate guard, but the rest, exhaust manifolds and all, can
be slid in from the side with a cherry picker, or it can be supported from an
overhead beam and the chassis slid around it from the side. I had a beam, so
we did it that way.
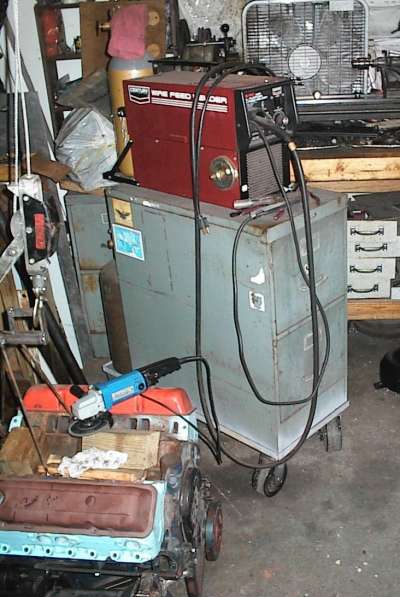 This is a gratuitous shot of my MIG welder. It's an inexpensive Century, but
it has performed well for many years. The handle on the top means it is
"portable", but only if you're Arnold Schwarzenegger. I bought a little Radio
Flyer wagon to put it in, but the new wagons are so cheesy they had problems
even on a smooth concrete floor, and the welder was still too low to get to
easily.
This is a gratuitous shot of my MIG welder. It's an inexpensive Century, but
it has performed well for many years. The handle on the top means it is
"portable", but only if you're Arnold Schwarzenegger. I bought a little Radio
Flyer wagon to put it in, but the new wagons are so cheesy they had problems
even on a smooth concrete floor, and the welder was still too low to get to
easily.
The Steelcase filing cabinet was a freebie. I built an angle-iron frame to
hold four large casters. I made the frame long enough to hold extra argon
bottles; you can see one just beind the cabinet. My mask and accessories go
in the top drawer and "stuff" in the bottom drawer. I have a couple of garden
hose hangers I've been meaning to install, to hold the welding and ground
cables, but they've been waiting for round tuits.
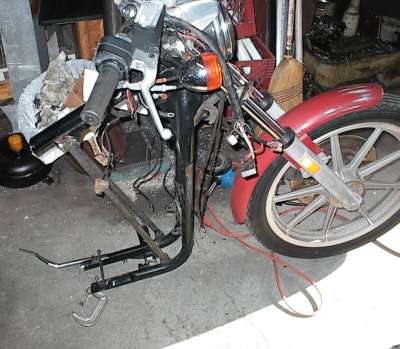
 The powertrain technically fit, except the front exhaust tubes would have
required substantial fangleage around the front downtubes. I could have
notched the tubes and pinched the pipes, but I decided to just extend the
chassis a bit so I could run a regular off-the-shelf pair of shorty headers.
The powertrain technically fit, except the front exhaust tubes would have
required substantial fangleage around the front downtubes. I could have
notched the tubes and pinched the pipes, but I decided to just extend the
chassis a bit so I could run a regular off-the-shelf pair of shorty headers.
The chassis is sitting in front of the engine despite the way it looks. Yes,
I've been working in a very small area; the shop is full of "stuff". [sigh]
Anyway, I've welded some 3/4 x 5/16 flat here and there to keep the chassis
from going "sproing!" when I cut it in half.
 A few minutes with the angle grinder and hack saw and we have a rear
unicycle...
A few minutes with the angle grinder and hack saw and we have a rear
unicycle...
 ...and a front unicycle.
 .090" tubing had to be massaged a bit before being hammered into odd-shaped
chassis tube, It provides some chassis reinforcement around the weld, plus it
makes a nice back-up in the weld area.
.090" tubing had to be massaged a bit before being hammered into odd-shaped
chassis tube, It provides some chassis reinforcement around the weld, plus it
makes a nice back-up in the weld area.
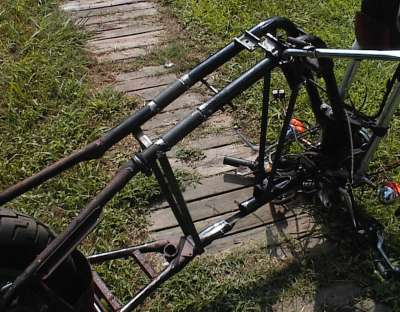
 1/8" wall tubes are slid over the .090" tubes, the mating surfaces ground
clean and chamfered. The frame stretch is 3 inches. Harley used an odd size
of tubing for the frame; my spacers are a little larger in diameter than what
they used. I considered turning the spacers down on the lathe, but decided it
didn't matter since they wouldn't be visible from most angles.
1/8" wall tubes are slid over the .090" tubes, the mating surfaces ground
clean and chamfered. The frame stretch is 3 inches. Harley used an odd size
of tubing for the frame; my spacers are a little larger in diameter than what
they used. I considered turning the spacers down on the lathe, but decided it
didn't matter since they wouldn't be visible from most angles.
Yes, we have lots of measuring, shimming, etc. again. One of those magazine
boutique shops would just clamp everything down to their $5,000 surface plate,
but we can do the same thing with simple measuring tools, time, and selected
profanity.
 I welded the tops of the joints with the bike rightside-up, then dragged it
outside where there was more room to flip it upside-down.
I welded the tops of the joints with the bike rightside-up, then dragged it
outside where there was more room to flip it upside-down.
This shot shows how I moved the sidestand forward. The Harley has a very large, strong sidestand pivot, but it fouled the oil pan. Since I was cutting the chassis anyway, it was easy to just make an extra cut and move it forward.
The whole bottom section will get boxed in with 18ga steel sheet later.
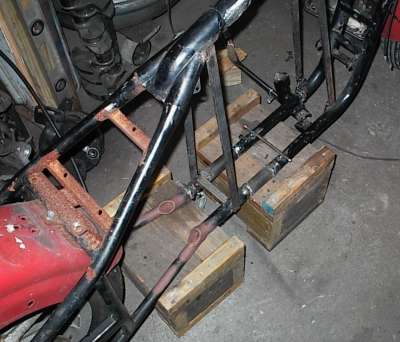
 Putting the weight of the powertrain on the chassis (shimmed on the left frame
tube only at that time) tended to tweak the top rail halves out of alignment.
Board and C-clamps were all it took to keep things straight.
Putting the weight of the powertrain on the chassis (shimmed on the left frame
tube only at that time) tended to tweak the top rail halves out of alignment.
Board and C-clamps were all it took to keep things straight.
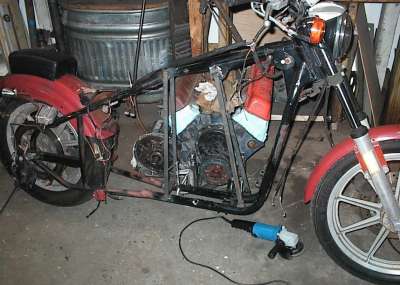
 Engine lifter bracket in use. Our guess as to the front-rear CG was dead on.
Much posing and bragging there.
Engine lifter bracket in use. Our guess as to the front-rear CG was dead on.
Much posing and bragging there.
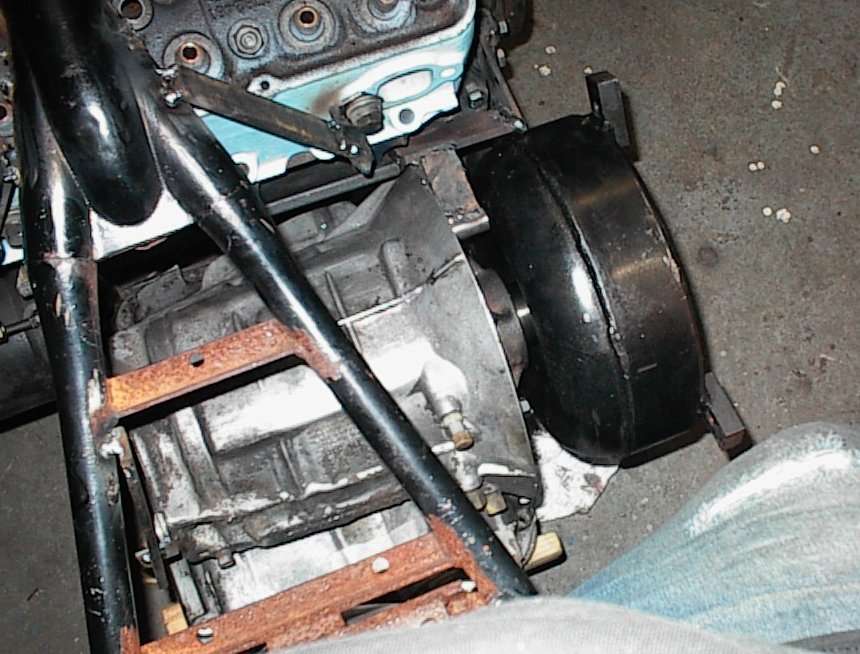 Your knee goes over the torque convertor in riding position. The overall
width is no more than a Gold Wing. I'm sitting on the back fender; the seat
would be in front of me.
Your knee goes over the torque convertor in riding position. The overall
width is no more than a Gold Wing. I'm sitting on the back fender; the seat
would be in front of me.
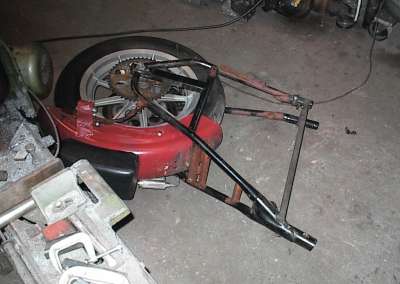
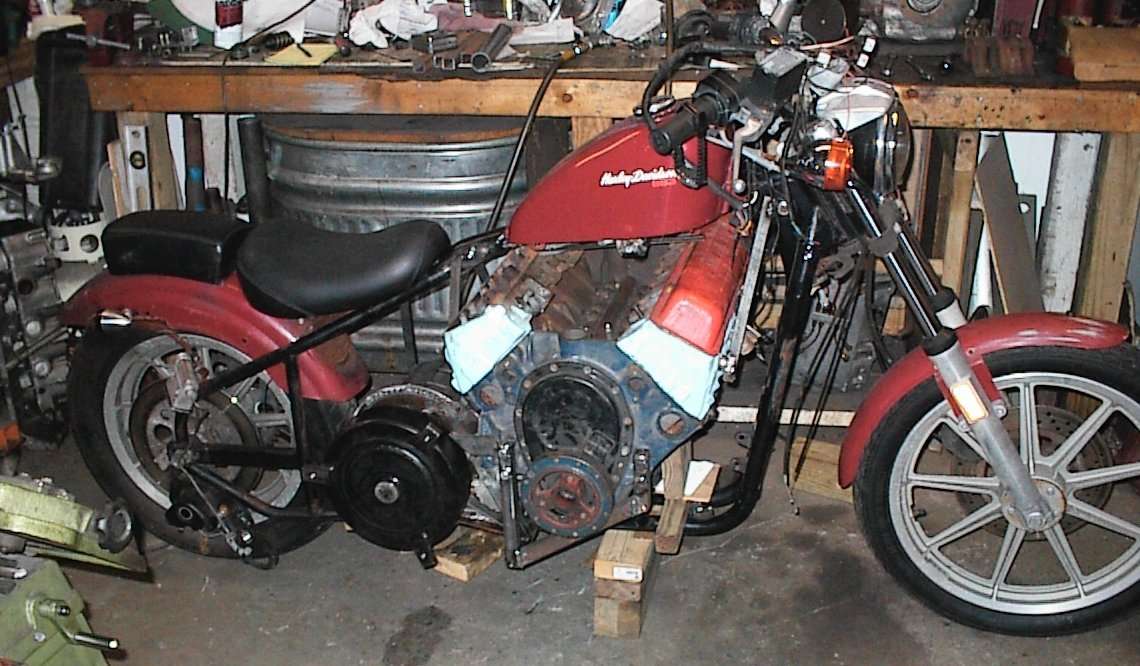
The left side of transmission case will have a bearing carrier (which I still need to make on the lathe) and I've already had the output shaft keyed to take an ordinary industrial sprocket adapter. We've flipped the rear wheel around to move the sprocket to the left side.
If you remember up at the top of the page, I'd blocked all the bits together
and done some rough measurements of the sprocket offset, transmission length,
and engine length, and it looked like it would work. It did. Whew! I trust
the measurements, of course, but it's nice when it all works out like it's
supposed to.
 Rider view.
The torque convertor and harmonic balancer are in alignment; all I need to do
is add the sprocket adapters.
I recycled the anti-tweak reinforcements into engine support bars. I don't normally hold with using the engine as a stressed member, but even pushing the bike around the shop showed that it flexed a lot. Well, it flexed before too, but I'll be adding more bracketry to try to reduce it.