brought to you by: Dave Williams
This page: www.bacomatic.org/~dw/bandit/bandit.htm
Main page:
http://www.bacomatic.org/~dw/index.htm
Last Updated: 20 Augn 2009
Author: Dave Williams; dlwilliams=aristotle=net
In summer of 2004 I acquired my brother's 1997 Suzuki Bandit 1200. Kevin had been drag racing it for several years, slowly honing it down to 6.18 in the eighth mile. A 1216 kit, GSXR cams, 13:1 CR, ported head, 36mm Mikuni flatslides, Dale Walker electric shifter, and many, many passes down the strip had sorted the engine out
Kevin put it back into street trim before I got it. This consisted of: swapping the 8"-over swingarm for a stocker, replacing the sidepipe with a Dale Walker stepped header, and reinstalling the centerstand, turn signals, and other oddments he'd stripped off in the quest for light weight.
The engine remained as it was, as did its ground-scraping lowered ride height.
Of course, I felt that a rumpity drag engine was just fine for a street bike... Kevin's skill at tuning made it almost as docile as a stock Suzuki. I wound up raising the ride height a bit to keep from bottoming out on the local roads, but it's still very close to its dragster past.
So far, I've racked up a bunch of miles, changed the stalked turn signals in front out for some surface-mount signals, replaced the tinted windscreen for a clear one, and cut the screen down two inches to keep it from directing so much air under my helmet at speed. Oh, and I added an Audiovox electronic cruise control.
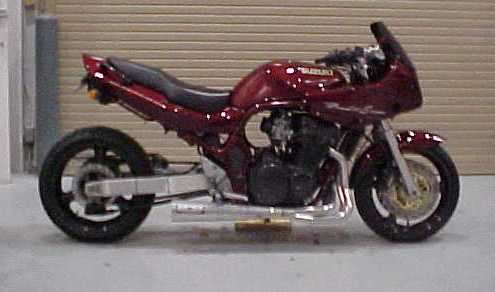 The Bandit in its final drag race configuration. 6.18 in the 1/8 at Holt
Raceway in Florida. It's wearing an 8"-over swingarm and a sidepipe here.
The Bandit in its final drag race configuration. 6.18 in the 1/8 at Holt
Raceway in Florida. It's wearing an 8"-over swingarm and a sidepipe here.
 The bike was lowered quite a bit, and any non-essential bits removed to save
weight.
The bike was lowered quite a bit, and any non-essential bits removed to save
weight.
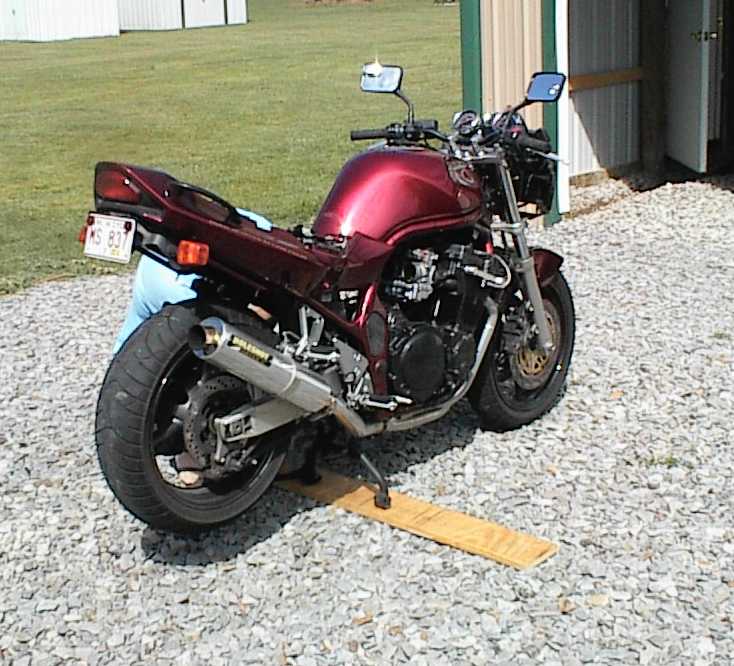
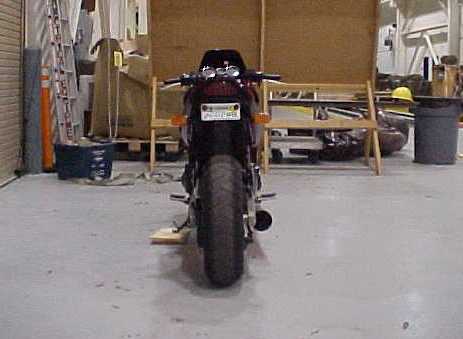 Pretty narrow from the back...
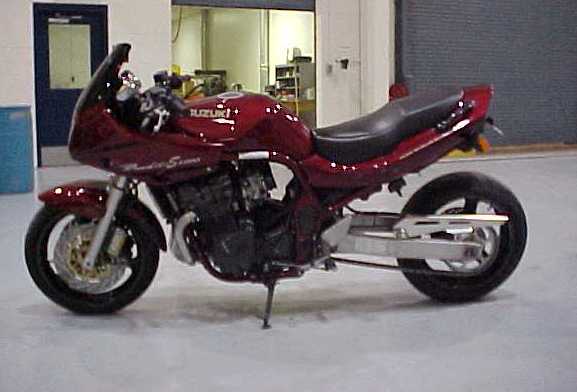
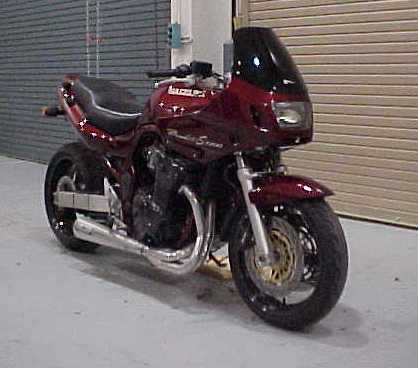 Not a bad looking toy, eh?
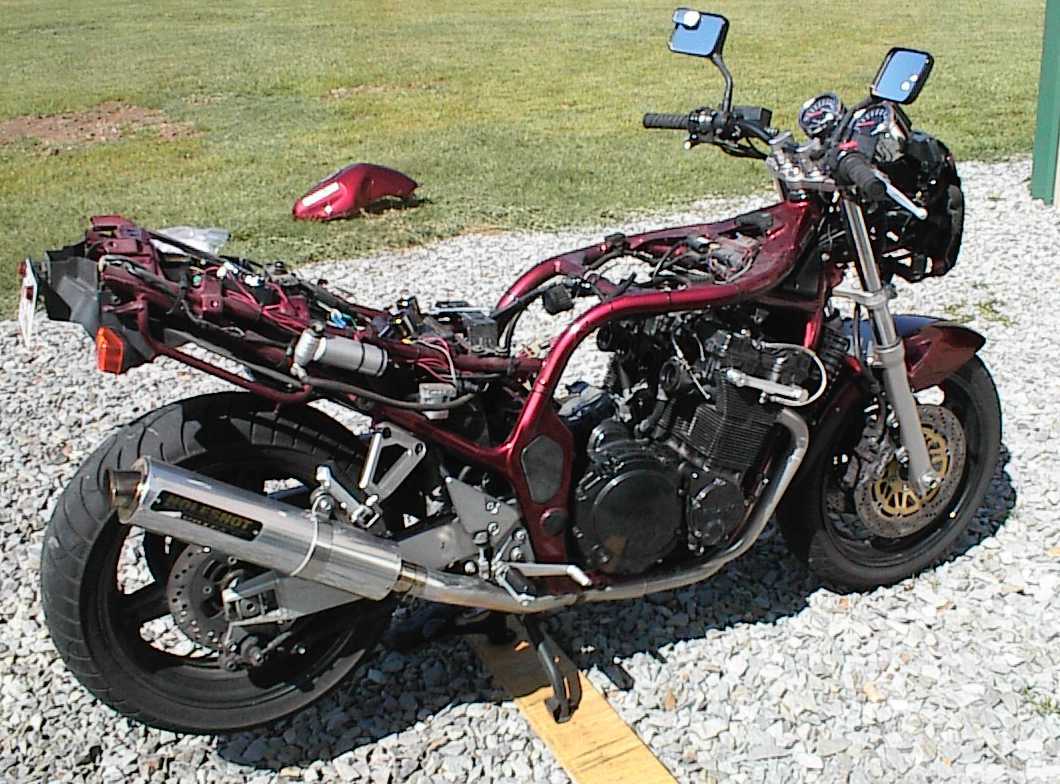
 Here it is after I got it. It's wearing a top-end oiler kit now, which is the
silver stuff on the cylinder head. We'd decided the jets Kevin had put in
were a bit lean, so we're over at his house, pulling the bike apart enough to
get to the jets. That's Kevin behind the bike, hunkered down fiddling with
the clamps on the carb boots...
Here it is after I got it. It's wearing a top-end oiler kit now, which is the
silver stuff on the cylinder head. We'd decided the jets Kevin had put in
were a bit lean, so we're over at his house, pulling the bike apart enough to
get to the jets. That's Kevin behind the bike, hunkered down fiddling with
the clamps on the carb boots...
 Note GSXR shock reservoir zip-tied to the frame rail. With the carbs off, you
can see the top of the piston past the open valves.
Note GSXR shock reservoir zip-tied to the frame rail. With the carbs off, you
can see the top of the piston past the open valves.
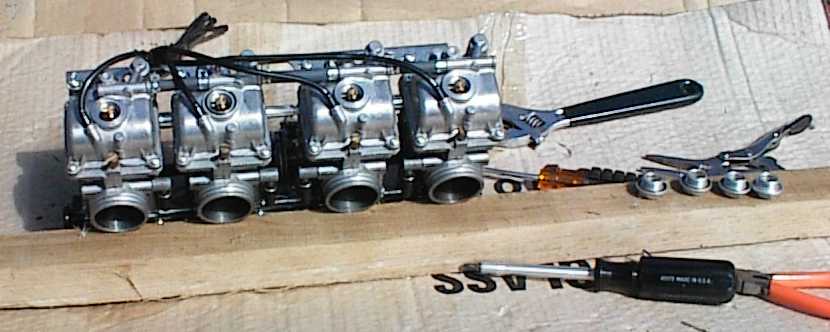 Once you get the carbs off, all you have to do is remove the plugs on the
bottoms to get to the jets. Moving from 125s to 130s made a major
difference in performance. These are aftermarket racing carbs, and cost a
small fortune.
Once you get the carbs off, all you have to do is remove the plugs on the
bottoms to get to the jets. Moving from 125s to 130s made a major
difference in performance. These are aftermarket racing carbs, and cost a
small fortune.
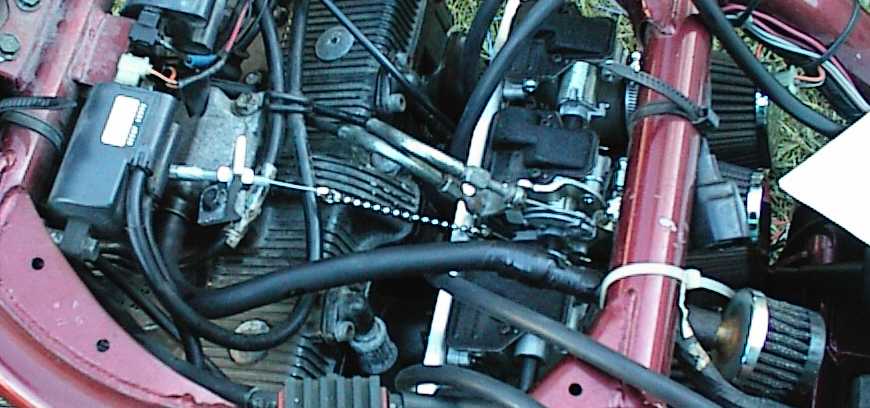 Here's the bracket for the end of the cruise control cable, the bead chain to
the carbs, and a bunch of hoses coming off the vacuum ports in the carbs.
Here's the bracket for the end of the cruise control cable, the bead chain to
the carbs, and a bunch of hoses coming off the vacuum ports in the carbs.
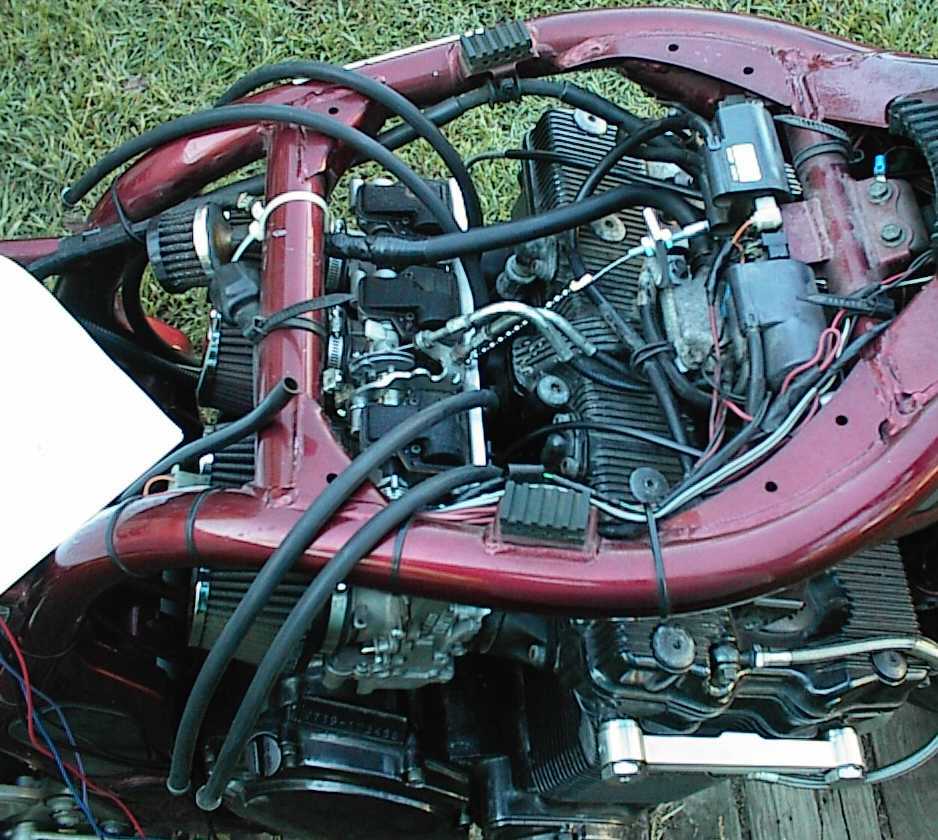 I picked up a bunch of check valves at the junkyard, to go between the carbs
and the vacuum tank. Even with the check valves, there's a noticeable
difference in throttle response. The engine is slightly soggier, and doesn't
return to idle very fast.
I picked up a bunch of check valves at the junkyard, to go between the carbs
and the vacuum tank. Even with the check valves, there's a noticeable
difference in throttle response. The engine is slightly soggier, and doesn't
return to idle very fast.
update: it turns out Mikuni flatslides need to be oiled periodically or the
slides will stick. Pulling the filters and oiling them restored normal
throttle action. I guess I was looking for something odd (throttle linkage
SNAFU, etc.) from the cruise install, and didn't notice the carbs had been
getting sticky until then.
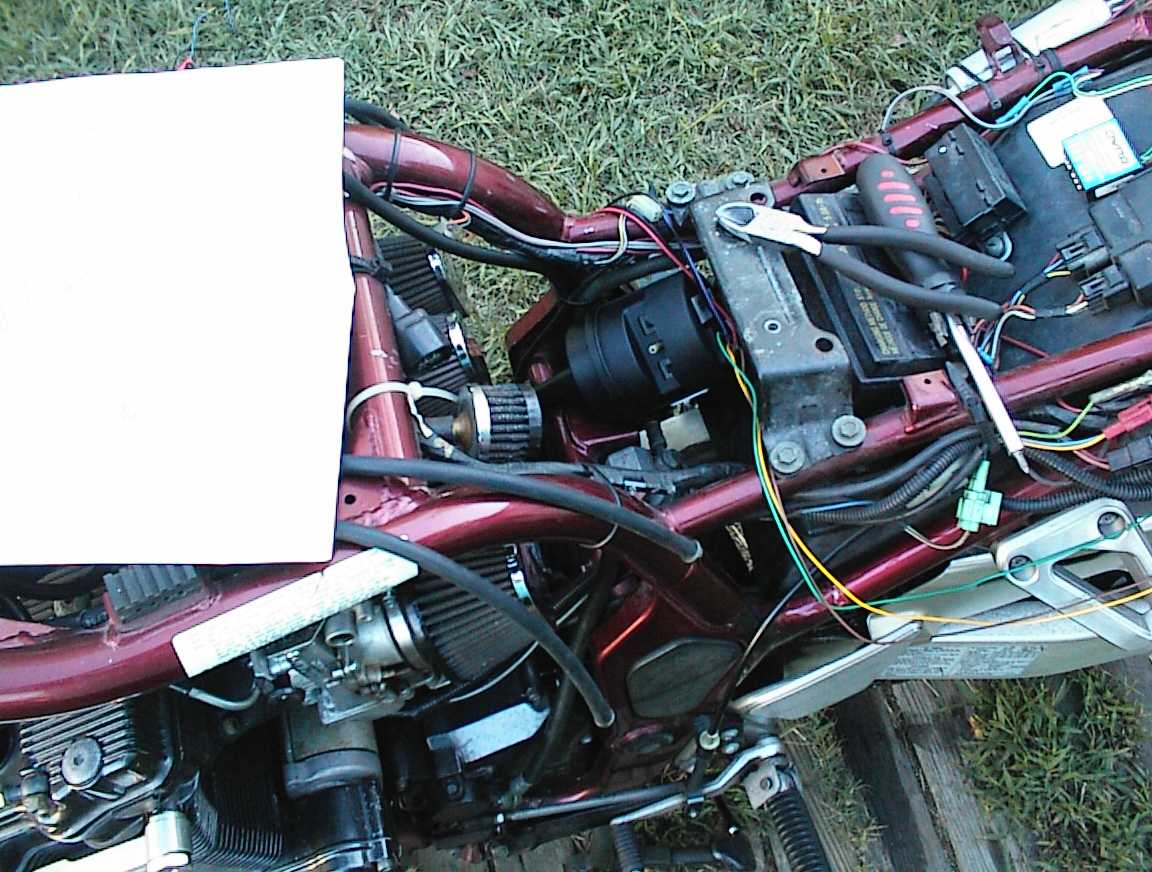 The vacuum servo has all the electronics buried inside it. I tucked it into
the space where the airbox used to be. For a stock Bandit, there's enough
room inside the fairing. I have wires looped and zip-tied all over the place;
I didn't want to cut them to length until I was sure everything worked.
The vacuum servo has all the electronics buried inside it. I tucked it into
the space where the airbox used to be. For a stock Bandit, there's enough
room inside the fairing. I have wires looped and zip-tied all over the place;
I didn't want to cut them to length until I was sure everything worked.
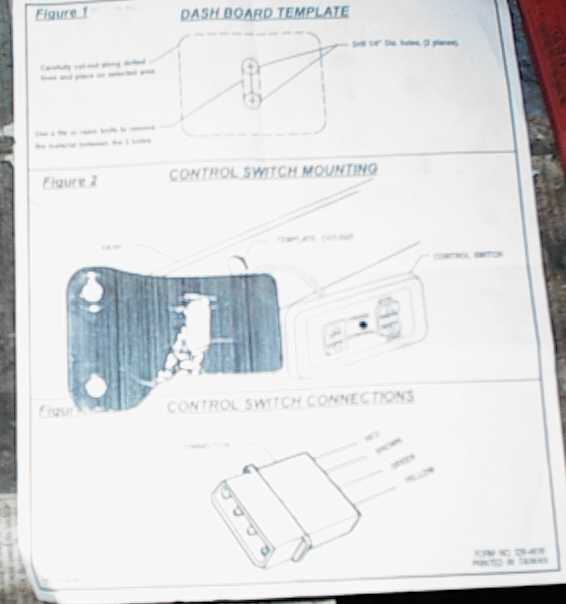 1/4" aluminum plate to hold the control box for the cruise control. Slot it
for the wires.
1/4" aluminum plate to hold the control box for the cruise control. Slot it
for the wires.
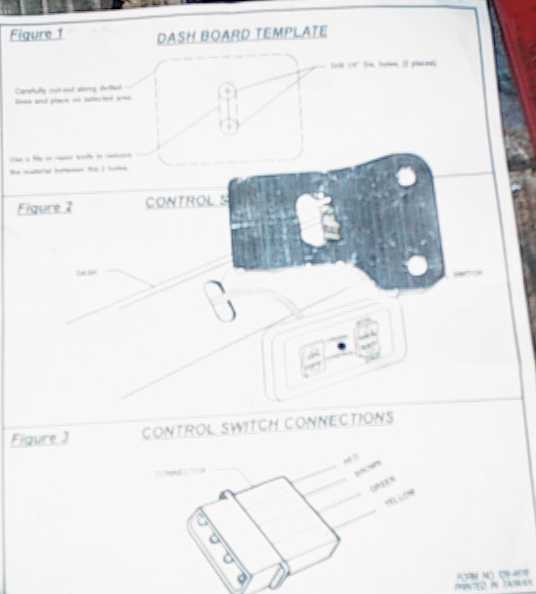 I beveled the slot so the wires could pass to the side of the stock switchbox.
The plate is spaced out from the master cylinder bracket with steel spacers
and longer bolts.
I beveled the slot so the wires could pass to the side of the stock switchbox.
The plate is spaced out from the master cylinder bracket with steel spacers
and longer bolts.
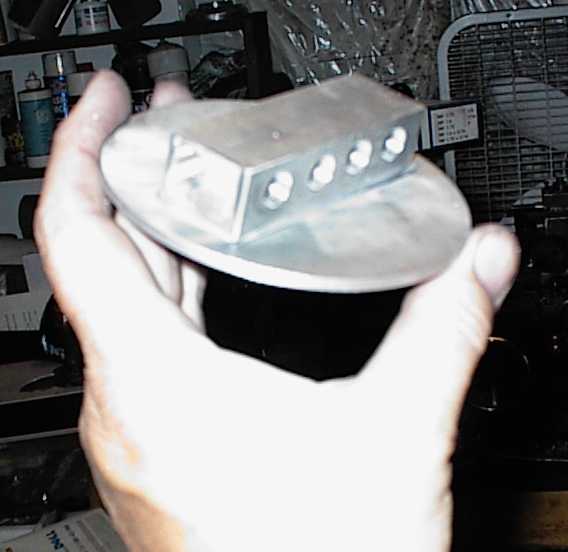 Top of the vacuum tank. Bar of aluminum has 1/8 NPT tapped ports. I put a
vacuum gauge on the bike and found it only had about 8" of vacuum in normal
cruise, and that dropped to zero whenever you opened the throttle any. Big
carbs, big cams, big compression. So I figured a storage tank of some sort
would be needed. There was still plenty of room where the airbox used to be,
and I happened to have some 4" thinwall aluminum tubing on hand to make the
tank.
Top of the vacuum tank. Bar of aluminum has 1/8 NPT tapped ports. I put a
vacuum gauge on the bike and found it only had about 8" of vacuum in normal
cruise, and that dropped to zero whenever you opened the throttle any. Big
carbs, big cams, big compression. So I figured a storage tank of some sort
would be needed. There was still plenty of room where the airbox used to be,
and I happened to have some 4" thinwall aluminum tubing on hand to make the
tank.
 Here you can see the two machine screws holding the bar to the plate, and the two
vacuum ports from the long passage drilled through the bar. They're epoxied
together as well as screwed.
Here you can see the two machine screws holding the bar to the plate, and the two
vacuum ports from the long passage drilled through the bar. They're epoxied
together as well as screwed.
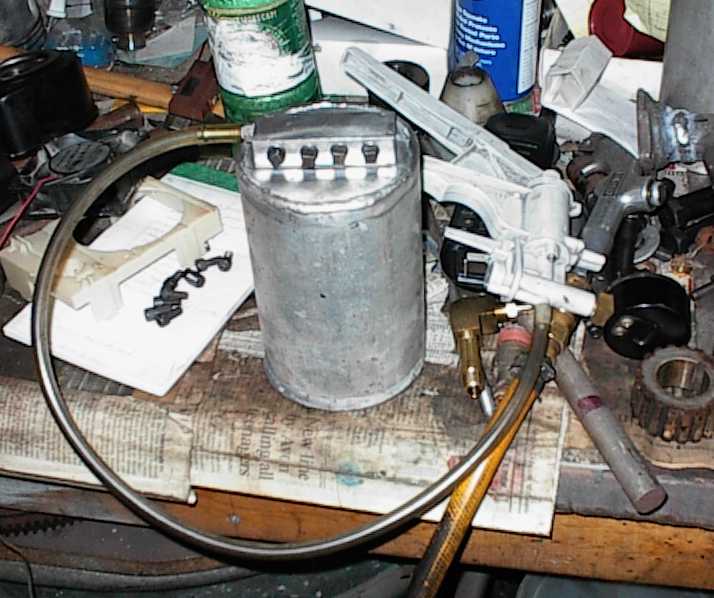 Pressure checking the vacuum tank after it was welded. A-OK.
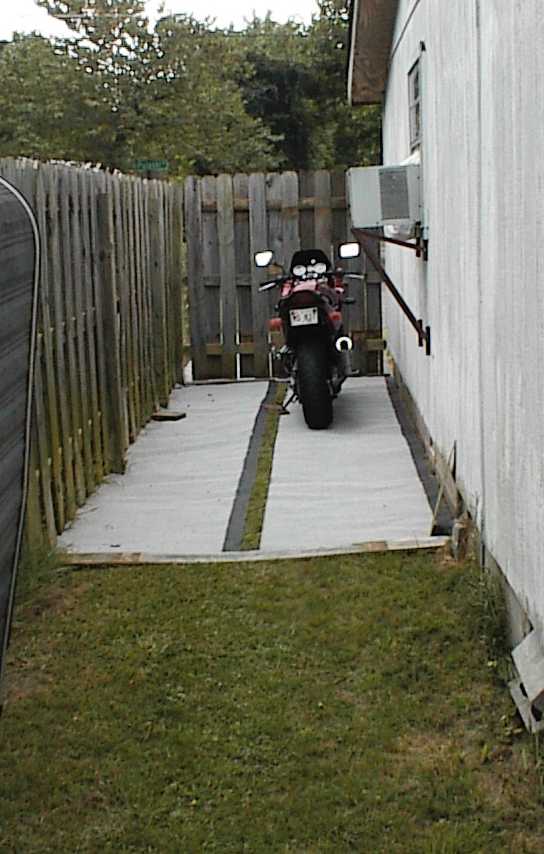 Back years ago I used to park the Yamaha on the front walk by the porch. With
the neighborhood like it is now, anything parked there would be stolen or
vandalized the first night. So I took part of the fence down, turned it into
a pair of gates, and used three rolls of heavy roll roofing to make a mud-free
parking area. I need to make a cover for it next.
Back years ago I used to park the Yamaha on the front walk by the porch. With
the neighborhood like it is now, anything parked there would be stolen or
vandalized the first night. So I took part of the fence down, turned it into
a pair of gates, and used three rolls of heavy roll roofing to make a mud-free
parking area. I need to make a cover for it next.
The window air conditioner is supported by a fabricated steel triangulated
structure, with stainless steel bolts. Because I'm a too much of a geek to
use a piece of 2x4...
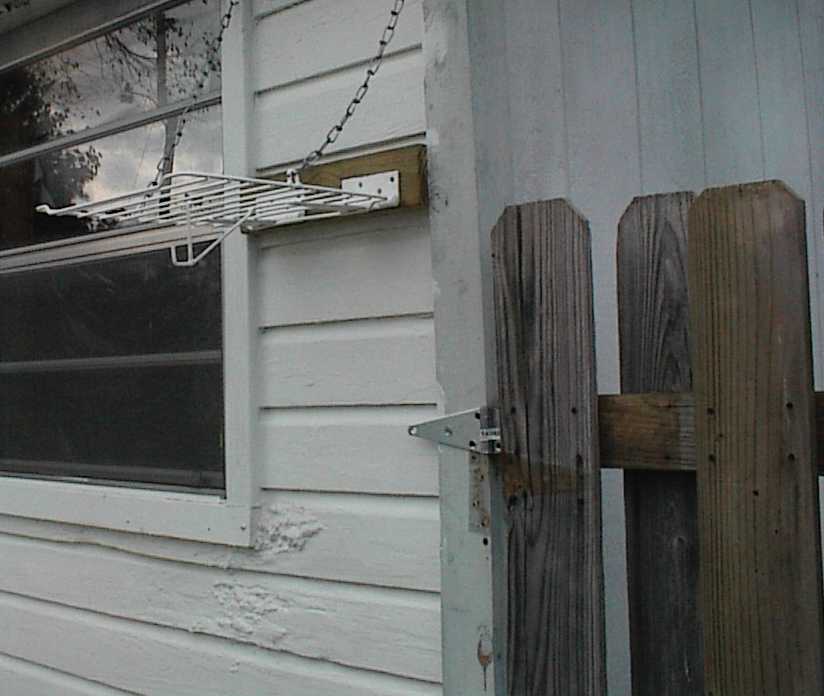 I took an old refrigerator rack, welded some hinges and bits on, and attached
it to the house by the gate. It has a couple of chains to keep it level when
folded down.
I took an old refrigerator rack, welded some hinges and bits on, and attached
it to the house by the gate. It has a couple of chains to keep it level when
folded down.
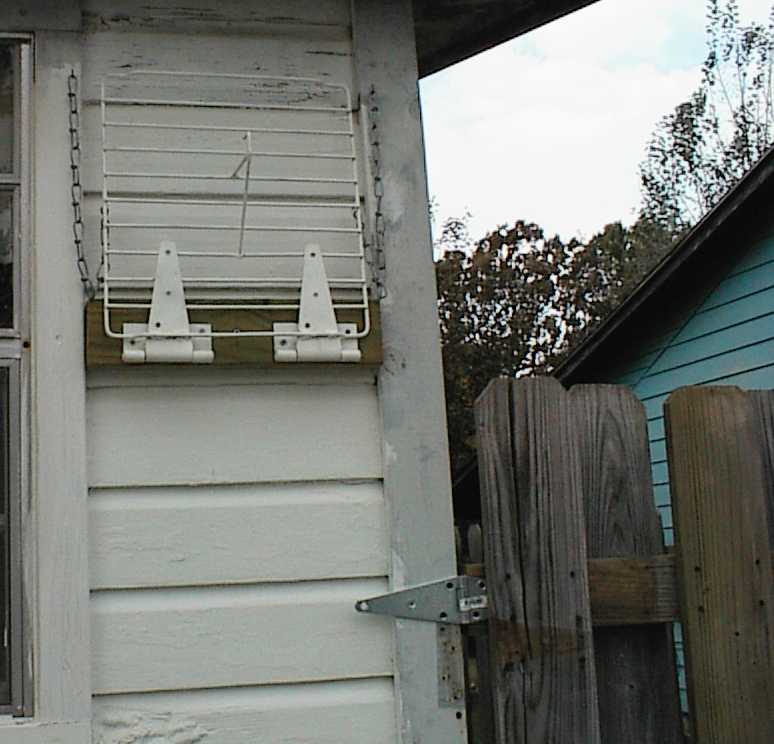 The hook on the bottom is for my tailbag, which hangs underneath. The helmet
and gloves go up top. That gives me a place to put all my stuff while moving
the Bandit in or out of its kennel.
The hook on the bottom is for my tailbag, which hangs underneath. The helmet
and gloves go up top. That gives me a place to put all my stuff while moving
the Bandit in or out of its kennel.
Yes, the house needed paint and some maintenance in these pictures...
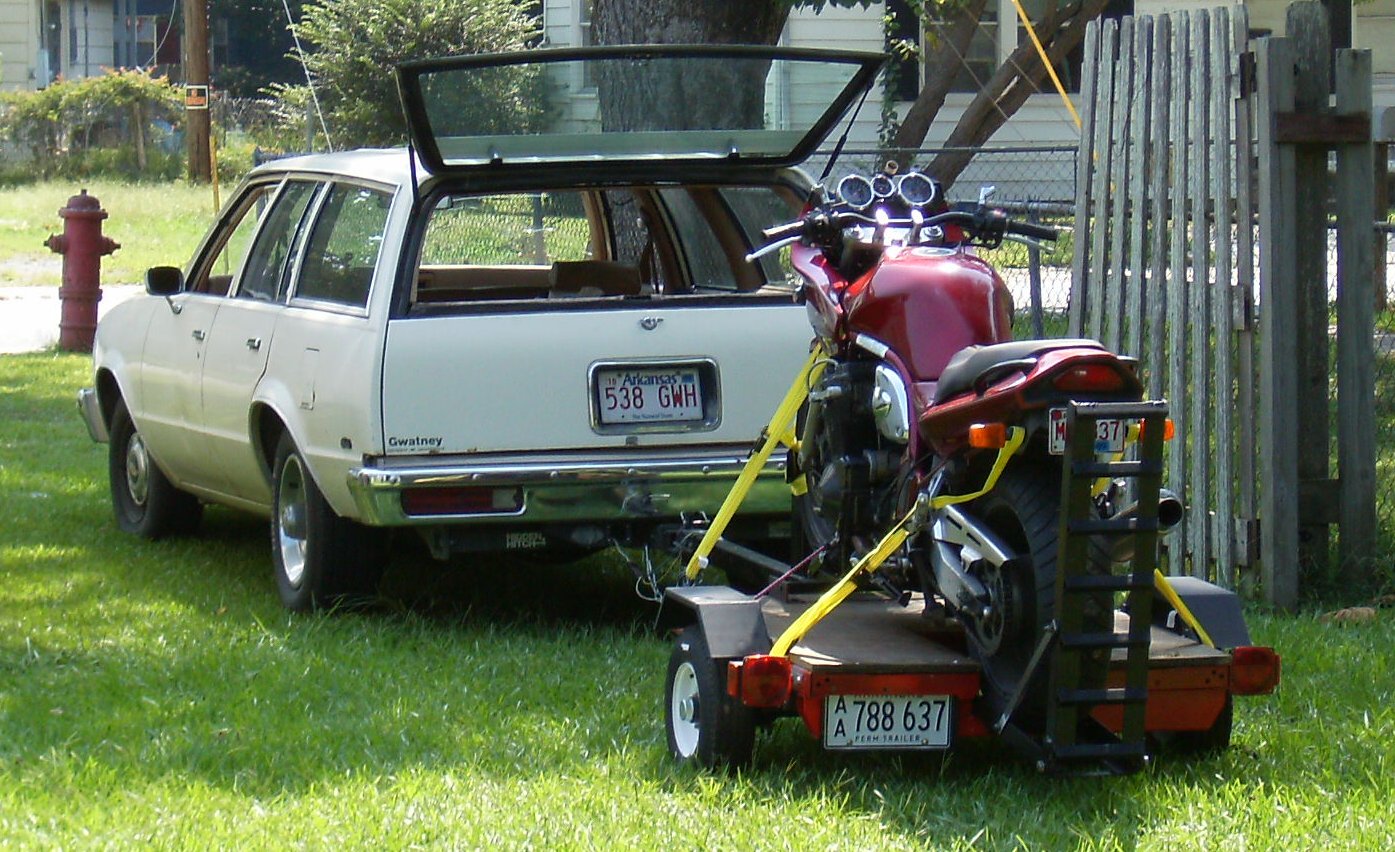
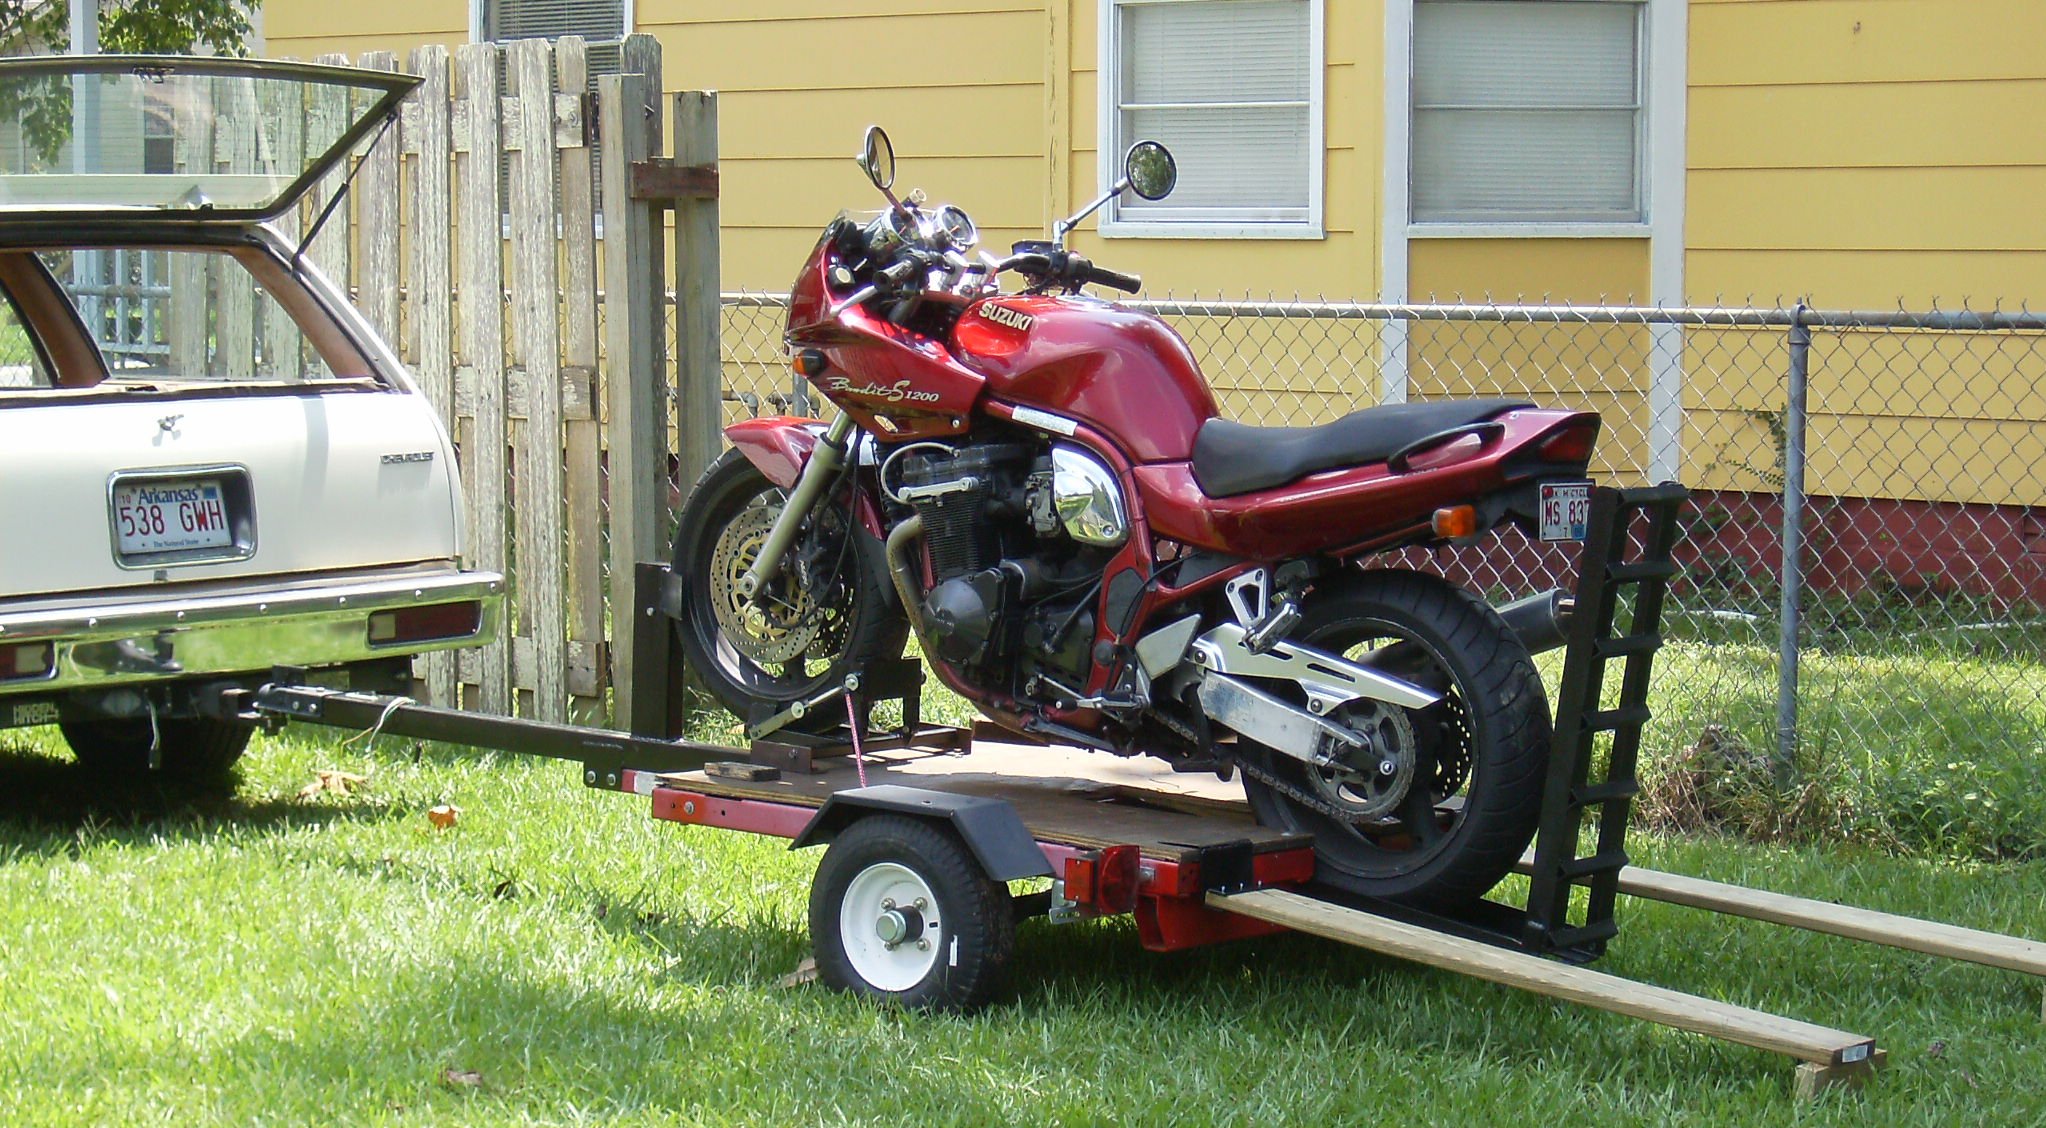 I built this trailer to tow the Bandit to the race track.
Note the cool front wheel rocker. Just ride it up, get off, and start tying it down.
The chicken boards are mostly for backing it off the trailer. Right now I
just toss them in the back of the wagon when not using them. Later I'll make
some kind of bracket to fasten them to the trailer.
 When the ramp is folded down it's a very gentle slope onto the trailer. I
flipped the axle over on top of the springs to lower the trailer several
inches, then notched the back to let lower the ramp so the bike wouldn't high-
center when I lower the bike later.
When the ramp is folded down it's a very gentle slope onto the trailer. I
flipped the axle over on top of the springs to lower the trailer several
inches, then notched the back to let lower the ramp so the bike wouldn't high-
center when I lower the bike later.